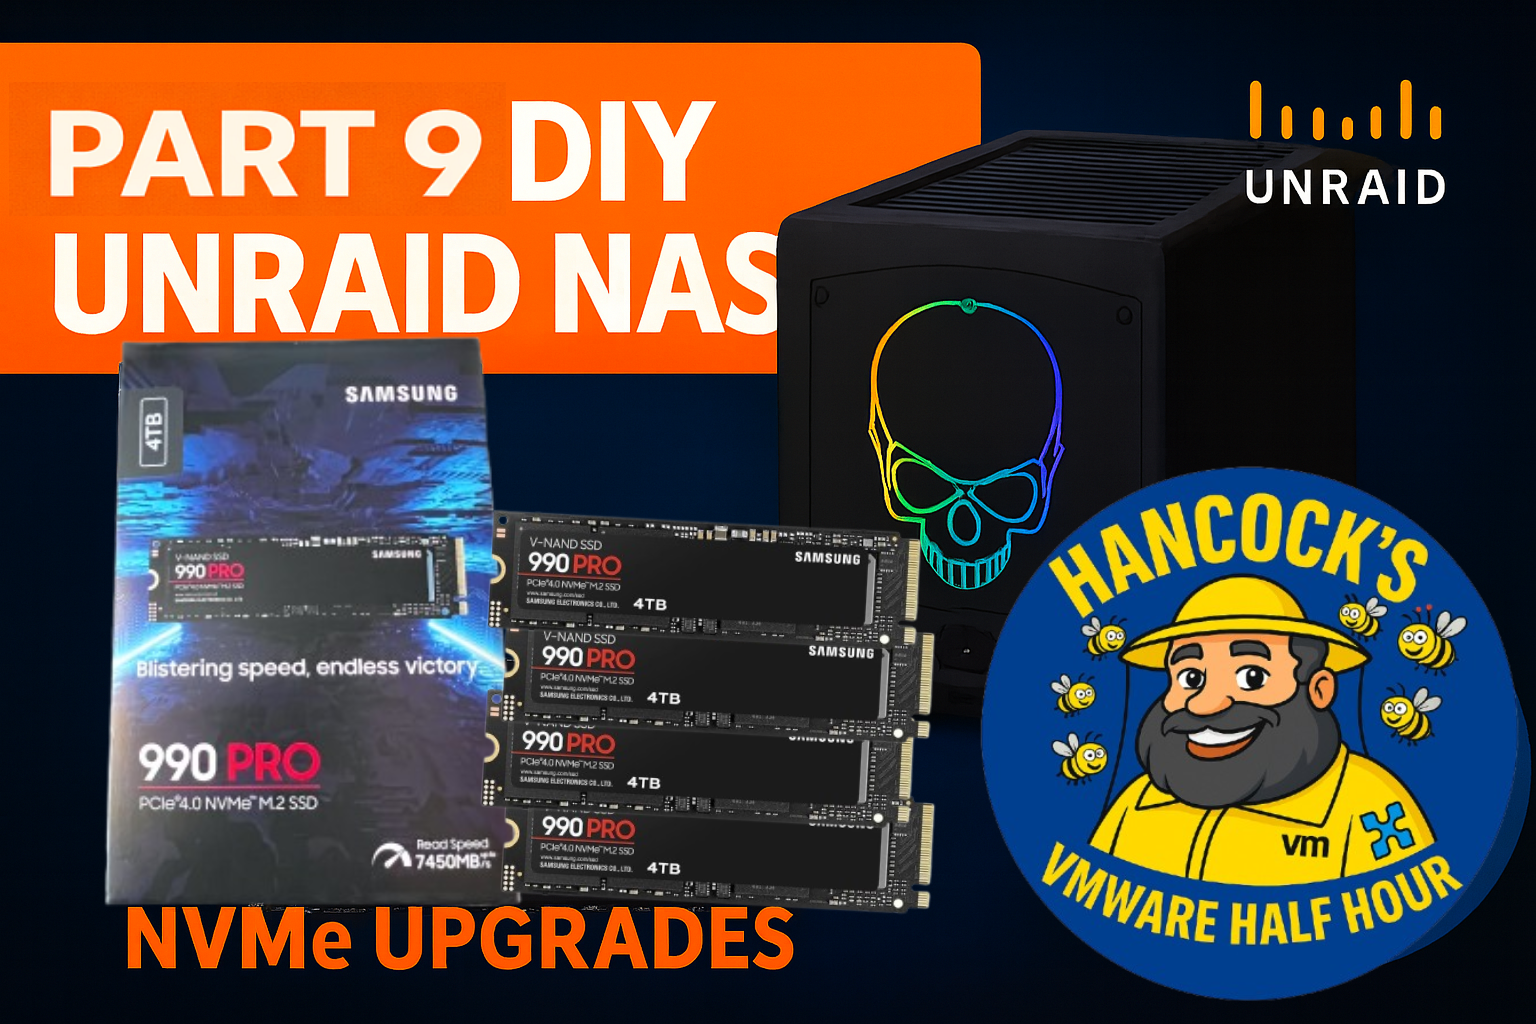
In Part 9 of the DIY UnRAID NAS series, we finally tackle one of the most requested upgrades — NVMe cache expansion.
This episode covers upgrading the UnRAID cache pool using Samsung 990 PRO 4TB NVMe SSDs,
walking through the hardware changes, UnRAID configuration, and the impact on performance.
What’s covered in Part 9
Removing NVMe devices from PCI passthrough
Rebooting and validating UnRAID hardware changes
Why UnRAID is used instead of vSAN in the homelab
Upgrading and rebalancing the NVMe cache pool
Btrfs RAID1 behaviour and live rebalance
Firmware considerations for Samsung 990 PRO NVMe drives
Why NVMe Matters in UnRAID
NVMe cache drives dramatically improve Docker, VM, and application performance in UnRAID.
With fast PCIe 4.0 NVMe devices, write amplification is reduced, cache flushes are faster,
and overall system responsiveness improves — especially under mixed workloads.
Unlike enterprise storage platforms, UnRAID allows flexible cache pool configurations,
making it ideal for homelab experimentation without vendor lock-in.
As always, thanks for watching, and if you’ve got questions about NVMe cache pools,
Btrfs behaviour, or UnRAID design decisions, drop them in the comments.
DIY UNRAID NAS Part 8: Preparing the Zero-Downtime NVMe Upgrade
Welcome back to Hancock’s VMware Half Hour and to Part 8 of the DIY UNRAID NAS build series.
In this episode, I walk through the planning and preparation for a zero-downtime NVMe cache
upgrade on my homelab UNRAID NAS, running on an Intel NUC 11 Extreme.
The goal of this two-part upgrade is to move from a single 512 GB XPG NVMe cache device
to a pair of Samsung 990 PRO 4 TB NVMe SSDs, ending up with a high capacity Btrfs RAID 1
cache pool for VMs, Docker, and PCIe passthrough workloads. Part 8 focuses on the design,
constraints, and first hardware changes. Part 9 completes the migration and final Btrfs rebalance.
Video: DIY UNRAID NAS Part 8
You can watch the full episode on YouTube here:
DIY UNRAID NAS – Part 8: Preparing the Zero-Downtime NVMe Upgrade
What This Episode Covers
Part 8 is all about understanding the current environment, identifying limitations in UNRAID,
and laying the groundwork for a non-destructive storage upgrade. In the video, I cover:
How my UNRAID array and cache devices are currently configured.
The future hardware specifications for the homelab UNRAID NAS.
Plans for using enterprise U.2 NVMe devices in future expansions.
Why we cannot simply create another cache pool in UNRAID to solve this.
A staged plan to replace the old 512 GB XPG NVMe with 4 TB Samsung 990 PRO drives.
How to safely stop Docker and virtual machines before making hardware changes.
Using PCIe passthrough (VMDirectPath I/O) to present NVMe devices directly to a Windows 11 VM.
Updating Samsung 990 PRO firmware from within the passthrough VM using Samsung Magician.
Confirming that all Samsung NVMe drives are genuine and authenticated.
Reviewing the NVMe slot layout in the Intel NUC 11 Extreme (2 x Gen 3 and 2 x Gen 4).
Chapter Breakdown
Here is the chapter list from the video for quick navigation:
00:00 – Intro
00:05 – Welcome to Hancock’s VMware Half Hour
00:47 – This is Part 8 DIY UNRAID NAS
01:21 – Explanation of UNRAID and how I have set up UNRAID
04:20 – Explanation of UNRAID array and cache devices
04:51 – Future specifications for homelab UNRAID NAS
05:54 – Future use of enterprise NVMe U.2 device
09:42 – I have a cunning plan says Andy
12:02 – We cannot create another cache pool
12:56 – Stop Docker and VMs
13:10 – Shutdown ESXi on UNRAID
13:28 – Shutdown Windows 11 on UNRAID
14:22 – New NVMe installed, old XPG removed
15:16 – PCIe passthrough demonstration configuration for UNRAID VMs
17:14 – Restart NAS
17:29 – NVMe devices are enabled for PCI passthrough
18:11 – VMware VM Direct I/O (PCI passthrough) explained
18:46 – Configure Windows 11 VM for PCI passthrough
20:00 – Samsung Magician advising firmware update available
20:48 – Update firmware of Samsung 990 PRO from Windows 11
23:14 – Confirmation that all Samsung NVMe are authenticated
26:22 – NVMe slots in Intel NUC 11 Extreme are 2 x Gen 3 and 2 x Gen 4
27:06 – Remove NVMe devices from Windows 11 VM
The Cunning Plan: A Staged, Non-Destructive NVMe Upgrade
The key challenge in this build is upgrading from a 512 GB NVMe cache to larger 4 TB devices
without wiping the array or losing data. Because UNRAID cannot create an additional cache pool
in this configuration, we need a staged process.
In Part 8, I outline and begin the following upgrade path:
Review the current UNRAID array and cache configuration.
Plan the future target: dual 4 TB NVMe Btrfs RAID 1 cache pool.
Shut down Docker and VM services cleanly.
Power down the NAS and remove the old XPG NVMe.
Install the first Samsung 990 PRO 4 TB NVMe drive.
Boot the system and confirm the new NVMe is detected.
Use PCIe passthrough to present the NVMe to a Windows 11 VM for firmware checks and updates.
Update NVMe firmware using Samsung Magician and validate that the drive is genuine.
The actual Btrfs pool expansion and final dual-drive RAID 1 configuration are completed
in Part 9, where the second 4 TB NVMe is installed and the cache pool is fully migrated.
PCIe Passthrough and Firmware Updates
A significant part of the episode is dedicated to demonstrating PCIe passthrough
(VMDirectPath I/O) from VMware ESXi into UNRAID and then into a Windows 11 virtual machine.
This allows the Samsung 990 PRO NVMe to be exposed directly to Windows for:
Running Samsung Magician.
Checking for and applying firmware updates.
Verifying drive health and authenticity.
This approach is particularly useful in homelab environments where the hardware is
permanently installed in a server chassis, but you still want to access vendor tools
without moving drives between physical machines.
Intel NUC 11 Extreme NVMe Layout
Towards the end of the video, I review the NVMe slot layout inside the Intel NUC 11 Extreme.
This platform provides:
2 x PCIe Gen 4 NVMe slots.
2 x PCIe Gen 3 NVMe slots.
Understanding which slots are Gen 3 and which are Gen 4 is critical when deciding where to place
high performance NVMe devices such as the Samsung 990 PRO, especially when planning for
future workloads and potential enterprise U.2 NVMe expansion.
What Comes Next in Part 9
Part 8 ends with the new 4 TB NVMe installed, firmware updated, and the environment ready
for the next stage. In Part 9, I complete the migration by:
Replacing the remaining 512 GB cache device with a second 4 TB Samsung 990 PRO.
Rebuilding the Btrfs cache pool as a dual-drive RAID 1 configuration.
Verifying capacity, redundancy, and performance.
If you are interested in UNRAID, NVMe-based cache pools, or nested VMware and PCIe
passthrough in a small form factor system like the Intel NUC 11 Extreme, this two-part
upgrade is a practical, real-world example of how to approach it safely.
Related Content
DIY UNRAID NAS build playlist on Hancock’s VMware Half Hour (YouTube).
Previous parts in the series covering hardware assembly, base UNRAID configuration, and initial NVMe installation.
Upcoming parts focusing on performance testing, further storage expansion, and homelab workloads.
By The Power Of UnRAID – The Secret Reveal Of ESXi And Windows 11 VMs
For the last few episodes of Hancock’s VMware Half Hour, we have been quietly building something a little different.
On the surface it looked like a simple DIY UNRAID NAS project and a couple of Windows 11 P2V demonstrations.
In reality, everything was running inside virtual machines on an UnRAID host.
In Part 7 of the DIY UNRAID NAS series, we finally pull back the curtain and reveal what has really been powering the lab:
UnRAID running nested ESXi and Windows 11 VMs, complete with PCI passthrough.
This post walks through the idea behind the episode, how it ties back to earlier parts, and why I keep saying,
“By the power of UnRAID.”
Recap: Parts 6, 100 and 101
If you have been following along you will have seen:
Part 6 – Installing and testing Samsung 990 PRO NVMe drives in the Intel NUC based NAS.
Part 100 – Performing P2V migrations of Windows 11 systems.
Part 101 – Continuing the Windows 11 P2V work and refining the process.
In those episodes the star of the show appeared to be a physical Windows 11 machine and a separate ESXi host called ESXi052.
In Part 7 we reveal that this was deliberately misleading. Both the Windows 11 system and the ESXi host were in fact virtual machines.
The Secret: Everything Was A Virtual Machine
Part 7 opens by jumping back to those previous episodes and then revealing the twist:
The “physical” Windows 11 machine you saw on screen was actually a Windows 11 VM.
The ESXi host ESXi052 that we used for P2V work was also a VM.
The same VM was used in Part 6 when we installed and tested the NVMe drives.
In other words, the entire recent run of content has been driven by virtual machines on UnRAID.
The NVMe upgrades, the Windows 11 P2Vs, and the ESXi demonstrations were all happening inside VMs, not on bare metal.
Windows 11 With PCI Passthrough
One of the key enabling features in this setup is PCI passthrough on UnRAID.
By passing through hardware devices such as NVMe controllers or GPUs directly into a Windows 11 VM,
we can test and demonstrate “bare metal like” performance while still keeping everything virtual.
In the video we show Windows 11 running with PCI passthrough on UnRAID, giving the VM direct access to the hardware.
This is ideal for lab work, testing, and for scenarios where you want to push a homelab system without dedicating separate physical machines.
Nested ESXi 8.0 On UnRAID
The next part of the reveal is nested virtualization.
UnRAID is hosting a VMware vSphere Hypervisor ESXi 8.0 VM which in turn can run its own VMs.
This gives an incredibly flexible environment:
UnRAID manages the storage, cache, parity and core virtual machine scheduling.
ESXi runs nested on top for VMware specific testing and lab work.
Windows 11 runs as another VM on the same UnRAID host, with PCI passthrough as needed.
With this approach a single Intel NUC based NAS can simulate a much larger lab
while still being compact and power efficient.
By The Power Of UnRAID
To celebrate the reveal I created a fun meme inspired by the classic “By the power of Grayskull” scene.
In our version, “By the power of UnRAID” raises ESXi and Windows 11 high above the NUC,
showing that UnRAID is the platform empowering the whole setup.
Whether you are running nested ESXi, Windows 11 with PCI passthrough, or a mixture of containers and VMs,
UnRAID makes it straightforward to combine storage flexibility with powerful virtualization features.
The Power Of UnRAID In The Homelab
The big takeaway from Part 7 is simple:
A single UnRAID host can consolidate multiple roles: NAS, hypervisor, and workstation.
You can experiment with ESXi 8.0, Windows 11, and PCI passthrough without building a large rack of servers.
By keeping everything virtual you gain snapshots, flexibility, and the ability to rebuild or clone systems quickly.
For homelab enthusiasts, students, and anyone who wants to learn VMware or Windows 11 in depth,
this approach offers a lot of power in a very small footprint.
Watch The Episode
If you want to see the full walkthrough, including the moment the secret is revealed,
watch Part 7 of the DIY UNRAID NAS series on Hancock’s VMware Half Hour.
You will see exactly how the Windows 11 VM, the nested ESXi host, and UnRAID all fit together.
Conclusion
Part 7 closes the loop on a long running lab story.
What looked like separate physical systems were really virtual machines,
carefully layered on top of an UnRAID powered NAS.
By the power of UnRAID, we have been able to demonstrate NVMe upgrades, Windows 11 P2Vs, and ESXi 8.0 testing
all on a single compact platform.
If you are planning a new homelab or want to refresh an existing one,
consider what UnRAID plus nested ESXi and Windows 11 VMs could do for you.
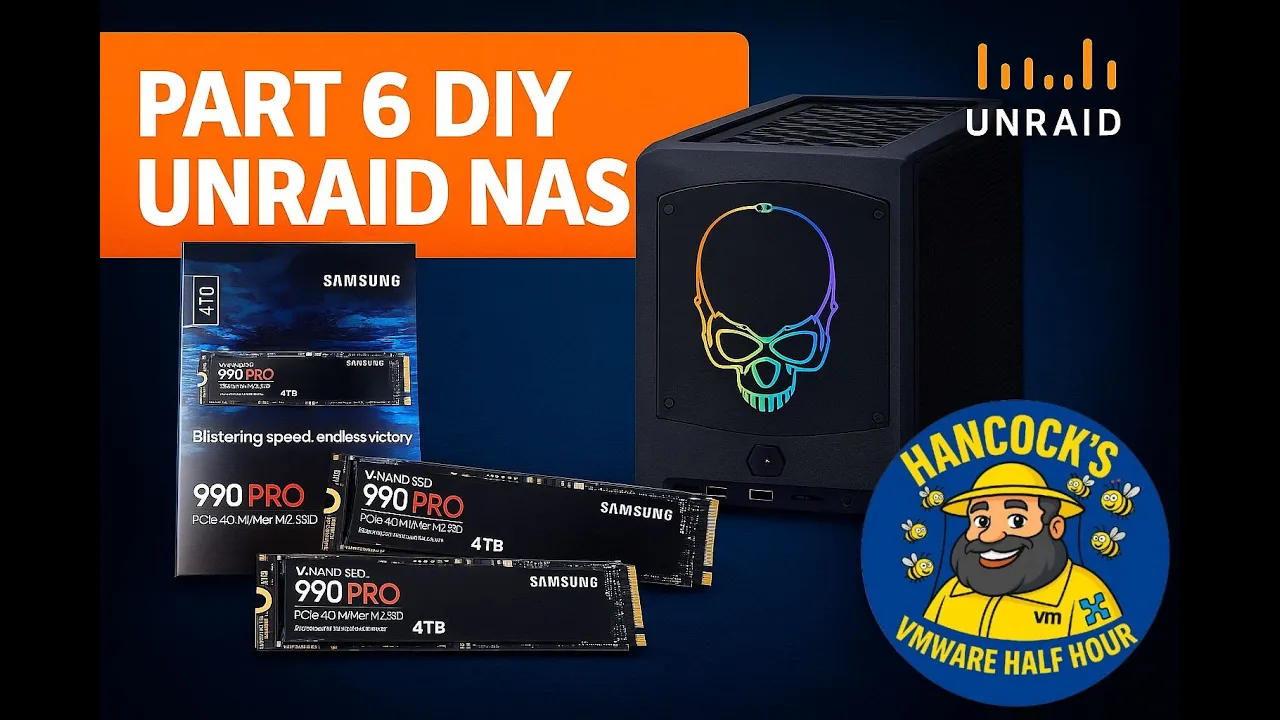
Welcome back to Hancock’s VMware Half Hour and to Part 6 of the DIY UNRAID NAS build series.
In this episode I install two Samsung 990 PRO Gen 4 NVMe M.2 SSDs into the Intel NUC 11 Extreme.
The NUC 11 Extreme has a surprisingly capable NVMe layout, providing:
2 × PCIe Gen 4 NVMe slots
2 × PCIe Gen 3 NVMe slots
The video walks through verifying the drives, opening the NUC, accessing both NVMe bays, and installing each SSD step-by-step, including the compute board NVMe slot that is a little more awkward to reach.
The episode finishes in Windows 11 where the drives are validated using Disk Manager and Samsung Magician to confirm that both NVMe SSDs are genuine.
What Is Covered in Part 6
Checking the authenticity of Samsung 990 PRO NVMe SSDs
Accessing both the bottom and compute-board NVMe slots in the Intel NUC 11 Extreme
Installing and securing each NVMe stick
Reassembling the NUC 11 Extreme, including panels, shrouds, NIC and PCIe bracket
Confirming both NVMe drives in Windows 11
Using Samsung Magician to verify that the drives are genuine
Preparing the NVMe storage for use in later parts of the UNRAID NAS series
Chapters
00:00 - Intro
00:07 - Welcome to Hancock's VMware Half Hour
00:29 - In Part 6 we are going to fit Samsung 990 PRO NVMe
01:24 - Intel NUC 11 Extreme has 2 x Gen3, 2 x Gen4 slots
01:45 - Check the NVMe are genuine
04:20 - Intel NUC 11 Extreme - open NVMe bottom panel
05:23 - Install first NVMe stick
06:33 - Remove NVMe screw
07:06 - Insert and secure NVMe stick
07:30 - Secure bottom NVMe panel cover
08:40 - Remove PCIe securing bracket
08:54 - Remove side panel
09:11 - Remove NIC
09:44 - Remove fan shroud
09:59 - Open compute board
12:23 - Installing the second NVMe stick
14:36 - Secure NVMe in slot
16:26 - Compute board secured
19:04 - Secure side panels
20:59 - Start Windows 11 and login
21:31 - Check in Disk Manager for NVMe devices
22:40 - This Windows 11 machine is the machine used in Part 100/101
22:44 - Start Disk Management to format the NVMe disks
23:43 - Start Samsung Magician to confirm genuine
25:25 - Both NVMe sticks are confirmed as genuine
25:54 - Thanks for watching
About This Build
This DIY NAS series focuses on turning the Intel NUC 11 Extreme into a compact but powerful UNRAID NAS with NVMe performance at its core.
The Samsung 990 PRO NVMe drives installed in this part will provide a significant uplift in storage performance and will feature heavily in later episodes when the NAS is tuned and benchmarked.
Support the Series
If you are enjoying the series so far, please consider supporting the channel and the content:
Like the video on YouTube
Subscribe to the channel so you do not miss future parts
Leave a comment or question with your own experiences or suggestions
Follow along for Parts 7, 8, 9 and beyond
Thank you for watching and for following the build.
Enjoy the build and stay tuned for upcoming parts where we continue configuring UNRAID and optimising the NAS.
Do not forget to like, comment and subscribe for more technical walkthroughs and builds.
Welcome back to Andysworld!*™ and to Part 5 of my DIY UNRAID NAS series.
In this instalment, I explore a small but very useful upgrade: using the free internal USB headers inside the Intel NUC Extreme 11th Gen to hide the UnRAID boot USB neatly inside the chassis. This keeps the build clean, reduces the risk of accidental removal, and makes the system feel much more like a dedicated appliance.
Why Move the UnRAID USB Inside the NUC?
UNRAID must boot from a USB flash drive. Most people leave it plugged into an external port on the back of the system, but the NUC Extreme includes internal USB 2.0 header pins.
By using those internal headers, we can:
Keep the USB drive inside the case
Free up an external USB port
Reduce the chance of accidental removal or damage
Improve the overall look and tidiness of the build
Make the system feel more like a self-contained NAS appliance
Credit and Hardware Used
This idea came from a very useful Reddit thread:
Reddit source:https://tinyurl.com/yd95mu37 Credit: Thanks to “JoshTheMoss” for highlighting the approach and the required cable.
Adapter Cable
The adapter used in this build was purchased from DeLock:
This adapter converts the internal USB header on the motherboard to a standard USB-A female connector, which is ideal for plugging in the UnRAID boot drive.
What Happens in Part 5
In this episode I:
Open up the Intel NUC Extreme 11th Gen chassis
Locate the unused internal USB header on the motherboard
Prepare the UnRAID USB stick, wrapping it in Kapton tape for additional insulation and protection
Install the DeLock internal USB adapter
Route and position the cable neatly inside the chassis
Connect the USB stick to the internal adapter (with the usual struggle of fitting fingers into a very small case)
Confirm that the system still boots correctly from the now-internal USB device
Give a short preview of what is coming next in Part 6
Video Chapters
00:00 – Intro
00:07 – Welcome to Hancock's VMware Half Hour
00:47 – Using the free internal USB headers
01:05 – Reddit Source – https://tinyurl.com/yd95mu37
01:17 – Kudos to "JoshTheMoss"
02:32 – The Reddit Post
02:44 – Purchased from – https://www.delock.com/produkt/84834/merkmale.html
02:59 – Intel NUC Extreme 11th Gen close-up
03:58 – Internal USB header left disconnected
04:36 – USB flash drive is used for UnRAID
04:49 – Wrapped USB flash drive in Kapton Tape
05:31 – Fit the cable with fat fingers
07:09 – Part 6 – NVMe Time
07:51 – 4 × 4 TB Samsung 990 PRO NVMe Gen 4
08:25 – Thanks for watching
Watch the Episode
Embedded video:
Follow the DIY UNRAID NAS Series on Andysworld!*™
This project is progressing nicely, and each part builds on the last. In Part 6, I move on to storage performance and install 4 × 4 TB Samsung 990 PRO Gen 4 NVMe SSDs for serious throughput.
If you are interested in homelab builds, UNRAID, VMware, or just general tinkering, keep an eye on the rest of the series here on Andysworld!*™.
If you’ve ever attempted a P2V migration using VMware vCenter Converter Standalone 9.0, you’ll know that the product can be as unpredictable as a British summer. One minute everything looks fine, the next minute you’re stuck at 91%, the Helper VM has thrown a wobbly, and the Estimated Time Remaining has declared itself fictional.
And yet… when it works, it really works.
This post is the follow-up to Part 100: HOW TO: P2V a Linux Ubuntu PC, where I walked through the seed conversion. In Part 101, I push things further and demonstrate how to synchronize changes — a feature newly introduced for Linux sources in Converter 9.0.
I won’t sugar-coat it: recording this episode took over 60 hours, spread across five days, with 22 hours of raw footage just to create a 32-minute usable video. Multiple conversion attempts failed, sequences broke, the change tracker stalled, and several recordings had to be completely redone. But I was determined to prove that the feature does work — and with enough perseverance, patience, and the power of video editing, the final demonstration shows a successful, validated P2V Sync Changes workflow.
Why Sync Changes Matters
Traditionally, a P2V conversion requires a maintenance window or downtime. After the initial seed conversion, any new data written to the source must be copied over manually, or the source must be frozen until cutover.
Converter 9.0 introduces a long-requested feature for Linux environments:
Synchronize Changes
This allows you to:
Perform an initial seed P2V conversion
Keep the source machine running
Replicate only the delta changes
Validate the final migration before cutover
It’s not quite Continuous Replication, but it’s closer than we’ve ever had from VMware’s free tooling.
Behind the Scenes: The Reality of Converter 9.0
Converter 9.0 is still fairly new, and “quirky” is an understatement.
Some observations from extensive hands-on testing:
The Helper VM can misbehave, especially around networking
At 91%, the Linux change tracker often stalls
The job status can report errors even though the sync completes
Estimated Time Remaining is not to be trusted
Each sync job creates a snapshot on the destination VM
Converter uses rsync under the hood for Linux sync
Despite all this, syncing does work — it’s just not a single-click process.
Step-by-Step Overview
Here’s the condensed version of the procedure shown in the video:
Start a seed conversion (see Part 100).
Once complete, use SSH on the source to prepare a 10GB test file for replication testing.
Run an MD5 checksum on the source file.
Select Synchronize Changes in Converter.
Let the sync job run — and don’t panic at the 91% pause.
Review any warnings or errors.
Perform a final synchronization before cutover.
Power off the source, power on the destination VM.
Verify the replicated file using MD5 checksum on the destination.
Celebrate when the checksums match — Q.E.D!
Proof of Success
In the final verification during filming:
A 10GB file was replicated
Both source and destination MD5 checksums matched
The Linux VM booted cleanly
Snapshot consolidation completed properly
Despite five days of interruptions, failed jobs, and recording challenges, the outcome was a successful, consistent P2V migration using Sync Changes.
Watch the Full Video (Part 101)
If you want to see the whole process — the setup, the problems, the explanations, the rsync behaviour, and the final success — the full video is now live on my YouTube channel:
This video was one of the most challenging pieces of content I’ve created. But the end result is something I’m genuinely proud of — a real-world demonstration of a feature that many administrators will rely on during migrations, especially in environments where downtime is limited.
Converter 9.0 may still have rough edges, but with patience, persistence, and a bit of luck, it delivers.
Thanks for reading — and as always, thank you for supporting Andysworld! Don’t forget to like, share, or comment if you found this useful.
DIY UnRAID NAS Build – Part 4: Installing a 10GBe Intel X710-DA NIC (Plus an Outtake!)
Welcome back to another instalment of my DIY UnRAID NAS Build series.
If you have been following along, you will know this project is built around an Intel NUC chassis that I have been carefully (and repeatedly!) taking apart to transform into a compact but powerful UnRAID server.
In Part 4, we move on to a major upgrade: installing a 10GBe Intel X710-DA network interface card. And yes, the eagle-eyed among you will notice something unusual at the beginning of the video, because this episode starts with a blooper. I left it in for your entertainment.
A Fun Outtake to Start With
Right from the intro, things get a little chaotic. There is also a mysterious soundtrack playing, and I still do not know where it came from.
If you can identify it, feel free to drop a comment on the video.
Tearing Down the Intel NUC Again
To install the X710-DA NIC, the NUC requires almost complete disassembly:
Remove the back plate
Remove the backplane retainer
Take off the side panels
Open the case
Remove the blanking plate
Prepare the internal slot area
This NUC has become surprisingly modular after taking it apart so many times, but it still puts up a fight occasionally.
Installing the Intel X710-DA 10GBe NIC
Once the case is stripped down, the NIC finally slides into place. It is a tight fit, but the X710-DA is a superb card for a NAS build:
Dual SFP+ ports
Excellent driver support
Great performance in VMware, Linux, and Windows
Ideal for high-speed file transfers and VM workloads
If you are building a NAS that needs to move data quickly between systems, this NIC is a great option.
Reassembly
Next, everything goes back together:
Side panels reinstalled
Back plate fitted
Case secured
System ready for testing
You would think after doing this several times I would be quicker at it, but the NUC still has a few surprises waiting.
Booting into Windows 11 and Driver Issues
Once everything is reassembled, the NUC boots into Windows 11, and immediately there is a warning:
Intel X710-DA: Not Present
Device Manager confirms it. Windows detects that something is installed, but it does not know what it is.
Time to visit the Intel website, download the correct driver bundle, extract it, and install the drivers manually.
After a reboot, success. The NIC appears correctly and is fully functional.
Why 10GBe
For UnRAID, 10GBe significantly improves:
VM migrations
iSCSI and NFS performance
File transfers
Backup times
SMB throughput for Windows and macOS clients
It also future-proofs the NAS for any future network upgrades.
The Mystery Soundtrack
Towards the end of the video I ask again: what is the music playing in the background?
I genuinely have no idea, so if you recognise it, please leave a comment on the video.
Watch the Episode
You can watch the full episode, including all teardown steps, NIC installation, Windows troubleshooting, and the blooper, here:
Thank You for Watching and Reading
Thank you for following along with this NAS build.
Part 5 will continue the series, so stay tuned.
If you have built your own UnRAID NAS or have a favourite NIC for homelab projects, feel free to comment and share your experience.
HOWTO: P2V a Linux Ubuntu PC Using VMware vCenter Converter Standalone 9.0
Migrating physical machines into virtual environments continues to be a key task for many administrators, homelabbers, and anyone modernising older systems. With the release of VMware vCenter Converter Standalone 9.0, VMware has brought back a fully supported, modernised, and feature-rich toolset for performing P2V (Physical-to-Virtual) conversions.
In this post, I walk through how to P2V a powered-on Ubuntu 22.04 Linux PC, using Converter 9.0, as featured in my recent Hancock’s VMware Half Hour episode.
This guide covers each stage of the workflow, from configuring the source Linux machine to selecting the destination datastore and reviewing the final conversion job. Whether you’re prepping for a migration, building a new VM template, or preserving older hardware, this step-by-step breakdown will help you get the job done smoothly.
Video Tutorial
If you prefer to follow along with the full step-by-step: Embed your YouTube video here once uploaded.
What’s New in VMware vCenter Converter Standalone 9.0?
A refreshed and modern UI
Improved compatibility with modern Linux distributions
Updated helper VM for Linux conversions
Support for newer ESXi and vSphere versions
Better overall performance and reliability
Linux P2V via passwordless sudo-enabled accounts
This makes it far easier to bring physical Linux workloads into your virtual infrastructure.
Full Tutorial Breakdown (Step-by-Step)
Below is a summary of all the steps demonstrated in the video:
Step 1 — Open Converter & Select “Convert Machine”
Step 2 — Choose “Powered On”
Step 3 — Detect Source Machine
Step 4 — Select “Remote Linux Machine”
Step 5 — Enter FQDN of the Linux PC
Step 6 — Use a passwordless sudo-enabled user account
Step 7 — Enter the password
Step 8 — Proceed to the next stage
Step 9 — Enter ESXi or vCenter Server FQDN
Step 10 — Authenticate with username and password
Step 11 — Continue
Step 12 — Name your destination VM
Step 13 — Choose datastore & VM hardware version
Step 14 — Go to the next screen
Step 15 — TIP: Avoid making unnecessary changes!
Step 16 — Next
Step 17 — Review settings and click “Finish”
Step 18 — Monitor the conversion job
Step 19 — Review Helper VM deployment on ESXi
Step 20 — Cloning process begins
Step 21 — Converter best practices & tips
Step 22 — Conversion reaches 98%
Step 23 — Conversion reaches 100%
Step 24 — Disable network on the destination VM
Step 25 — Power on the VM
Step 26 — Teaser: Something special about Brother 52 (esxi052)!
Why Disable the Network Before First Boot?
Doing this avoids:
IP conflicts
Hostname duplication
Duplicate MAC address issues
Unwanted services broadcasting from the cloned system
After confirming the VM boots correctly, you can safely reconfigure networking inside the guest.
Final Thoughts
VMware vCenter Converter Standalone 9.0 brings P2V workflows back into the modern VMware ecosystem. With full Linux support—including Ubuntu 22.04—it’s easier than ever to migrate physical workloads into vSphere.
If you’re maintaining a homelab, doing DR planning, or preserving old systems, Converter remains one of the most valuable free tools VMware continues to offer.
Stay tuned — the next video showcases something special about Brother 52 (esxi052) that you won’t want to miss!
Don’t Forget!
Like the video
Subscribe to Hancock’s VMware Half Hour
Leave a comment — What P2V tutorial should I do next?
PART 3 – DIY Unraid NAS: Power Testing & Stability Checking with OCCT
Welcome back to Part 3 of the DIY Unraid NAS series!
In Part 1, we unboxed and assembled the hardware.
In Part 2, we ran a quick Windows 11 installation test (and of course, everything that could go wrong… went Pete Tong).
Now that the system boots and behaves under a “normal” workload, it’s time to get serious. Before committing this Intel NUC–powered machine to Unraid full-time, we need to ensure it’s electrically stable, thermally stable, and capable of running 24/7 without surprises.
This stage is all about power draw, thermals, and stress testing using OCCT — a powerful tool for validating hardware stability.
Why Power & Stability Testing Is Essential for a NAS
A NAS must be:
Reliable
Predictable
Stable under load
Able to handle long uptimes
Capable of sustained read/write operations
Tolerant of temperature variation
Unlike a desktop, a NAS doesn’t get breaks. It runs constantly, serving files, running Docker containers, hosting VMs, and performing parity checks. Any weakness now — PSU spikes, hot VRMs, faulty RAM — will eventually show up as file corruption or unexpected reboots.
That’s why stress testing at this stage is non-negotiable.
Using OCCT for a Full-System Torture Test
OCCT is typically used by overclockers, but it’s perfect for checking new NAS hardware.
It includes tests for:
1. CPU Stability
Pushes the CPU to 100% sustained load.
Checks:
Thermal throttling
Cooling capacity
Voltage stability
Clock behaviour under load
A NAS must not throttle or overheat under parity checks or rebuilds.
2. Memory Integrity Test
RAM is the most overlooked component in DIY NAS builds.
Errors = silent data corruption.
OCCT’s memory test:
Fills RAM with patterns
Reads, writes, and verifies
Detects bit-flip issues
Ensures stability under pressure
Memory integrity is vital for Unraid, especially with Docker and VMs.
3. Power Supply Stress Test
OCCT is one of the few tools capable of stressing:
CPU
GPU (if present)
Memory
All power rails
simultaneously.
This simulates worst-case load and reveals:
Weak PSUs
Voltage drops
Instability
Flaky power bricks
VRM overheating
Not what you want in a NAS.
4. Thermal Behaviour Monitoring
OCCT provides excellent graphs showing:
Heat buildup
Fan curve response
Temperature equilibrium
VRM load
Stability over time
This shows whether the NUC case and cooling can handle long running services.
Test Results: Can the Intel NUC Handle It?
After running OCCT, the system performed exceptionally well.
CPU
No throttling
Temperatures within acceptable limits
Clock speeds held steady
RAM
Passed memory integrity tests
No bit errors
Stable under extended load
Power Delivery
No shutdowns or brown-outs
The power brick handled peaks
VRMs stayed within thermal limits
Thermals
Fans behaved predictably
Temperature plateau was stable
No unsafe spikes
In other words: This machine is ready to become an Unraid NAS.
Why Validate Hardware Before Installing Unraid?
Because fixing hardware problems AFTER configuring:
Shares
Parity
Docker containers
VMs
Backups
User data
…is painful.
Hardware validation now ensures:
No silent RAM corruption
No thermal issues
No unexpected shutdowns
No nasty surprises during parity builds
The system is reliable for 24/7 operation
This step protects your data, your time, and your sanity.
What’s Coming in Part 4
With the hardware:
Burned in
Power-tested
Thermally stable
Verified by OCCT
We move to the exciting part: Actually installing Unraid!
In Part 4, we will:
Prepare the Unraid USB boot device
Configure BIOS for NAS use
Boot Unraid for the first time
Create the array
Assign drives
Add parity
Begin configuring shares and services
We’re finally at the point where the NAS becomes… a NAS!
Welcome back to Part 2 of our DIY Unraid NAS adventure! In Part 1, we unboxed the hardware, checked the spec, and got ready to build a tiny but mighty home-brew NAS around the Intel NUC “Skull” chassis.
Before committing this machine to Unraid full-time, I wanted to run a quick hardware test — and what better way than to throw a Windows 11 installation at it? Simple, right?
Well… maybe not. As usual, things went a bit Pete Tong along the way! ?
Booting the NUC – and Immediate Problems
The video starts with the NUC firing up nicely… until I discover the mouse isn’t working. Not ideal when you’re trying to install an OS.
After poking around, I realise the issue is down to the NanoKVM I use for remote access. The trick? Switch the KVM to HID mode only — suddenly the mouse returns from the dead.
Lesson learned: Tiny KVMs can cause BIG installation headaches.
Ventoy + Windows 11 ISO = Let’s Try This Again
Once the input devices were behaving, I booted Ventoy from USB and selected the Windows 11 ISO.
This part should be smooth. Except it wasn’t.
Windows 11 booted fine… The setup loaded… Language and keyboard selected… Version chosen… Installation begins…
Then: “Windows 11 installation has failed.”
No reason. No explanation. Just a failure screen and a shrug.
Excellent.
If At First You Don’t Succeed – Install Again
Time for round two.
Ventoy ? Windows 11 ISO ? Setup ? Install Copying files…
YES! It finally completes.
That warm feeling of success lasted a whole ten seconds before Windows restarted to continue configuration — and hit me with another set of “what now?!” delays.
Still, persistence wins. Eventually we get to:
Keyboard setup
Feature selection
Updates
Account creation
Security questions
More updates
Even more updates
Whoever said installing Windows 11 only takes 10 minutes was telling porkies.
Finally… Windows 11 Desktop
After the second attempt, repeated reboots, KVM issues, updates, and the bizarre initial failure, we finally land on a clean, working Windows 11 desktop.
Why bother with all this before Unraid?
Because hardware burn-in testing NOW can save hours (or days) of pain LATER.








![[Valid RSS]](http://andysworld.org.uk/images/valid-rss.png "Validate my RSS feed")