Archive for January, 2010

Big Garden Birdwatch Results

Sunday, January 31st, 2010

I’ve just spent the last hour doing the Big Garden Birdwatch, from 09:50 – 10:50, and here are my results (it’s not too late if you’ve not done it, but too late for Self-Assessment Tax Return!)

  • Blackbird – 4
  • Blue tit – 3
  • Chaffinch – 3
  • Collared Dove – 11
  • Goldfinch – 10
  • Great tit – 1
  • House sparrow – 31
  • Starling – 44
  • Crow – 12
  • Bullfinch – 1

I now know why, the bird seed gets eaten in one day!

Post to Twitter

I thought my carpets were clean until I purchased a Dyson

Saturday, January 30th, 2010
The old Electrolux Contour

The old Electrolux Contour

Well it finally had to happen our Electrolux Contour vacuum cleaner which we purchased in 1989, has finally gone to Vacuum Cleaner heaven. It’s typical after just purchasing replacement bags and drive belts, but it would appear that the motor is worn out, and it no longer sucks! When this was first advertised on the TV circa 1989, they showed it holding a dinner plate it had that much suction – not any more! It’s been repaired countless times, and it broke three years ago and we went and purchased an in-expensive Electrolux Cyclone bagless vacuum cleaner- this was rubbish, the filters were always blocking and needed cleaning under a tap every time it was used, so we stopped using it, and I fixed the Electrolux Contour again!

So, we are no longer Dyson virgins, as I purchased a new Dyson DC20 Stowaway later this evening, before taking the Contour vacuum cleaner apart earlier, and in the process damaged one of Lindsey’s ornaments in the lounge. The Carved Gourd now has a hole in it! (and you cannot bring anything home without the cats inspecting it!)

Dyson DC20 in box (Angus)

Dyson DC20 in box (Angus)

Dyson DC20 in box (Tilly)

Dyson DC20 in box (Tilly)

The amount of suction this vacuum cleaner has got is unbelievable, the carpets get sucked up, off the underlay, and it looks like I’m Arnold Schwarzenegger in Terminator!

Dyson DC20 out of the box!

Dyson DC20 out of the box!

“I thought my carpets were clean until I purchased a Dyson”

so thumbs up to another James!

Post to Twitter

Dripping, Noise, Flood and Silence

Friday, January 29th, 2010
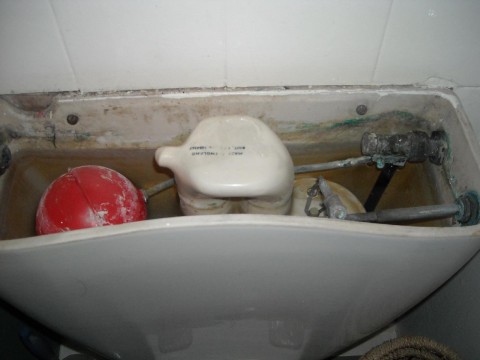
Toilet 'vintage' cistern with old ball-cock and valve

Toilet 'vintage' cistern with old ball-cock and valve

This all started about three and a half years ago, when we first purchased the house, the first DIY job I had was to fix the dripping overflow from the toilet in the bathroom. The toilet cistern is rather narrow, and possibly vintage (or old) because it contains a very large porcelain flush, the disadvantage of this is, there is not much room in the cistern for a replacement ball cock and valve.

After searching in various DIY stores, I couldn’t find replacement part that would fit the cistern, so I just “modified” the brass ball cock arm by bending it slightly to stop the dripping overlow.
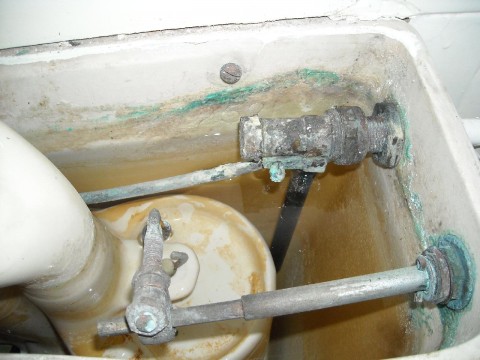
close-up of old ball-cock and valve

close-up of old ball-cock and valve

Many months later, I found some replacement brass fittings, so I purchased three of them, and stored them in the garage until it needed replacing for good.
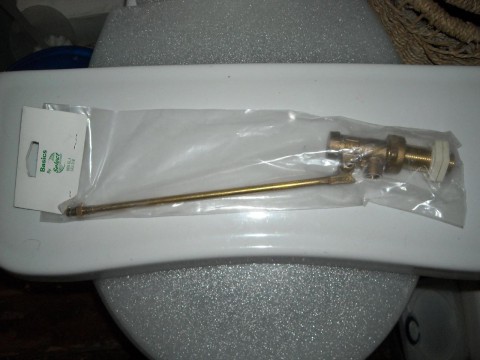
New brass ball cock valve

New brass ball cock valve

Well this DIY bodge job came back to haunt me, because it started dripping again a few months ago. So it was time to replace with the parts in stock in the garage.
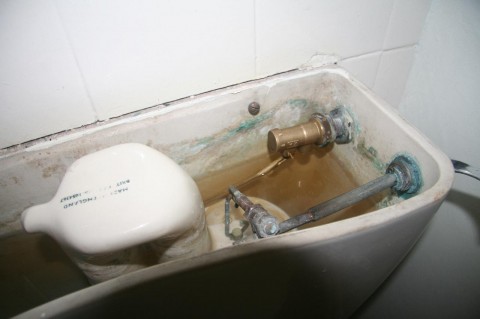
New part fitted

New part fitted

The only problem with the new ball cock and valve fitted, was the shaft was too short, and I couldn’t fit the ball cock to it. Back to the drawing board, so I removed the old shaft, and connected it to the new valve. This worked and stopped the dripping valve, but when the toilet cistern filled, it was horrendously noisy! I later discovered it was the venturi action of the valve that was causing the noise under high pressure. So back to the drawing board and Google. I then discovered Fluidmaster a quiet fill small footprint fill valve, but there isn’t much room in the cistern, so off to Screwfix for the part.
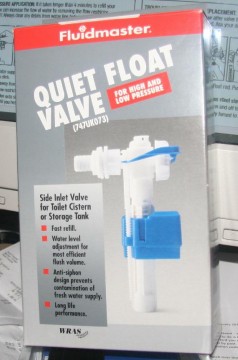
Fluidmaster Quiet Float Valve

Fluidmaster Quiet Float Valve

When was the last plumbing part your purchased, comes in a nice box? with instructions on the back of the box, and an A4 sheet inside!

It didn’t take me very long to fit this new Fluidmaster part, and there was just enough space, a few millimetres clearance from the flush mechanism and walls of the cistern, must make sure there’s enough clearance, and regularly check or will have another flood!

Oh yes the flood, following the instructions, Step 7. IMPORTANT ALWAYS CLEAR ANY DEBRIS FROM WATER LINE TO COMPLETE INSTALLATION. So I shut off the water as instructed, removed the cap, went downstairs, and under the kitchen sink, turn-ed back on the water…… oh #@!? when I returned to the bathroom, water under extreme pressure was hitting the opposite end of the cistern, and water was then travelling vertically, and hitting the ceiling, and then dripping off, I had to run back downstairs and turn off the water! I think it would have been best if the instructions had stated to place the top back on the cistern!

The bathroom was flooded!!! (didn’t have time to take pictures, mopping up the water!).

Anyway pictures of the Fluidmaster installed…
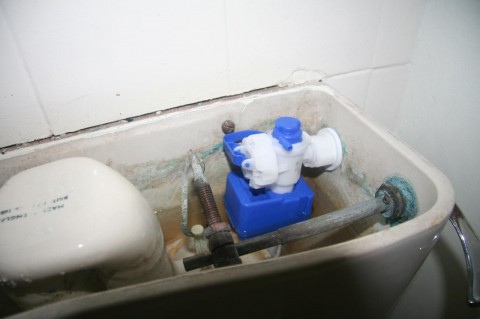
Quiet Float Valve by Fluidmaster
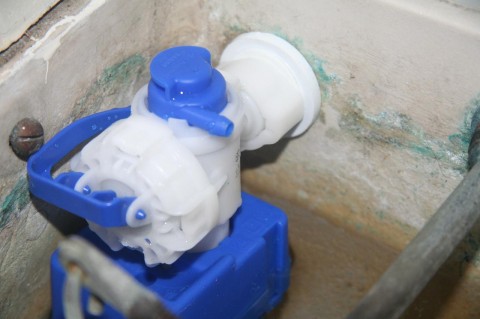
Quiet Float Valve by Fluidmaster
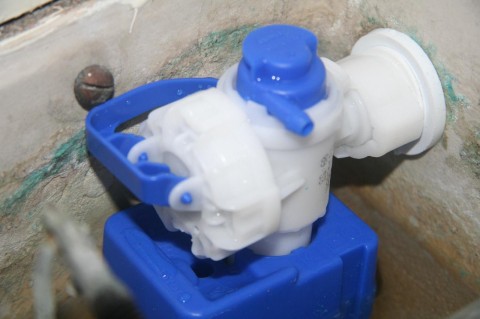
Quiet Float Valve by Fluidmaster

Quiet Float Valve by Fluidmaster

Quiet Float Valve by Fluidmaster

Quiet Float Valve by Fluidmaster

It does what it says on the tin or box in this case, it’s quiet! So no more nosiy toilet! (when it’s filling anyway!).

Post to Twitter

Big Garden Birdwatch, 30 – 31 January 2010

Friday, January 29th, 2010

Why not spend an hour this weekend filling the bird feeders and taking part in the Big Garden Birdwatch, 30 – 31 January 2010. Watch the birds in your garden or park for one hour and record the highest number of each species you see at any one time.

Counting birds each year is very important. Information from the Big Garden Birdwatch over the past 30 years has produced valuable scientific data. Comapring the fugures helps us determine which birds are doing well and which are struggling, and so need some action to help them.

I’ve topped up my feeders for this weekend, have you!

Post to Twitter

Best of friends

Thursday, January 14th, 2010

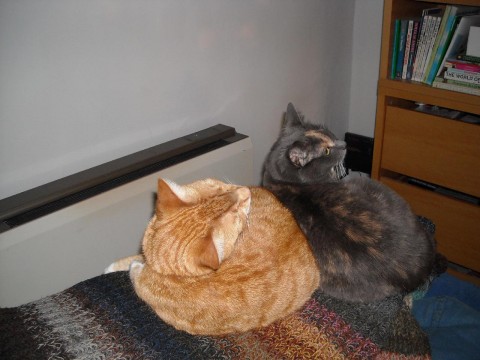
“Best of friends” or maybe it’s the cold weather, that’s why they are cuddling up together…

Esther and Angus 'best of friends'

Esther and Angus 'best of friends'

Post to Twitter

Servicing my Vintage Hy-Flo Model C Air Pump

Thursday, January 14th, 2010

Over a week ago, the socket ring main tripped, and shortly afterwards my vintage Hy-Flo Model C Air Pump stopped working, I don’t think this was the reason for it stopping, just coincidence.

Hy-Flo vintage reciprocating piston aquarium air pumps were manufactured by Medcalf Bros. Ltd. of Potters Bar, England. They ceased trading many years ago.

I think they were manufactured in the 50/60s for the laboratory and research establishments, universities and polytechnics some were used in the ornamental aquatics industries, but as they were expensive, many fish keepers, used Rena, Whisper or Hoffman pumps of that time. Most aquarium air pumps of this generation were manufactured from bakelite or plastic, and used a rubber diaphragm, which needed regular replacement due to wear, and were of the vibrator design. Most of the pumps on the market today use this design.

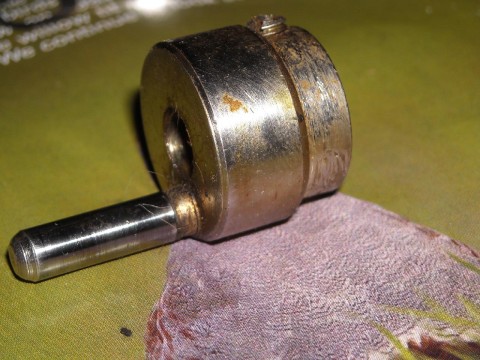
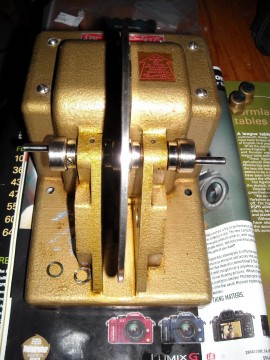
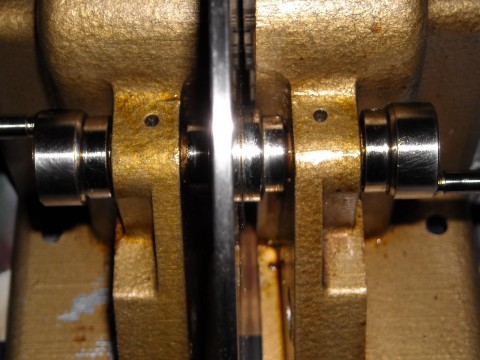
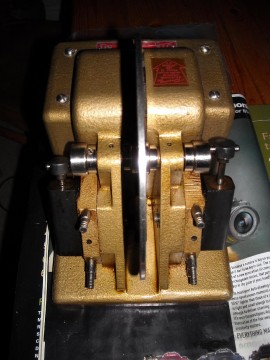
The Hy-flo pump is made out of a solid cast iron block, the Model C weighs approx 5kg, a metal flywheel moves between an alternating current electromagnetic coil (motor), causing the flywheel to start and rotate, the flywheel gets a little hot due to eddy currents induced in the flywheel, even if the flywheel gets jammed the flywheel can get very hot, if it does important to turn off, otherwise damage to the coils (motor) could occur. The flywheel spins on an axel/rod, at the end of the axel, cams connect to a piston and valve chamber which generates air.

My Hy-flo air pump, had stopped spinning. Using a electrical power meter from JLB Electronics, the Hy-flo pump was still drawing 50 watts of electricity, and the flywheel got very hot (see above eddy currents).

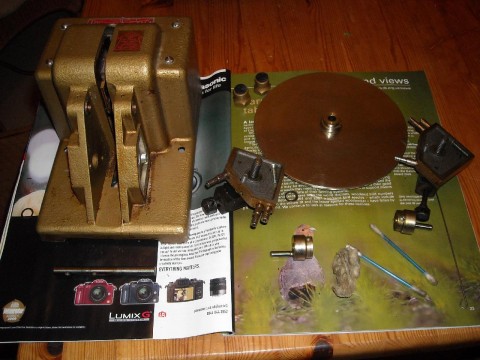
flywheel, pistons and cams removed

flywheel, pistons and cams removed

I removed the two piston assemblies and valve chambers but the flywheel still didn’t spin freely when power was applied.

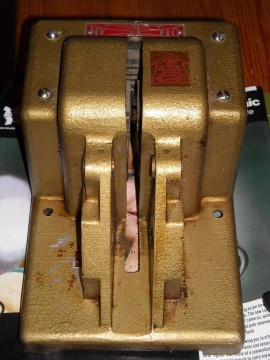
just a block of iron

just a block of iron

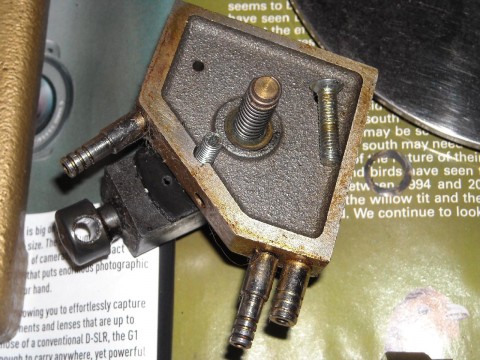
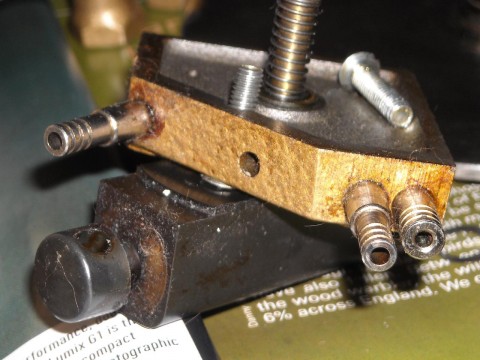
piston and valve chamber

piston and valve chamber

cam from Hy-flo Model C

cam from Hy-flo Model C

piston and valbe chamber

piston and valbe chamber

So I sent an email to Sonik Systems for guidance, they re-sale, service and repair Hy-flo pumps (Medcalf Bros. ceased trading many years ago). They advised me that because the flywheel was getting hot, but not spinning, the motor (electric coils) were still working, and it was either an alignment or dirt on the axel that was causing the issue. The axel could be moved, and was not rubbing against the motor (coil). Sonik Systems confirmed that the flywheel should spin freely for approx 30 seconds when pushed with power off. My flywheel was not free spinning.

back together after oiling

back together after oiling

close-up of flywheel

close-up of flywheel

The axel would not move freely by hand, so a small tap with a rubber mallet freed the axel. The moment that this was freed, the flywheel span for 40 seconds un-aided. I suspect due to build up of dirt, and the possible dry/humidity in the fish house, had dried out the oil, and the remaining hard residue had caused it to cease.

Hy-Flo Model C

Hy-Flo Model C

All oiled and working

Post to Twitter

Snow starts to thaw…

Thursday, January 14th, 2010

These pictures are before the snow thawed, and now it’s started to comeback, our first snowfall last night, since last Friday.

snow 10 inch deep

snow 10 inch deep

snow 7 inch deep

snow 7 inch deep

Post to Twitter

LED Luminaire from CoralLed

Wednesday, January 13th, 2010

I was reading a review of the LED Luminaire from CoralLed in the January 2010 issue of Practial Fiskeeping Magazine by Jeremy Gay, he states ‘It’s Good … British Made … built by hand”

Yes, it looks like it, my cat could do a better job with a solering iron, if you look at the poor soldering joints in the photograph attached.

Note the soldering joints

Note the soldering joints

As an electronics engineer, this is very poor, I’m all for British Made products, but there’s no excuse, these connections are poorly made, there are much better ways for terminating connections onto a PCB than this! Price from £600 – £2000! (if they’ve had hidden them from view it would have been better, I would be embarrased of a photo of a product constructed like this!).

Another electronics company stated “we are disgusted by this quality of workmanship, we would be embarassed if we produced a product like this and if we did, we might as well close up shop”.

Post to Twitter

Broken Storage Heater – Fixed

Thursday, January 7th, 2010

The thermal fuselinks obtained from http://www.storageheater.co.uk/ have fixed the night storage heater. Just in time as external night temperatures plument to below -7 degrees C. We walked to the local town again yesterday to obtain coffee for Lindsey. The local roads are no better, and are worse with the overnight snowfall.

the long walk home in a blizzard

the long walk home in a blizzard

But we were lucky, because a nice man in his 4×4 Mercedes Benz with snow tyres gave us a lift back to the hamlet!

Post to Twitter

Broken Storage Heater

Tuesday, January 5th, 2010

I noticed the other day that one of our storage heaters (the only heating we have), was cold as ice.

storage heater thermal fuselink

storage heater thermal fuselink

and this is the reason why! The thermal fuselink has blown, indicating that the storage heater has over heated, and the thermal fuse has blown, a safety feature. I spoke to a very nice man from http://www.storageheater.co.uk/, and ordered some replacement thermal fuselinks (blue!). He also emailed me the service manuals for these Creda storage heaters. The thermal fuselinks arrived very promptly today, Thanks Roger!

So quickly fitted the new fuselink.

new fuselink fitted

new fuselink fitted

closeup of new thermal fuselink

closeup of new thermal fuselink

It has a temperature of 145 degrees C written on it, so I assume this is the temperature at which it blows! Hopefully the room will be warmer this evening, I’ll have to wait for the Ecnomoy 7 electric to come on at 12.30am, to check it’s working!

Post to Twitter