Posts Tagged ‘Scripting’

Automating Windows 2000 Professional in VirtualBox with PowerShell

Monday, August 31st, 2026

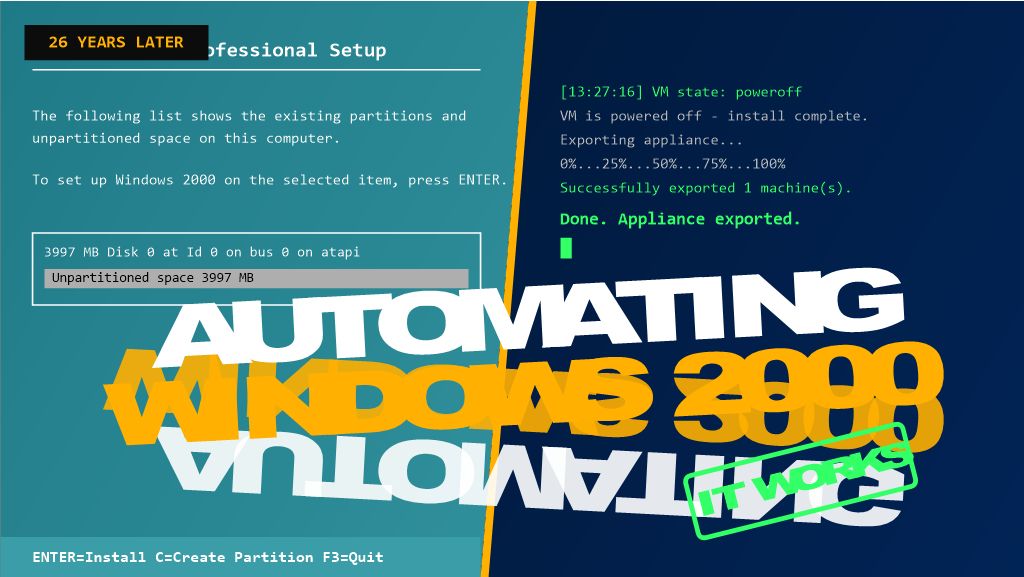
26 years after its release, Windows 2000 Professional still has a place in testing, legacy support, and retro-computing labs — but building a VM for it by hand, every single time, gets old fast. In my latest video, HOWTO VirtualBox: How to Automate the Creation of an Appliance File,” I walk through a PowerShell script that does the whole job unattended: create the VM, install Windows 2000 Pro with zero clicking through Setup, power it off automatically, and export the finished appliance as a portable .ova file.

This was originally written as an answer to an Experts Exchange question, and it’s part of the Hancock’s VMware Half Hour series — which has expanded beyond core vSphere content into related virtualization tooling like this.

Here’s the write-up, including a couple of the gotchas that tripped the script up along the way.

Why Automate This?

A VirtualBox appliance file (.ova) packages a fully configured VM — OS, disk, settings, all of it — into a single portable file you can import anywhere. Building one by hand through the GUI is fine once. Needing a fresh Windows 2000 Pro VM repeatedly for a lab or test environment is a different story, and that’s where scripting the whole pipeline with VBoxManage.exe through PowerShell pays off.

The Twist With Windows 2000

Windows 2000 predates the autounattend.xml mechanism that later Windows versions use, so the assumption going in was that VBoxManage unattended install — the built-in facility that auto-generates a Windows answer file — wouldn’t support it, and that a hand-built winnt.sif + floppy would be needed instead.

Turns out that’s not the case. VBoxManage unattended install does support Windows 2000 — it builds its own answer file, auxiliary ISO, and floppy internally, no manual winnt.sif or floppy-writing tool required. That’s the route this script uses.

What the Script Does

At a high level, Deploy-Win2kProVM.ps1 handles the whole pipeline in one run:

  1. Prompts for a VM name and cleans up any existing VM with that name.
  2. Creates a new VirtualBox VM (Windows2000 guest type, PIIX4 IDE controller, 1 CPU — matches what this OS actually needs).
  3. Creates and attaches a virtual hard disk.
  4. Kicks off VBoxManage unattended install pointed at a standard Windows 2000 Pro install ISO — VBoxManage handles the answer file, auxiliary ISO, and floppy itself, and installs Guest Additions in the same pass.
  5. Polls the VM’s state until it powers itself off.
  6. Exports the finished VM to a .ova appliance file.

The full script is available on GitHub: [link to your GitHub repo]

Gotchas Worth Knowing About Before You Run This

A few things that came up while getting this working, in case they save you the same troubleshooting:

  • Flag names for unattended install are strict and easy to get wrong. It’s --key, not --product-key. It’s --user-password (or --admin-password, depending on the account type), not --password. VBoxManage errors out immediately with an “Unknown option” message if you get these wrong — worth double-checking against VBoxManage unattended install --help for your installed version.
  • Windows 2000 needs 1 CPU and --ioapic off. This matches a manually-built VM confirmed to install and boot reliably — modern virtual chipset defaults can trip up an OS this old.
  • Setup won’t shut down on its own. Without a shutdown command, the VM finishes install and just sits at the desktop, so the polling loop in the script would wait forever. The fix is VBoxManage’s own --post-install-command="shutdown -s -t 0" flag, which runs inside the guest automatically once Setup completes (via the Guest Additions execution channel — hence --install-additions needs to run first).
  • Downloaded scripts get blocked by Windows. If you see “not digitally signed” when running the .ps1 file, it’s the Mark of the Web from a browser download. Fix it with:
 
powershell
  Unblock-File -Path '.\Deploy-Win2kProVM.ps1'
  • A genuine product key is required. There’s no way around supplying a real one in the unattended install parameters.

What You End Up With

Run the script, type a VM name, and walk away — no manual clicking through Setup, no hand-built floppy images. A few minutes later, you’ve got a fully installed, Guest-Additions-equipped Windows 2000 Professional VM exported as a ready-to-share .ova.

That exported file also becomes a reusable template — importing it for a fresh copy is far faster than rerunning the whole install.

Watch the Full Video

This post covers the highlights, but the video walks through the whole process live — including the actual errors we hit and fixed along the way. Check it out here: https://youtu.be/Nz2vhgU01qM

If you’ve automated your own VirtualBox workflows, I’d love to hear how — drop a comment on the video or below!

Part 7: DIY UNRAID NAS “BY THE POWER OF UNRAID” THE SCRET REVEALED

Saturday, December 6th, 2025

By The Power Of UnRAID – The Secret Reveal Of ESXi And Windows 11 VMs

For the last few episodes of Hancock’s VMware Half Hour, we have been quietly building something a little different.
On the surface it looked like a simple DIY UNRAID NAS project and a couple of Windows 11 P2V demonstrations.
In reality, everything was running inside virtual machines on an UnRAID host.

In Part 7 of the DIY UNRAID NAS series, we finally pull back the curtain and reveal what has really been powering the lab:
UnRAID running nested ESXi and Windows 11 VMs, complete with PCI passthrough.
This post walks through the idea behind the episode, how it ties back to earlier parts, and why I keep saying,
“By the power of UnRAID.”

Recap: Parts 6, 100 and 101

If you have been following along you will have seen:

  • Part 6 – Installing and testing Samsung 990 PRO NVMe drives in the Intel NUC based NAS.
  • Part 100 – Performing P2V migrations of Windows 11 systems.
  • Part 101 – Continuing the Windows 11 P2V work and refining the process.

In those episodes the star of the show appeared to be a physical Windows 11 machine and a separate ESXi host called ESXi052.
In Part 7 we reveal that this was deliberately misleading. Both the Windows 11 system and the ESXi host were in fact virtual machines.

The Secret: Everything Was A Virtual Machine

Part 7 opens by jumping back to those previous episodes and then revealing the twist:

  • The “physical” Windows 11 machine you saw on screen was actually a Windows 11 VM.
  • The ESXi host ESXi052 that we used for P2V work was also a VM.
  • The same VM was used in Part 6 when we installed and tested the NVMe drives.

In other words, the entire recent run of content has been driven by virtual machines on UnRAID.
The NVMe upgrades, the Windows 11 P2Vs, and the ESXi demonstrations were all happening inside VMs, not on bare metal.

Windows 11 With PCI Passthrough

One of the key enabling features in this setup is PCI passthrough on UnRAID.
By passing through hardware devices such as NVMe controllers or GPUs directly into a Windows 11 VM,
we can test and demonstrate “bare metal like” performance while still keeping everything virtual.

In the video we show Windows 11 running with PCI passthrough on UnRAID, giving the VM direct access to the hardware.
This is ideal for lab work, testing, and for scenarios where you want to push a homelab system without dedicating separate physical machines.

Nested ESXi 8.0 On UnRAID

The next part of the reveal is nested virtualization.
UnRAID is hosting a VMware vSphere Hypervisor ESXi 8.0 VM which in turn can run its own VMs.
This gives an incredibly flexible environment:

  • UnRAID manages the storage, cache, parity and core virtual machine scheduling.
  • ESXi runs nested on top for VMware specific testing and lab work.
  • Windows 11 runs as another VM on the same UnRAID host, with PCI passthrough as needed.

With this approach a single Intel NUC based NAS can simulate a much larger lab
while still being compact and power efficient.

By The Power Of UnRAID

To celebrate the reveal I created a fun meme inspired by the classic “By the power of Grayskull” scene.
In our version, “By the power of UnRAID” raises ESXi and Windows 11 high above the NUC,
showing that UnRAID is the platform empowering the whole setup.

Whether you are running nested ESXi, Windows 11 with PCI passthrough, or a mixture of containers and VMs,
UnRAID makes it straightforward to combine storage flexibility with powerful virtualization features.

The Power Of UnRAID In The Homelab

The big takeaway from Part 7 is simple:

  • A single UnRAID host can consolidate multiple roles: NAS, hypervisor, and workstation.
  • You can experiment with ESXi 8.0, Windows 11, and PCI passthrough without building a large rack of servers.
  • By keeping everything virtual you gain snapshots, flexibility, and the ability to rebuild or clone systems quickly.

For homelab enthusiasts, students, and anyone who wants to learn VMware or Windows 11 in depth,
this approach offers a lot of power in a very small footprint.

Watch The Episode

If you want to see the full walkthrough, including the moment the secret is revealed,
watch Part 7 of the DIY UNRAID NAS series on Hancock’s VMware Half Hour.
You will see exactly how the Windows 11 VM, the nested ESXi host, and UnRAID all fit together.

Conclusion

Part 7 closes the loop on a long running lab story.
What looked like separate physical systems were really virtual machines,
carefully layered on top of an UnRAID powered NAS.
By the power of UnRAID, we have been able to demonstrate NVMe upgrades, Windows 11 P2Vs, and ESXi 8.0 testing
all on a single compact platform.

If you are planning a new homelab or want to refresh an existing one,
consider what UnRAID plus nested ESXi and Windows 11 VMs could do for you.