Welcome back to Hancock’s VMware Half Hour and to Part 6 of the DIY UNRAID NAS build series.
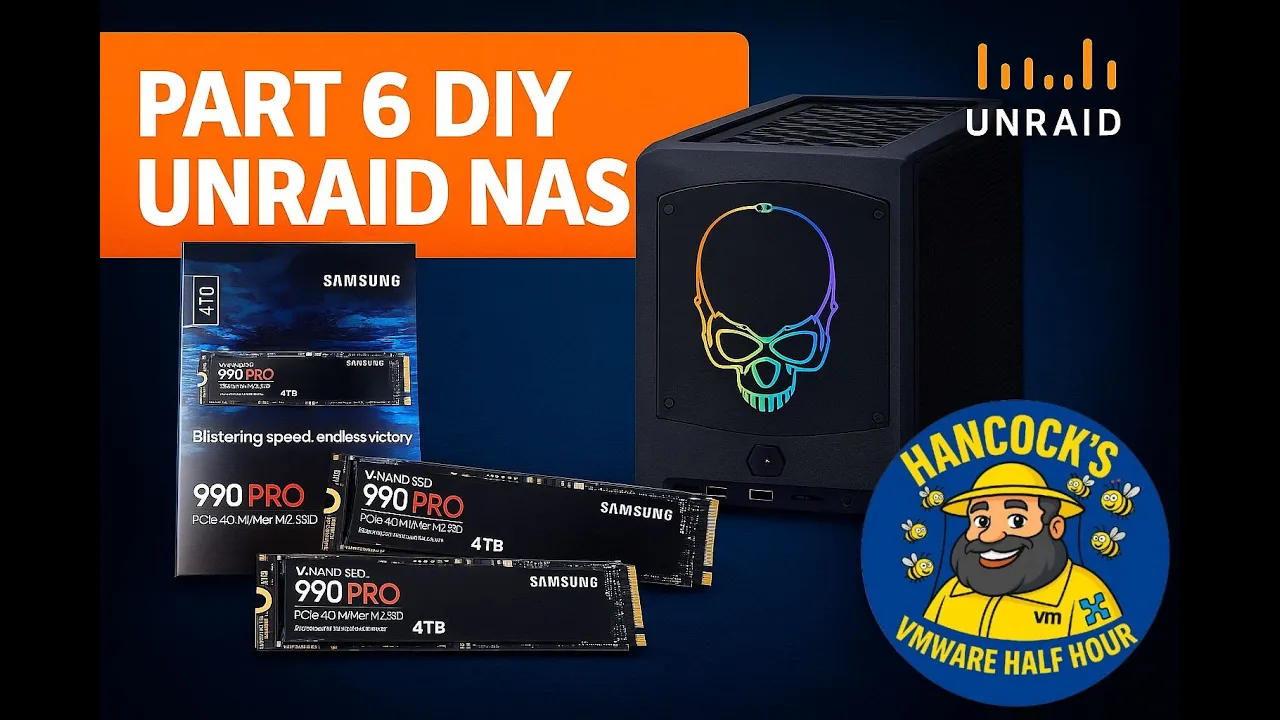
In this episode I install two Samsung 990 PRO Gen 4 NVMe M.2 SSDs into the Intel NUC 11 Extreme.
The NUC 11 Extreme has a surprisingly capable NVMe layout, providing:
2 × PCIe Gen 4 NVMe slots
2 × PCIe Gen 3 NVMe slots
The video walks through verifying the drives, opening the NUC, accessing both NVMe bays, and installing each SSD step-by-step, including the compute board NVMe slot that is a little more awkward to reach.
The episode finishes in Windows 11 where the drives are validated using Disk Manager and Samsung Magician to confirm that both NVMe SSDs are genuine.
What Is Covered in Part 6
Checking the authenticity of Samsung 990 PRO NVMe SSDs
Accessing both the bottom and compute-board NVMe slots in the Intel NUC 11 Extreme
Installing and securing each NVMe stick
Reassembling the NUC 11 Extreme, including panels, shrouds, NIC and PCIe bracket
Confirming both NVMe drives in Windows 11
Using Samsung Magician to verify that the drives are genuine
Preparing the NVMe storage for use in later parts of the UNRAID NAS series
Chapters
00:00 - Intro
00:07 - Welcome to Hancock's VMware Half Hour
00:29 - In Part 6 we are going to fit Samsung 990 PRO NVMe
01:24 - Intel NUC 11 Extreme has 2 x Gen3, 2 x Gen4 slots
01:45 - Check the NVMe are genuine
04:20 - Intel NUC 11 Extreme - open NVMe bottom panel
05:23 - Install first NVMe stick
06:33 - Remove NVMe screw
07:06 - Insert and secure NVMe stick
07:30 - Secure bottom NVMe panel cover
08:40 - Remove PCIe securing bracket
08:54 - Remove side panel
09:11 - Remove NIC
09:44 - Remove fan shroud
09:59 - Open compute board
12:23 - Installing the second NVMe stick
14:36 - Secure NVMe in slot
16:26 - Compute board secured
19:04 - Secure side panels
20:59 - Start Windows 11 and login
21:31 - Check in Disk Manager for NVMe devices
22:40 - This Windows 11 machine is the machine used in Part 100/101
22:44 - Start Disk Management to format the NVMe disks
23:43 - Start Samsung Magician to confirm genuine
25:25 - Both NVMe sticks are confirmed as genuine
25:54 - Thanks for watching
About This Build
This DIY NAS series focuses on turning the Intel NUC 11 Extreme into a compact but powerful UNRAID NAS with NVMe performance at its core.
The Samsung 990 PRO NVMe drives installed in this part will provide a significant uplift in storage performance and will feature heavily in later episodes when the NAS is tuned and benchmarked.
Support the Series
If you are enjoying the series so far, please consider supporting the channel and the content:
Like the video on YouTube
Subscribe to the channel so you do not miss future parts
Leave a comment or question with your own experiences or suggestions
Follow along for Parts 7, 8, 9 and beyond
Thank you for watching and for following the build.
Enjoy the build and stay tuned for upcoming parts where we continue configuring UNRAID and optimising the NAS.
Do not forget to like, comment and subscribe for more technical walkthroughs and builds.
Welcome back to Andysworld!*™ and to Part 5 of my DIY UNRAID NAS series.
In this instalment, I explore a small but very useful upgrade: using the free internal USB headers inside the Intel NUC Extreme 11th Gen to hide the UnRAID boot USB neatly inside the chassis. This keeps the build clean, reduces the risk of accidental removal, and makes the system feel much more like a dedicated appliance.
Why Move the UnRAID USB Inside the NUC?
UNRAID must boot from a USB flash drive. Most people leave it plugged into an external port on the back of the system, but the NUC Extreme includes internal USB 2.0 header pins.
By using those internal headers, we can:
Keep the USB drive inside the case
Free up an external USB port
Reduce the chance of accidental removal or damage
Improve the overall look and tidiness of the build
Make the system feel more like a self-contained NAS appliance
Credit and Hardware Used
This idea came from a very useful Reddit thread:
Reddit source:https://tinyurl.com/yd95mu37 Credit: Thanks to “JoshTheMoss” for highlighting the approach and the required cable.
Adapter Cable
The adapter used in this build was purchased from DeLock:
This adapter converts the internal USB header on the motherboard to a standard USB-A female connector, which is ideal for plugging in the UnRAID boot drive.
What Happens in Part 5
In this episode I:
Open up the Intel NUC Extreme 11th Gen chassis
Locate the unused internal USB header on the motherboard
Prepare the UnRAID USB stick, wrapping it in Kapton tape for additional insulation and protection
Install the DeLock internal USB adapter
Route and position the cable neatly inside the chassis
Connect the USB stick to the internal adapter (with the usual struggle of fitting fingers into a very small case)
Confirm that the system still boots correctly from the now-internal USB device
Give a short preview of what is coming next in Part 6
Video Chapters
00:00 – Intro
00:07 – Welcome to Hancock's VMware Half Hour
00:47 – Using the free internal USB headers
01:05 – Reddit Source – https://tinyurl.com/yd95mu37
01:17 – Kudos to "JoshTheMoss"
02:32 – The Reddit Post
02:44 – Purchased from – https://www.delock.com/produkt/84834/merkmale.html
02:59 – Intel NUC Extreme 11th Gen close-up
03:58 – Internal USB header left disconnected
04:36 – USB flash drive is used for UnRAID
04:49 – Wrapped USB flash drive in Kapton Tape
05:31 – Fit the cable with fat fingers
07:09 – Part 6 – NVMe Time
07:51 – 4 × 4 TB Samsung 990 PRO NVMe Gen 4
08:25 – Thanks for watching
Watch the Episode
Embedded video:
Follow the DIY UNRAID NAS Series on Andysworld!*™
This project is progressing nicely, and each part builds on the last. In Part 6, I move on to storage performance and install 4 × 4 TB Samsung 990 PRO Gen 4 NVMe SSDs for serious throughput.
If you are interested in homelab builds, UNRAID, VMware, or just general tinkering, keep an eye on the rest of the series here on Andysworld!*™.
DIY UnRAID NAS Build – Part 4: Installing a 10GBe Intel X710-DA NIC (Plus an Outtake!)
Welcome back to another instalment of my DIY UnRAID NAS Build series.
If you have been following along, you will know this project is built around an Intel NUC chassis that I have been carefully (and repeatedly!) taking apart to transform into a compact but powerful UnRAID server.
In Part 4, we move on to a major upgrade: installing a 10GBe Intel X710-DA network interface card. And yes, the eagle-eyed among you will notice something unusual at the beginning of the video, because this episode starts with a blooper. I left it in for your entertainment.
A Fun Outtake to Start With
Right from the intro, things get a little chaotic. There is also a mysterious soundtrack playing, and I still do not know where it came from.
If you can identify it, feel free to drop a comment on the video.
Tearing Down the Intel NUC Again
To install the X710-DA NIC, the NUC requires almost complete disassembly:
Remove the back plate
Remove the backplane retainer
Take off the side panels
Open the case
Remove the blanking plate
Prepare the internal slot area
This NUC has become surprisingly modular after taking it apart so many times, but it still puts up a fight occasionally.
Installing the Intel X710-DA 10GBe NIC
Once the case is stripped down, the NIC finally slides into place. It is a tight fit, but the X710-DA is a superb card for a NAS build:
Dual SFP+ ports
Excellent driver support
Great performance in VMware, Linux, and Windows
Ideal for high-speed file transfers and VM workloads
If you are building a NAS that needs to move data quickly between systems, this NIC is a great option.
Reassembly
Next, everything goes back together:
Side panels reinstalled
Back plate fitted
Case secured
System ready for testing
You would think after doing this several times I would be quicker at it, but the NUC still has a few surprises waiting.
Booting into Windows 11 and Driver Issues
Once everything is reassembled, the NUC boots into Windows 11, and immediately there is a warning:
Intel X710-DA: Not Present
Device Manager confirms it. Windows detects that something is installed, but it does not know what it is.
Time to visit the Intel website, download the correct driver bundle, extract it, and install the drivers manually.
After a reboot, success. The NIC appears correctly and is fully functional.
Why 10GBe
For UnRAID, 10GBe significantly improves:
VM migrations
iSCSI and NFS performance
File transfers
Backup times
SMB throughput for Windows and macOS clients
It also future-proofs the NAS for any future network upgrades.
The Mystery Soundtrack
Towards the end of the video I ask again: what is the music playing in the background?
I genuinely have no idea, so if you recognise it, please leave a comment on the video.
Watch the Episode
You can watch the full episode, including all teardown steps, NIC installation, Windows troubleshooting, and the blooper, here:
Thank You for Watching and Reading
Thank you for following along with this NAS build.
Part 5 will continue the series, so stay tuned.
If you have built your own UnRAID NAS or have a favourite NIC for homelab projects, feel free to comment and share your experience.
Welcome to AndysWorld.org.uk! Today, we’re diving into a project that’s perfect for anyone looking to build a powerful, yet compact, DIY Network-Attached Storage (NAS) solution. In this post, I’ll walk you through the first part of building a ‘MEGA’ NVMe NAS using the Intel NUC 11 Extreme (Beast Canyon). This mini-PC packs a punch with its powerful hardware, making it a great choice for a NAS build, especially when combined with UnRAID to handle storage and virtualization.
Why Choose the Intel NUC 11 Extreme for a NAS?
If you’ve been looking into NAS setups, you know the balance between power, size, and expandability is crucial. The Intel NUC 11 Extreme (Beast Canyon) checks all the right boxes, offering:
Compact Form Factor: It’s a small but powerful solution that doesn’t take up much space.
High-Performance NVMe Support: NVMe drives provide incredibly fast data transfer speeds—perfect for a NAS that needs to handle heavy workloads.
Flexibility for Virtualization: With UnRAID, you can set up multiple virtual machines, containers, and storage arrays, making it a versatile solution for any home or small office.
For this build, we’re focusing on using NVMe storage for high-speed access to files and a 64GB Kingston Fury DDR4 RAM kit to ensure smooth performance under load.
What You’ll Need for This Build:
Intel NUC 11 Extreme (Beast Canyon)
64GB Kingston Fury DDR4 RAM
2 x 512GB XPG GAMMIX NVMe SSDs
UnRAID Operating System
A few basic tools for assembly (screwdriver, anti-static mat, etc.)
If you’ve never worked with the Intel NUC before, don’t worry! I’ll guide you through every step of the assembly process. Let’s get into it!
Step-by-Step Build Process:
1. Unboxing the Intel NUC 11 Extreme
First things first, let’s unbox the Intel NUC 11 Extreme (Beast Canyon). When you open the box, you’ll find the compact, sleek chassis, which packs quite a punch for such a small form factor. This NUC is equipped with an 11th Gen Intel Core i7 processor and can support a variety of high-speed storage options, including NVMe SSDs.
2. Installing the RAM and NVMe Drives
With the NUC unboxed, the next step is to install the Kingston Fury RAM and XPG GAMMIX NVMe SSDs. Be careful during installation—especially with the tiny NVMe screws! The NUC has an easy-to-access compute board where both the RAM and NVMe drives will fit.
Installing the RAM: Simply slot the 64GB Kingston Fury DDR4 RAM sticks into the dedicated slots, making sure they’re fully seated.
Installing the NVMe SSDs: These go directly onto the motherboard and can be secured using small screws. Be sure to handle them gently as the connectors are quite delicate.
3. Reassembling the NUC
Once the RAM and NVMe drives are installed, it’s time to reassemble the NUC. This involves:
Reattaching the fan tray and shroud
Reinstalling the side and back panels
At this stage, everything should feel secure and ready for the next steps.
Why NVMe Storage for a NAS?
NVMe drives are game-changers when it comes to NAS storage. Here’s why:
Speed: NVMe offers lightning-fast read/write speeds compared to SATA SSDs or traditional HDDs. For anyone who works with large files or needs to serve data quickly, NVMe is a must.
Future-Proofing: With more applications and data being handled in the cloud, having NVMe in your NAS ensures your storage solution is ready for the future.
Reliability: NVMe drives are more reliable than traditional spinning hard drives, with less moving parts and faster data recovery times.
What’s Next?
Now that we’ve completed the hardware installation, in the next post, we’ll dive into setting up UnRAID on the NUC. UnRAID will allow us to easily configure our storage arrays, virtual machines, and containers—all from a user-friendly interface. Stay tuned for Part 2, where we’ll cover configuring the software, optimizing the NAS, and making sure everything runs smoothly.
Helpful Resources:
To help you along the way, I recommend checking out the blog posts from two experts in the field:
This build was just the beginning! The Intel NUC 11 Extreme provides an excellent foundation for a fast, reliable NAS. With NVMe storage and the flexibility of UnRAID, you can build a high-performance system that’s both versatile and compact.
What do you think of this build? Have you used the Intel NUC for similar projects? Drop a comment below or connect with me on social media—I’d love to hear about your experiences!
Follow Andy’s World for More DIY Tech Projects Don’t forget to check out the latest posts and tutorials on AndysWorld.org.uk to keep up with all things tech and DIY. Happy building!
Minisforum MS-A2 Hyper-V to Proxmox 9.0 Migration Minisforum MS-A2 Series Part 15 Ultimate #homelab
In this episode of Hancock’s VMware Half Hour, I walk you through migrating Hyper-V virtual machines to Proxmox 9.0 on the Minisforum MS-A2.
We’ll cover connecting to the Proxmox server via SSH, exploring datastores, working with VHDX files, and running migration demos—including moving a full VM in under 60 seconds! This step-by-step guide shows how easy it is to transition workloads from Hyper-V into Proxmox for your #homelab or production environment.
Whether you’re testing, learning, or planning a migration, this video gives you the tools and knowledge to make it happen smoothly.
Scripts are here on GitHub – https://github.com/einsteinagogo/Hyper-VtoProxmoxMigration.git
As a beekeeper, the beginning of each year brings a mix of excitement and uncertainty. However, 2024 tested my patience and optimism like no other. Back in May through July, my outlook was far from positive. With spring weather patterns working against us, the critical early-season crop seemed doomed. It’s no exaggeration to say that by mid-summer, I was feeling quite pessimistic about the year’s honey crop.
Spring Setbacks: A Beekeeper’s Challenge
Spring is typically when the hives kick into high gear. The bees emerge, eager to forage on early blooms, and begin building reserves that set the foundation for the rest of the year. But 2024 had different plans. The season’s unusually poor weather disrupted the natural cycle – what should have been a time of abundance turned out to be a near-washout. With fewer foraging opportunities and continued unpredictability in the climate, the colonies faced one challenge after another, putting both the bees and myself on high alert.
To add to this challenge, the spring crop didn’t just underperform; it was, frankly, a disaster. Hive after hive struggled to produce the usual bounty, and despite my best efforts to mitigate losses with supplemental feeding, the lack of natural forage meant the colonies could only do so much.
Turning the Tide: A Summer Comeback
Around mid-summer, just when I thought we might be on track for one of the leanest seasons I’d ever had, the tides began to turn. The weather started to stabilize, and a late surge in blooming forage plants provided a second wind. Watching the bees set out on these fresh foraging runs was a welcome sight, and I noticed a significant improvement in hive activity.
By late July, my pessimism began to soften. The bees’ tenacity had paid off, and we started seeing the hives gradually replenish themselves. While the honey flow wasn’t as fast or plentiful as in previous years, the resilience of the colonies brought in a decent summer crop. With careful management and a bit of luck, I found myself – despite my early doubts – with honey stores that could just meet demand.
The Harvest: Warming Cabinets and the Big Clean-Up
Now, with the final supers – or “honey boxes” – extracted and the honey filtered, they’re stacked neatly in the honey warming cabinets, ready for jarring. But before the first jar can even be labeled, there’s a massive clean-up ahead. If you’ve never experienced it, imagine honey practically everywhere – likely even in my ears! Every surface in the processing area needs a thorough washdown, and then each sticky super needs to be wrapped, racked, and palletized for safe storage until next season.
With the last of the honey tucked away, the work continues with inventory checks and restocking in the bee shed. Final orders are placed with distributors for fresh frames and wax foundations, and I get down to building frames for the next season. And if time allows, I’ll even try my hand at some candle making from the leftover beeswax – a favorite winter project.
Reflections on Beekeeping’s Ups and Downs
Looking back on the 2024 season, I’m reminded of the resilience and adaptability beekeeping demands. Despite the disappointment of a failed spring crop, this honey season taught me to trust in the bees’ ability to bounce back and adapt to changing conditions. Beekeeping is as much about partnership with nature as it is about hard work and preparation.
So, as I prepare to winterize the hives and reflect on the season, I do so with gratitude – both for the bees’ resilience and the loyal customers who support this journey, year after year. It was a season of twists and turns, but ultimately, one that ended on a much sweeter note than I could have predicted back in those challenging spring months.
In this video we will show you HOW TO: Backup (Export) and Restore (Import) virtual machines to VMware vSphere Hypervisor 7.0 for FREE. This procedure can be followed to backup (export) and restore (import) any virtual machine hosted on the VMware vSphere Hypervisor 7.0 host server.
Do you find yourself with half a dozen cloud storage providers?
I’ve currently got storage accounts with
Dropbox, Wuala, Box, Google Drive, Microsoft Skydrive and Evernote
I needed to get some files onto my Microsoft Surface RT tablet yesterday, unfortunately there seems to be an issue with Dropbox with the Surface RT and syncing to the cloud, the Surface RT uses Skydrive.
But how do I get my data from Dropbox to Skydrive?
Use cloudHQ, this cloud based application will continuously sync all your files between different cloud services: in real-time


![[Valid RSS]](http://andysworld.org.uk/images/valid-rss.png "Validate my RSS feed")