Posts Tagged ‘VirtualBox’

Automating Windows 2000 Professional in VirtualBox with PowerShell

Monday, August 31st, 2026

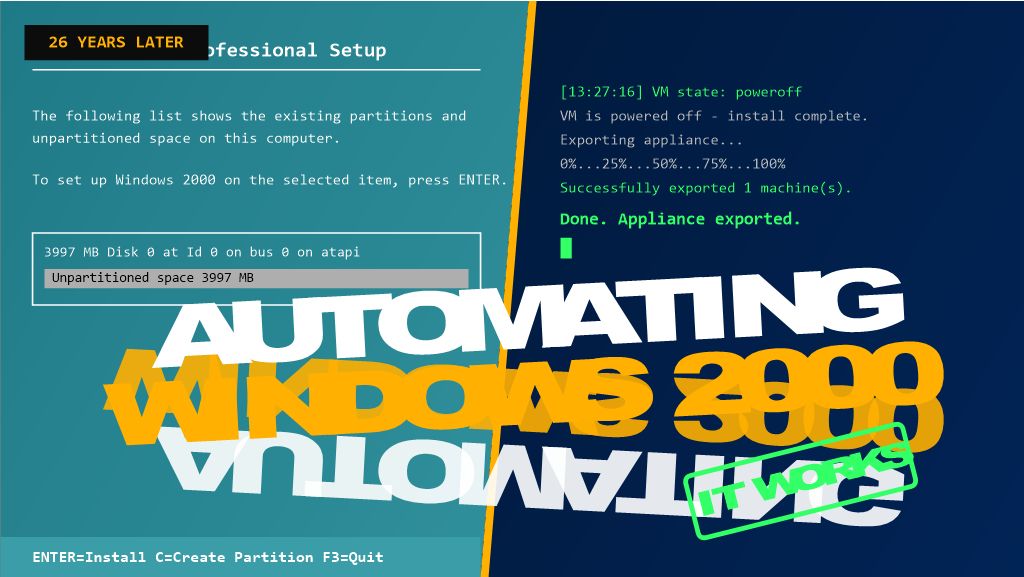
26 years after its release, Windows 2000 Professional still has a place in testing, legacy support, and retro-computing labs — but building a VM for it by hand, every single time, gets old fast. In my latest video, HOWTO VirtualBox: How to Automate the Creation of an Appliance File,” I walk through a PowerShell script that does the whole job unattended: create the VM, install Windows 2000 Pro with zero clicking through Setup, power it off automatically, and export the finished appliance as a portable .ova file.

This was originally written as an answer to an Experts Exchange question, and it’s part of the Hancock’s VMware Half Hour series — which has expanded beyond core vSphere content into related virtualization tooling like this.

Here’s the write-up, including a couple of the gotchas that tripped the script up along the way.

Why Automate This?

A VirtualBox appliance file (.ova) packages a fully configured VM — OS, disk, settings, all of it — into a single portable file you can import anywhere. Building one by hand through the GUI is fine once. Needing a fresh Windows 2000 Pro VM repeatedly for a lab or test environment is a different story, and that’s where scripting the whole pipeline with VBoxManage.exe through PowerShell pays off.

The Twist With Windows 2000

Windows 2000 predates the autounattend.xml mechanism that later Windows versions use, so the assumption going in was that VBoxManage unattended install — the built-in facility that auto-generates a Windows answer file — wouldn’t support it, and that a hand-built winnt.sif + floppy would be needed instead.

Turns out that’s not the case. VBoxManage unattended install does support Windows 2000 — it builds its own answer file, auxiliary ISO, and floppy internally, no manual winnt.sif or floppy-writing tool required. That’s the route this script uses.

What the Script Does

At a high level, Deploy-Win2kProVM.ps1 handles the whole pipeline in one run:

  1. Prompts for a VM name and cleans up any existing VM with that name.
  2. Creates a new VirtualBox VM (Windows2000 guest type, PIIX4 IDE controller, 1 CPU — matches what this OS actually needs).
  3. Creates and attaches a virtual hard disk.
  4. Kicks off VBoxManage unattended install pointed at a standard Windows 2000 Pro install ISO — VBoxManage handles the answer file, auxiliary ISO, and floppy itself, and installs Guest Additions in the same pass.
  5. Polls the VM’s state until it powers itself off.
  6. Exports the finished VM to a .ova appliance file.

The full script is available on GitHub: [link to your GitHub repo]

Gotchas Worth Knowing About Before You Run This

A few things that came up while getting this working, in case they save you the same troubleshooting:

  • Flag names for unattended install are strict and easy to get wrong. It’s --key, not --product-key. It’s --user-password (or --admin-password, depending on the account type), not --password. VBoxManage errors out immediately with an “Unknown option” message if you get these wrong — worth double-checking against VBoxManage unattended install --help for your installed version.
  • Windows 2000 needs 1 CPU and --ioapic off. This matches a manually-built VM confirmed to install and boot reliably — modern virtual chipset defaults can trip up an OS this old.
  • Setup won’t shut down on its own. Without a shutdown command, the VM finishes install and just sits at the desktop, so the polling loop in the script would wait forever. The fix is VBoxManage’s own --post-install-command="shutdown -s -t 0" flag, which runs inside the guest automatically once Setup completes (via the Guest Additions execution channel — hence --install-additions needs to run first).
  • Downloaded scripts get blocked by Windows. If you see “not digitally signed” when running the .ps1 file, it’s the Mark of the Web from a browser download. Fix it with:
 
powershell
  Unblock-File -Path '.\Deploy-Win2kProVM.ps1'
  • A genuine product key is required. There’s no way around supplying a real one in the unattended install parameters.

What You End Up With

Run the script, type a VM name, and walk away — no manual clicking through Setup, no hand-built floppy images. A few minutes later, you’ve got a fully installed, Guest-Additions-equipped Windows 2000 Professional VM exported as a ready-to-share .ova.

That exported file also becomes a reusable template — importing it for a fresh copy is far faster than rerunning the whole install.

Watch the Full Video

This post covers the highlights, but the video walks through the whole process live — including the actual errors we hit and fixed along the way. Check it out here: https://youtu.be/Nz2vhgU01qM

If you’ve automated your own VirtualBox workflows, I’d love to hear how — drop a comment on the video or below!

Minisforum MS-A2 Firmware UEFI BIOS Update | Part 2 – Hancock’s VMware Half Hour

Wednesday, July 16th, 2025

Welcome back to another episode of Hancock’s VMware Half Hour! In this video, we take you step-by-step through updating the UEFI BIOS on the Minisforum MS-A2, upgrading from version 1.0.1 to 1.0.2 – all from a very hot #homelab (35°C!).

We walk through downloading the BIOS update, prepping the system (disabling Secure Boot), launching the UEFI shell, and flashing the firmware using EfiFlash.nsh. There’s even a little pop culture nod to Toto and The Wizard of Oz ??, plus a shout-out to VMware vExperts like Daniel Kreiger, William Lam, and Stephen Wagner!


Chapters Included:

Setting up the MS-A2 for flashing

Booting into the UEFI Shell

Running the flash process

Successfully installing BIOS 1.0.2

VMware vExpert tips and how to apply

Post-update validation

Whether you’re a fellow VMware homelabber or just updating your own MS-A2 device, this guide will walk you through it with humour, precision, and heat-induced delirium.

Don’t forget to Like, Subscribe and Share  if this helped you out!

Useful Links:

Minisforum MS-A2 BIOS Downloads

UEFI Shell.efi on GitHub

VMware vExpert Program

Unboxing the Minisforum MS-A2 and Installing 128GB RAM: A Homelab Powerhouse!

Tuesday, July 15th, 2025


If you’ve followed Andysworld.org for any length of time, you’ll know I’m always on the lookout for compact, powerful systems that pack a serious punch — especially for virtualization, homelab testing, and edge computing. The Minisforum MS-A2 just landed on my desk, and I couldn’t wait to tear into it, max out the RAM, and see how this tiny monster performs.

Why the Minisforum MS-A2?

Minisforum has carved out a strong niche in the mini PC market, but the MS-A2 is something different. Designed around the AMD Ryzen 9 9955HX (a 16-core, 32-thread beast), this unit is built for power users: developers, sysadmins, content creators, and homelab enthusiasts like myself.

The MS-A2 offers:

  • AMD Ryzen 9 9955HX (Zen 4, 5nm, 16C/32T)

  • Up to 128GB DDR5 SODIMM RAM

  • Quadruple PCIe Gen4 NVMe M.2 slots

  • Dual 2.5G Ethernet, Dual 10G SFP+

  • USB 4.0 / HDMI 2.1 / USB-C

  • Compact footprint with surprisingly good thermals

With specs like that, it’s an ideal candidate for running Proxmox, VMware ESXi, KVM, or even just as a hyper-efficient workstation.


The Unboxing Experience

Right out of the box, the MS-A2 gives off a premium vibe. The packaging is minimalist but well thought out. Inside you’ll find:

  • The MS-A2 unit itself (dense, solid, well-built)

  • 120W or 180W power adapter (depending on config)

  • Mounting hardware

  • User manual and warranty information

Ports are plentiful and logically laid out. It even includes USB 4.0 and dual LAN ports — a must for virtualized networking setups in a homelab.


Installing 128GB DDR5 RAM

This is where things get exciting.

The MS-A2 officially supports up to 128GB of DDR5 SODIMM RAM (2x 64GB modules). While 64GB used to be the ceiling for mini PCs, the MS-A2 pushes those boundaries.

Here’s how I installed the RAM:

  1. Power Down and Open the Chassis:
    Remove the bottom screws (Torx) and gently lift the cover. The internals are neatly laid out.

  2. Locate the SODIMM Slots:
    There are two DDR5 SODIMM slots accessible without needing to remove any other components.

  3. Install 2x 64GB DDR5 4800MHz Modules:
    I used Kingston DDR5 SODIMMs — click, click, done.

  4. Reassemble and Boot:
    Replace the cover, screw it down, plug it in, and power on.

  5. Check BIOS/UEFI:
    The system immediately recognised the full 128GB RAM without issue.


Initial Impressions & Performance Potential

I haven’t fully benchmarked it yet, but early signs are strong. This thing is built for virtualization and power-intensive workflows. With 128GB RAM, you could comfortably run:

  • Nested vSphere or ESXi environments

  • A full Proxmox VE cluster in one box

  • Multiple Linux and Windows VMs for testing

  • Container platforms like Docker, Podman, or Kubernetes

The dual 2.5G NICs are ideal for setting up a virtualized network or using VLANs for isolated testing.

Thermals remained under control during initial tests, thanks to the robust cooling design. The unit is quieter than expected even under moderate load.


Who Is the MS-A2 For?

If you’re:

  • A homelab enthusiast looking to consolidate noisy, aging servers

  • A virtualization geek building a portable test lab

  • A developer or DevOps engineer running VMs or containers

  • Or just someone wanting a high-end mini PC that doesn’t take up half a desk…

…the MS-A2 is absolutely worth your consideration.


What’s Next?

In the next blog post, I’ll benchmark this machine with:

  • Proxmox VE running multiple VMs

  • VMware ESXi 8.0 (yes, it installs!)

  • Synthetic CPU, disk, and memory benchmarks

  • Power draw and thermal tests

And maybe even try some GPU passthrough.


Final Thoughts

The Minisforum MS-A2 is a seriously impressive piece of kit. It proves that small doesn’t have to mean slow or limited. With 128GB DDR5 RAM, Ryzen 9 power, and robust I/O, it’s more than capable of replacing a rackmount server for many use cases — and it’ll fit in your backpack.

Stay tuned for more testing, benchmarks, and homelab setup tips.

Cheers,
Andrew