
I thought I'd pimp my car with a CloudCred sticker! - NICE!
I thought I'd pimp my car with a CloudCred sticker! - NICE!
My new badge…what more can I say here it is:-

No email as yet, but I’ve just heard via twitter, my name appears on the vExpert 2013 title holders announced in this document published yesterday evening?
vExpert 2013 awardees announced
Thanks again John Troyer, Corey Romero, and the VMware Social Media & Community Team
![]()
If you would like to read the other articles in this series, they are listed here for your convenience.
HOW TO: Install and Configure VMware vSphere Hypervisor 5.1 (ESXi 5.1)
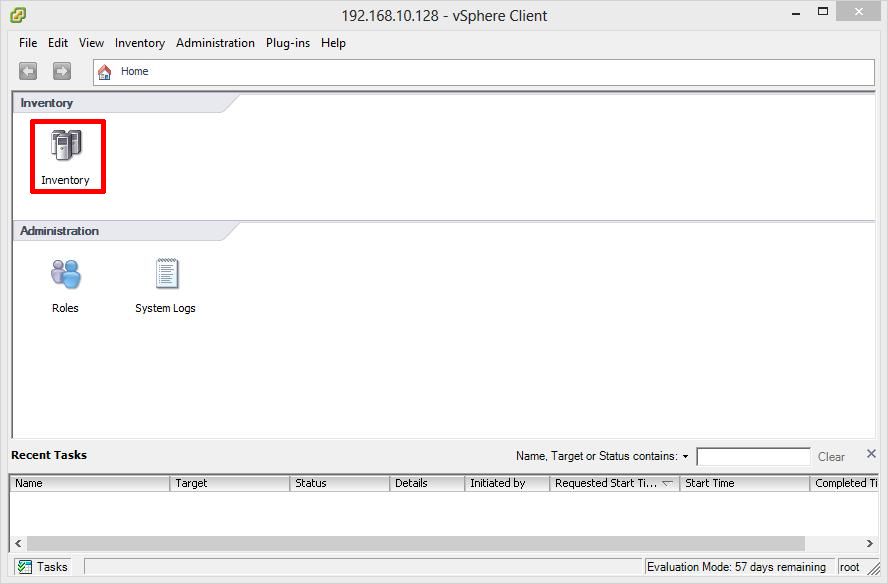
HOW TO: Connect to the VMware vSphere Hypervisor 5.1 (ESXi 5.1) using the vSphere Client
In this series of basic VMware articles for the Novice, I’ll be showing you the basic VMware skills required to install, configure and deploy virtual machines using VMware’s FREE VMware vSphere Hypervisor (ESXi).
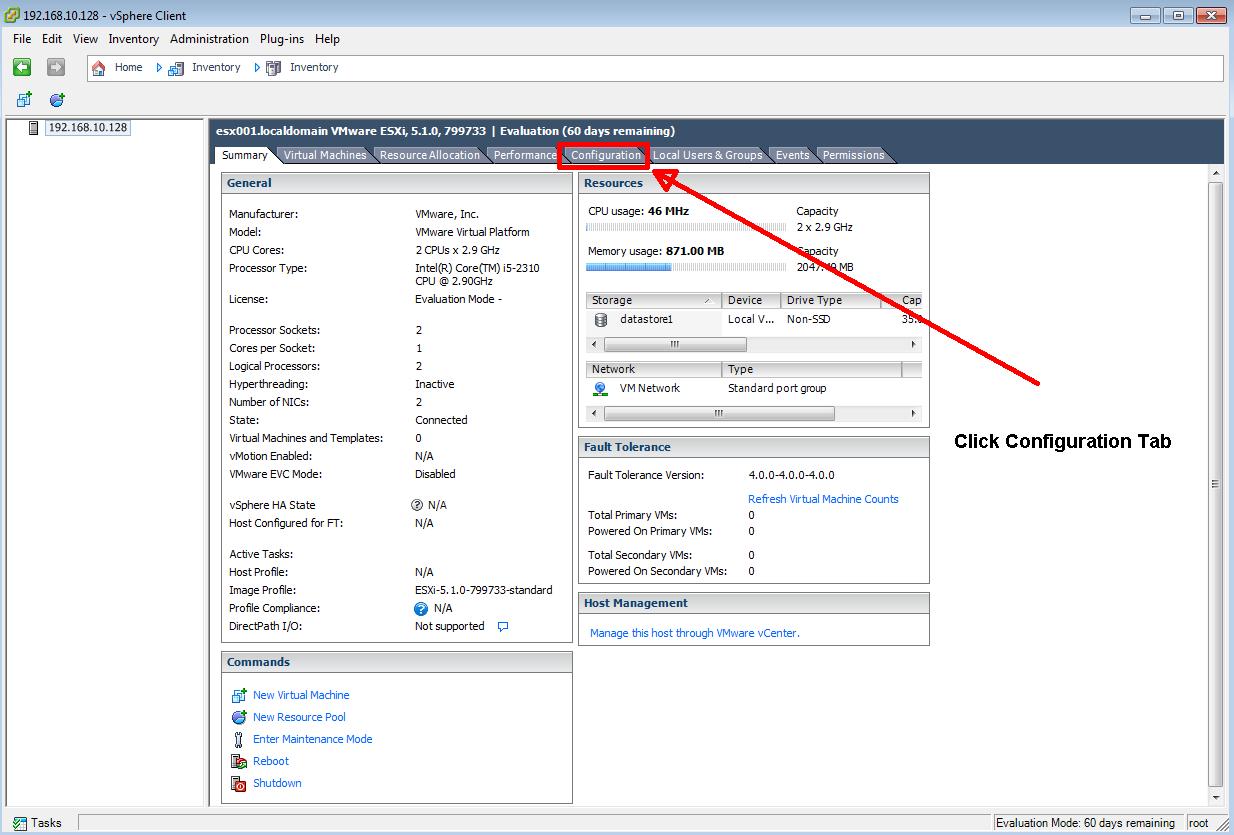
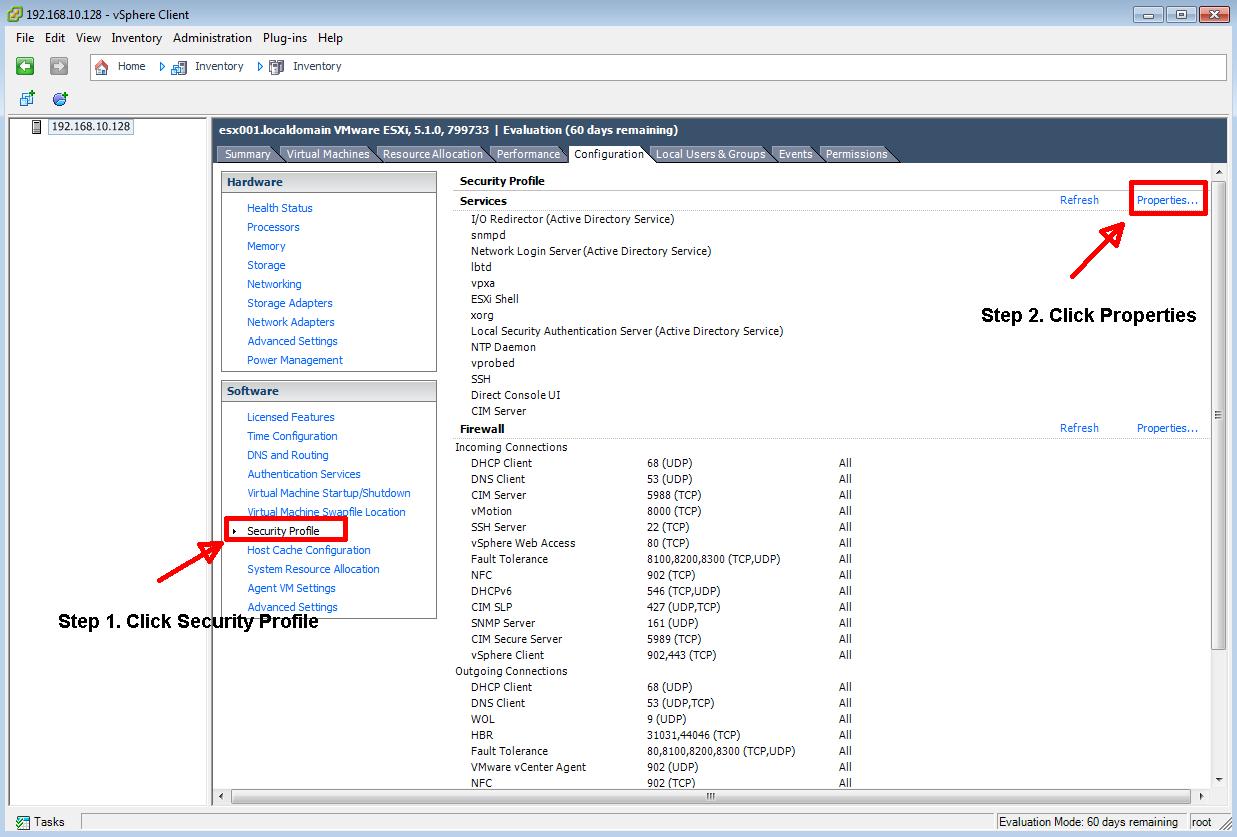
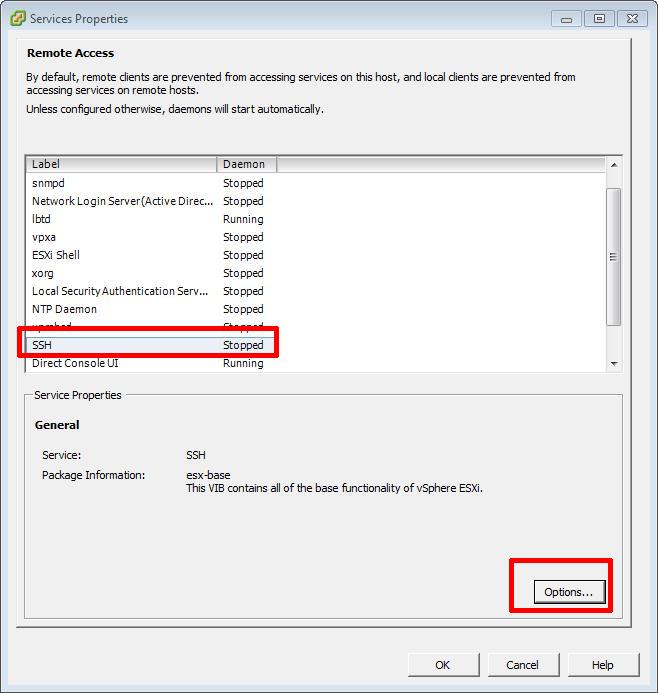
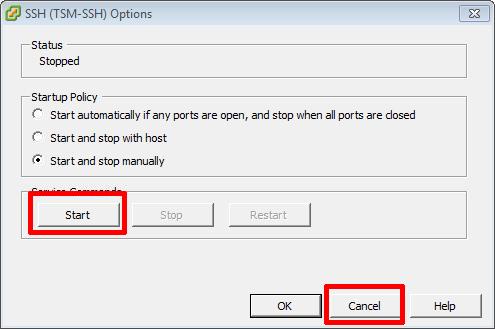
In this article we will show you HOW TO: Enable SSH Remote Access on a VMware vSphere Hypervisor 5.1 (ESXi 5.1) so you can remotely connect to the VMware vSphere Hypervisor 5.1 (ESXi 5.1) server remotely via SSH (PuTTY).
Please refer to my Andysworld! article on HOW TO: Connect to the VMware vSphere Hypervisor 5.1 (ESXi 5.1) using the vSphere Client
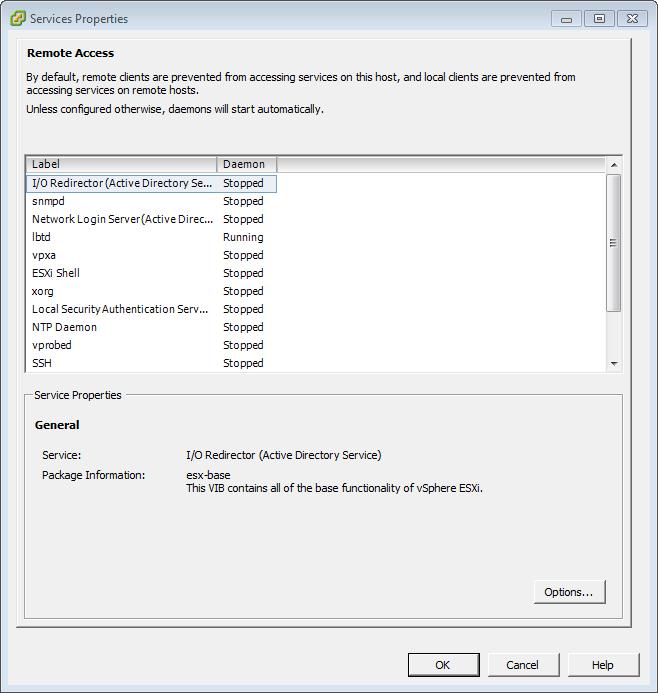

Confirm using PuTTY, you can connect to the server successfully.
In vSphere 4 1, 5.0 and 5.1, when you have enabled Remote SSH management of hosts from the vSphere Client, you may notice that that a Configuration Issues warning yellow box appears on the Summary page of the host ESXi server.

This Configuration Issues warning yellow box only appears when Remote SSH and/or ESXi shell has been enabled.
Please refer to my Andysworld! Article on HOW TO: Suppress Configuration Issues and Warnings Alert displayed in Summary status for ESXi 4.1 U2 or ESXi 5.0 after enabling SSH or ESXi Shell
Congratulations, you have successfully Enable SSH Remote Access on a VMware vSphere Hypervisor 5.1 (ESXi 5.1)
HOW TO: Install and Configure VMware vSphere Hypervisor 5.1 (ESXi 5.1)
HOW TO: Connect to the VMware vSphere Hypervisor 5.1 (ESXi 5.1) using the vSphere Client
In this series of basic VMware articles for the Novice, I’ll be showing you the basic VMware skills required to install, configure and deploy virtual machines using VMware’s FREE VMware vSphere Hypervisor (ESXi).
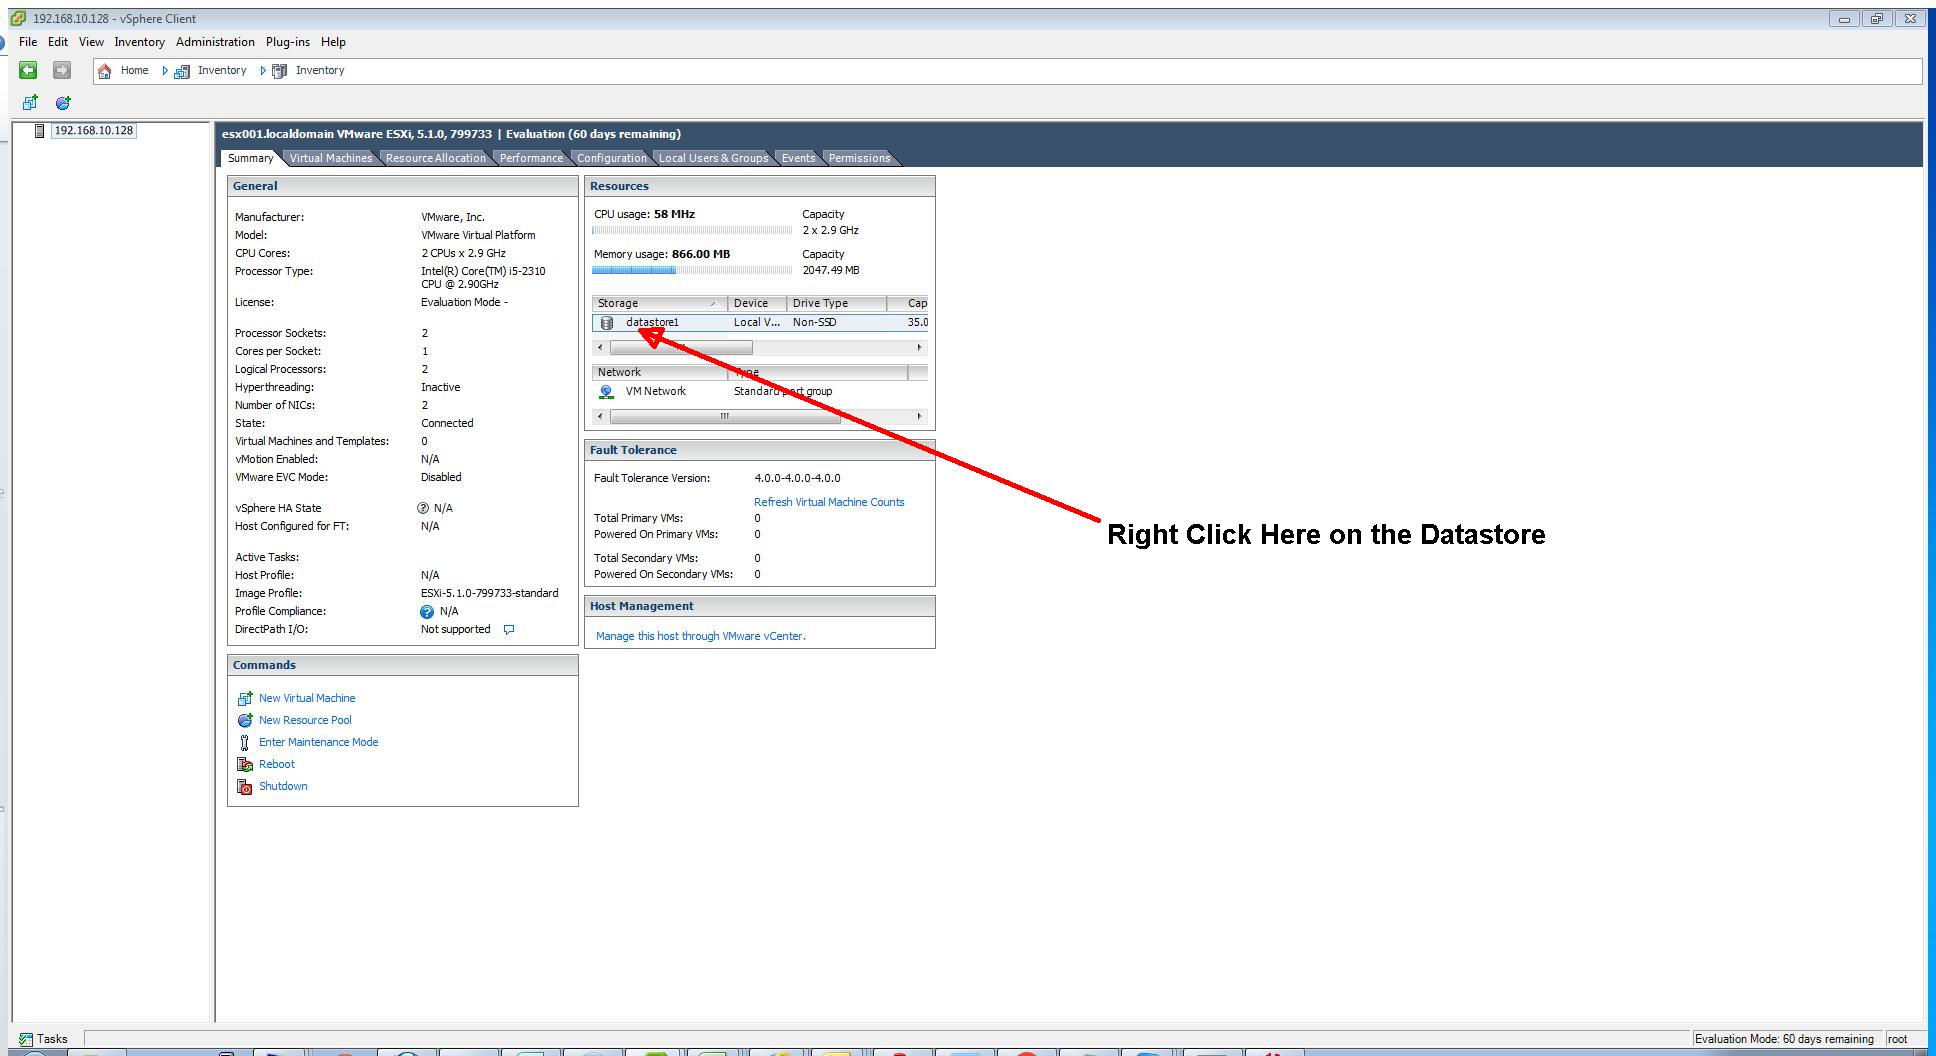
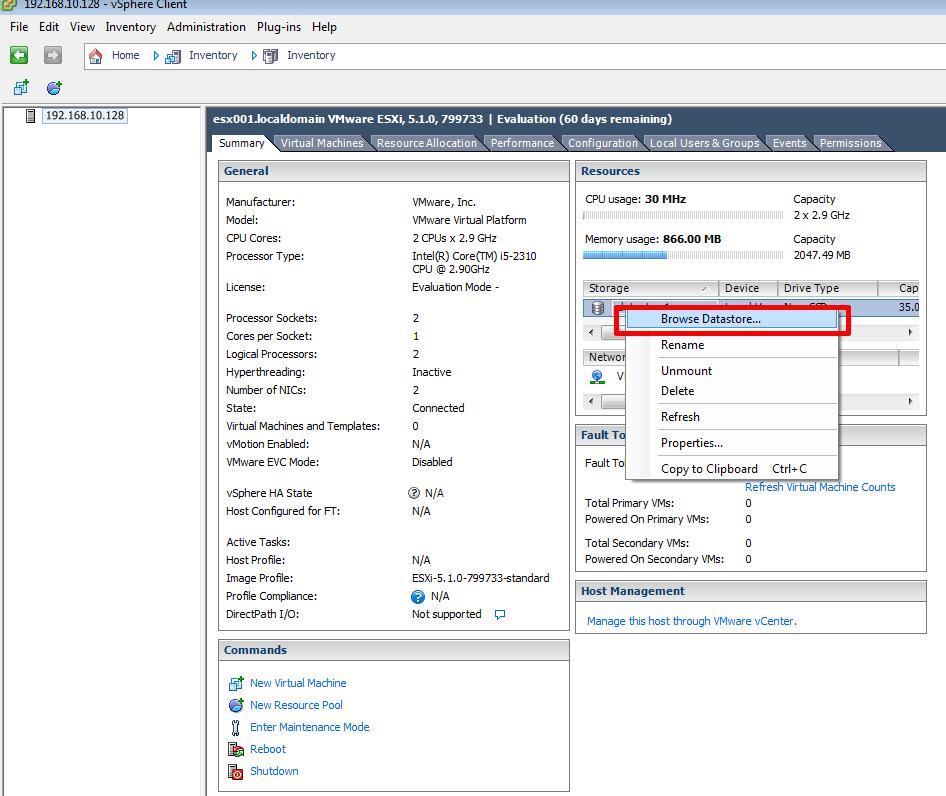
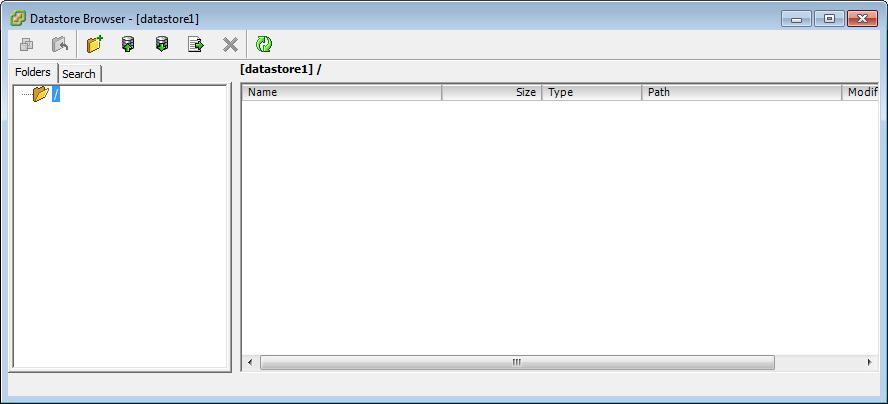
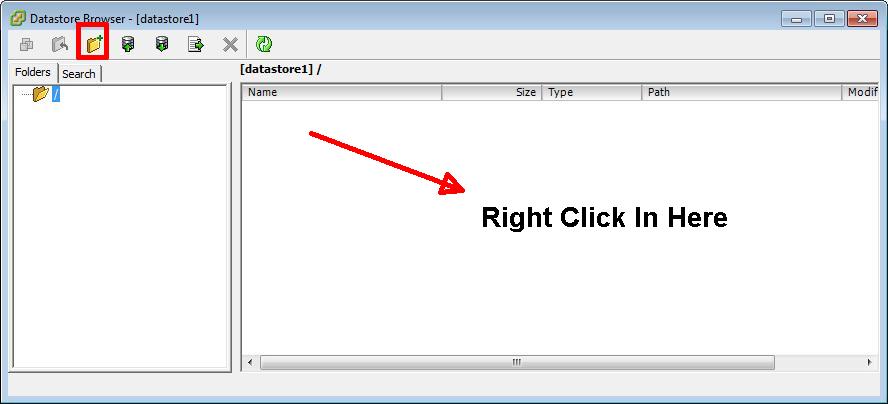
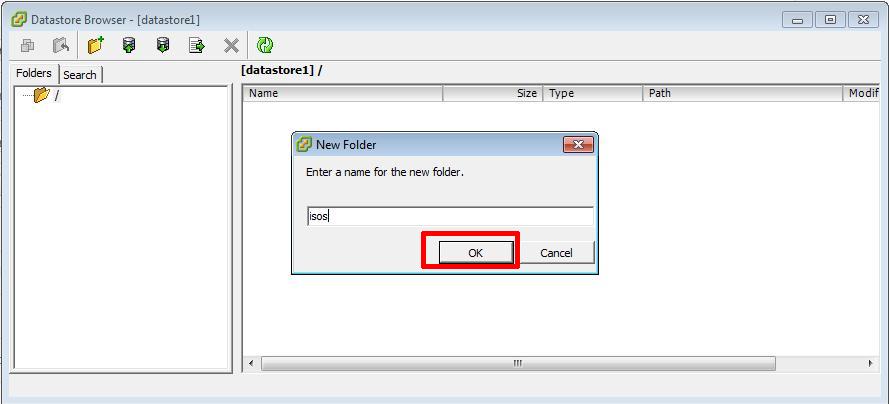
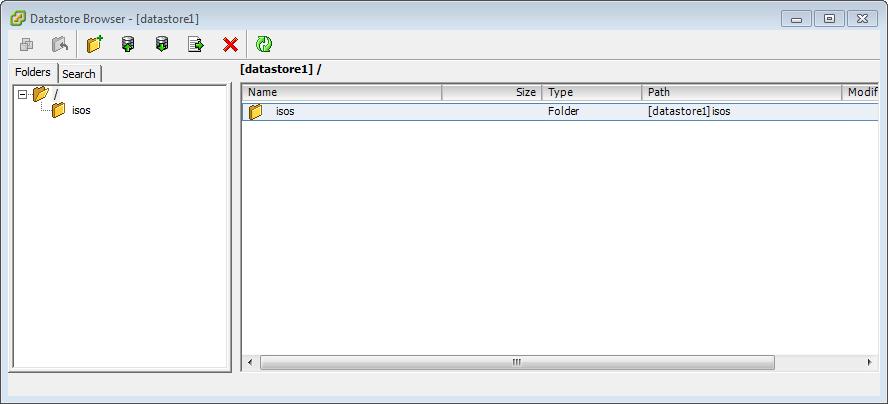
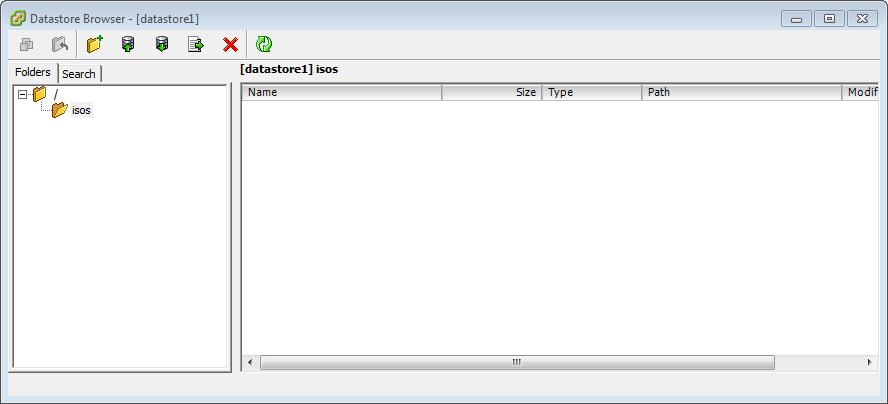
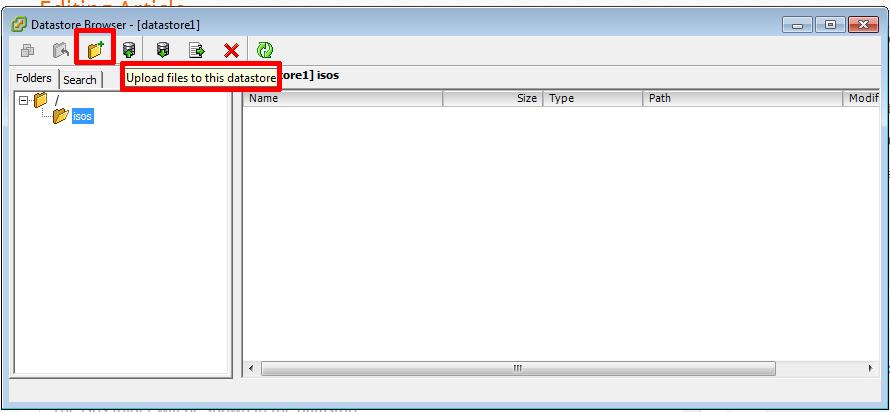
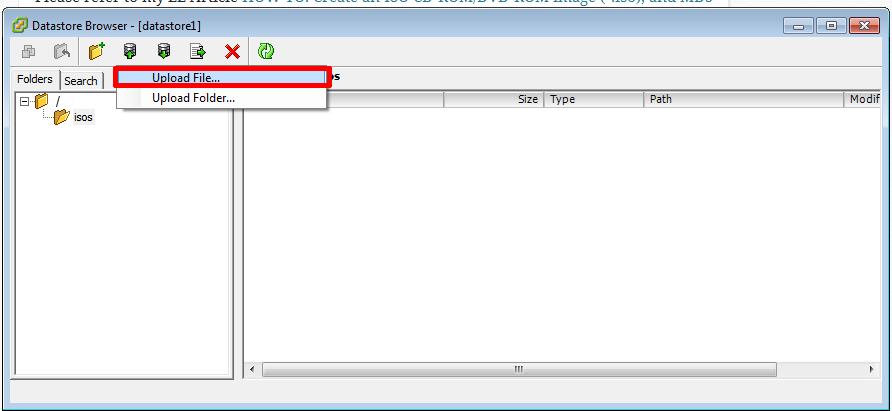
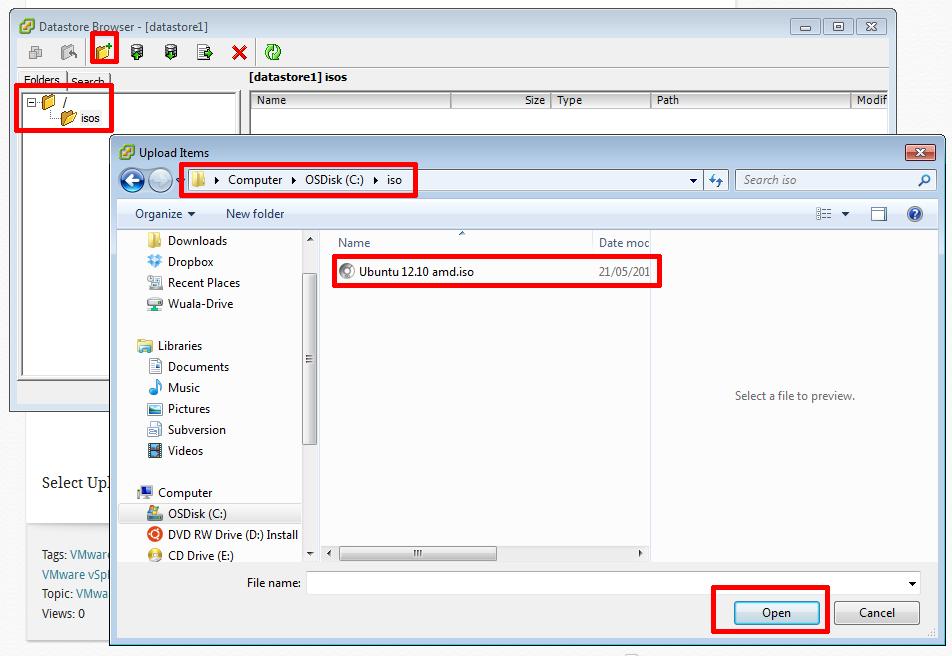
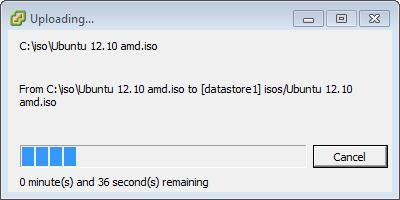
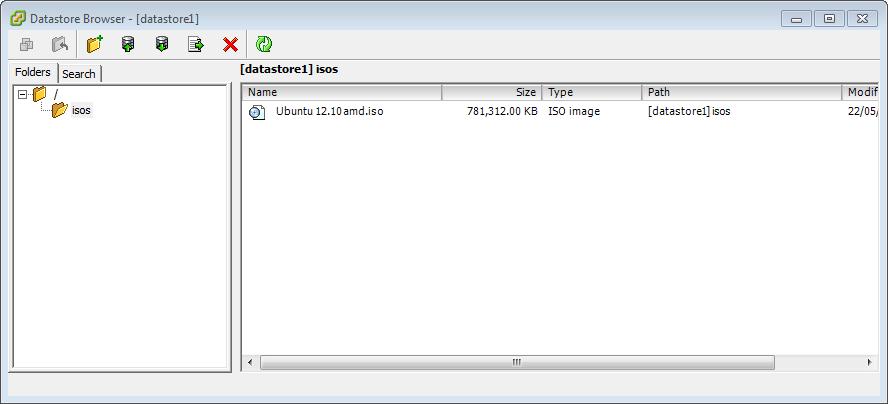
In this article we will show you HOW TO: Upload an ISO CD-ROM/DVD-ROM image to a VMware datastore for use with VMware vSphere Hypervisor 5.1 (ESXi 5.1) using the vSphere Client, and checking its MD5 checksum signature is correct. There are other third party tools, that can be used to upload ISO image files, these include:-
The above applications, require additional installation and configuration, in this article we will use the VMware vSphere Client.
Please refer to my EE article on HOW TO: Connect to the VMware vSphere Hypervisor 5.1 (ESXi 5.1) using the vSphere Client

Please refer to my Andysworld! Article HOW TO: Create an ISO CD-ROM/DVD-ROM image (*.iso), and MD5 checksum signature, for use with VMware vSphere Hypervisor 5.1 (ESXi 5.1)

To complete the following step SSH must be enabled and running on your VMware vSphere Hypervisor 5.1 (ESXi 5.1) host server, if SSH is not running you will receive a connection refused message.
To Enable SSH on your VMware vSphere Hypervisor 5.1 (ESXi 5.1) host server, please see my Andysworld! article HOW TO: Enable SSH Remote Access to a VMware vSphere Hypervisor 5.1 (ESXi 5.1)
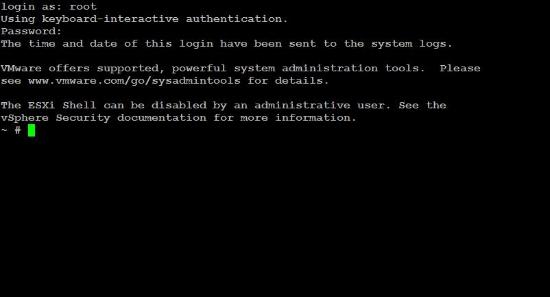
Connect to the VMware Hypervisor ESXi server via SSH. Using PuTTY a free telnet and SSH client or another SSH client Login and Connect to the VMware Hypervisor ESXi server, using IP address or hostname of the VMware Hypervisor ESXi server, using root username and password credentials. This can also be performed if you have access to the console.

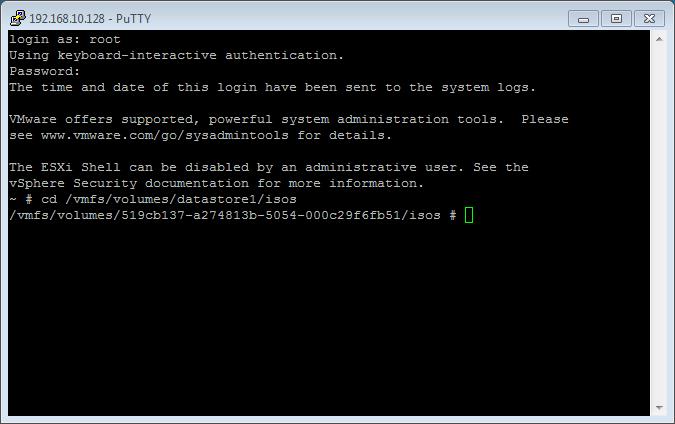
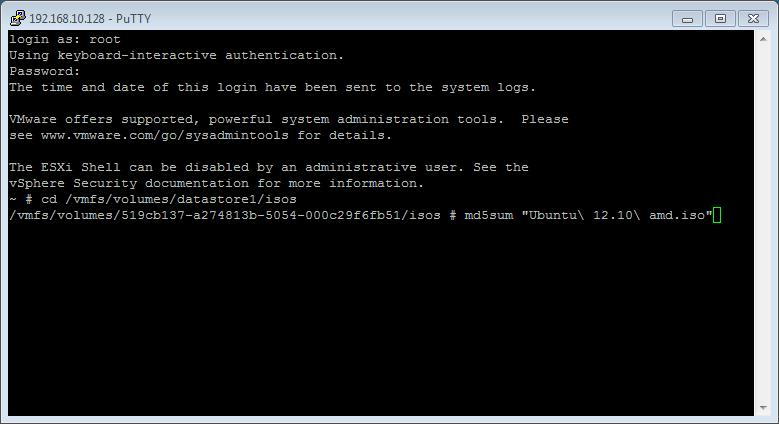

type md5sum Ubuntu 12.10 amd.iso in the SSH session window. After several minutes, and the time taken, depends on the size of the ISO image file, and speed of host processor and storage, a MD5 checksum signature will be displayed. The number displayed next to the filename – 7ad57cadae955bd04019389d4b
If you would like to read the other articles in this series, they are listed here for your convenience.
HOW TO: Install and Configure VMware vSphere Hypervisor 5.1 (ESXi 5.1)
HOW TO: Connect to the VMware vSphere Hypervisor 5.1 (ESXi 5.1) using the vSphere Client
In this series of basic VMware articles for the Novice, I’ll be showing you the basic VMware skills required to install, configure and deploy virtual machines using VMware’s FREE VMware vSphere Hypervisor (ESXi).
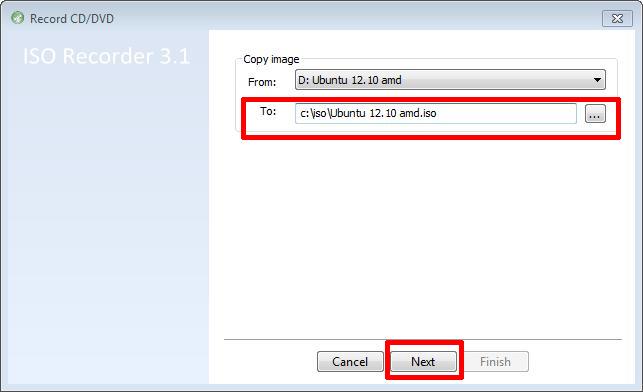
This article will show you how to create an ISO CD-ROM/DVD-ROM image (*.iso), and MD5 checksum signature, for use with VMware vSphere Hypervisor 5.1 (ESXi 5.1).
What is an ISO? (Andy’s Laymen Definition)
An ISO is an image or bit copy of a CD-ROM/DVD-ROM, the ISO is a file, similar to a compressed archived file, this *.iso file contains the data from a CD-ROM/DVD-ROM. The ISO file is a virtual CD-ROM/DVD-ROM. Using an *.iso file has many advantages, some are listed below:-
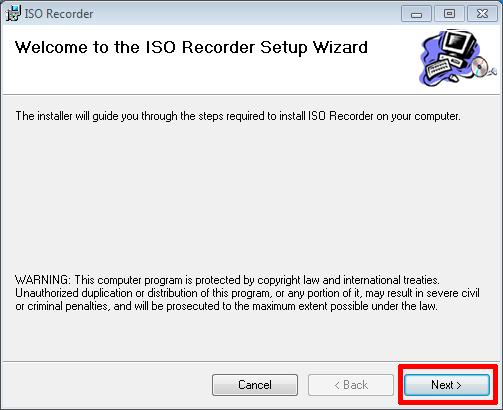
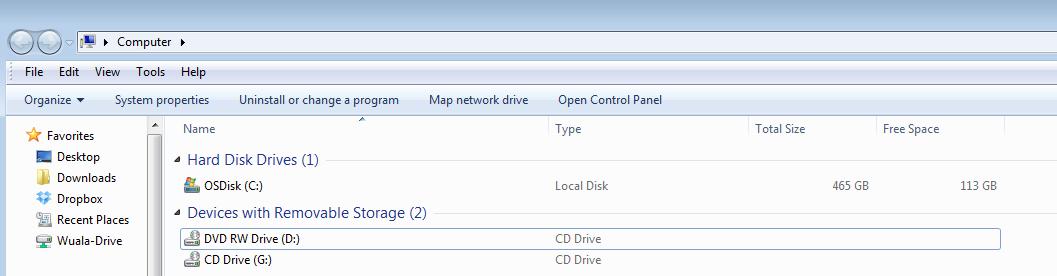
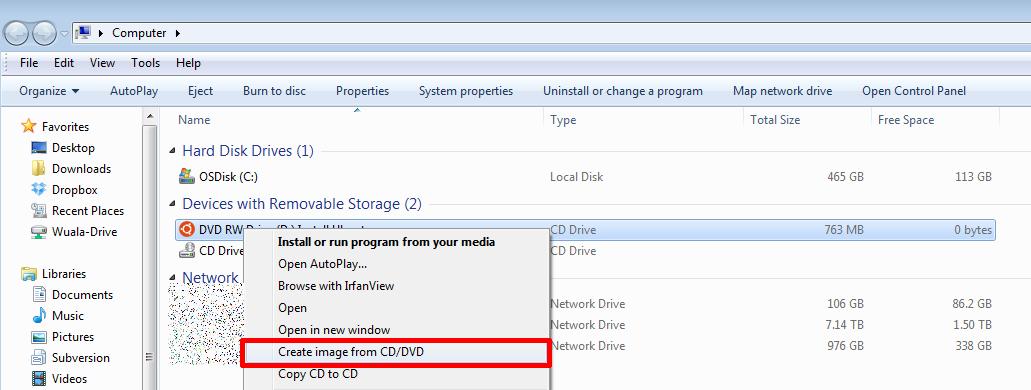
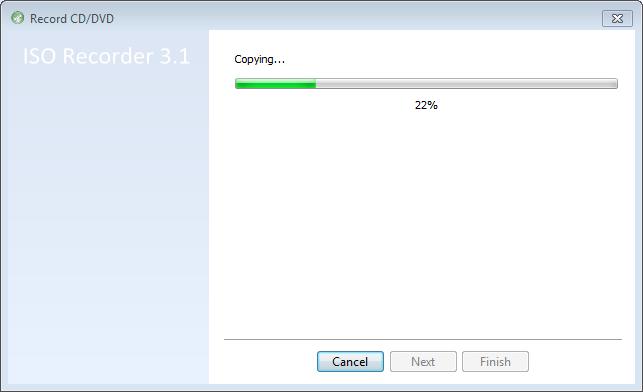
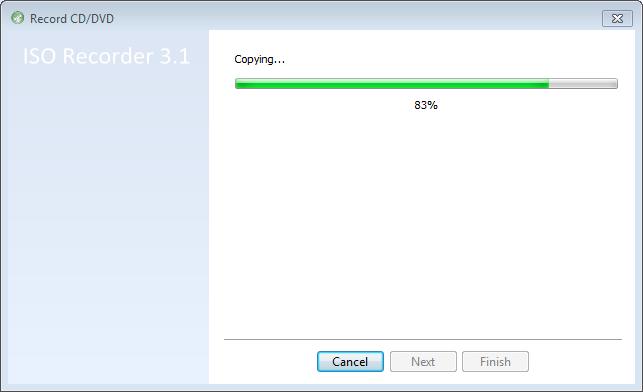
Download ISO Recorder from http://alexfeinman.co/isorecorder.htm We like to use ISO Recorder, because it is a small lightweight application, which integrates into the shell of your OS (operating system). e.g. you right click the CD-ROM/DVD-ROM reader and the option is there to create an ISO.
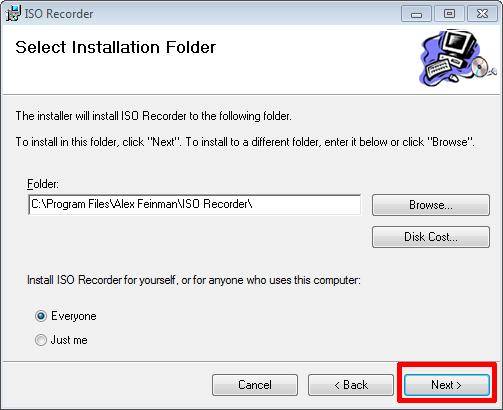
There are several versions of ISO Recorder to download, ensure you download the correct version for your OS, and the correct version for your processor, as there are 32-bit and 64-bit versions available.
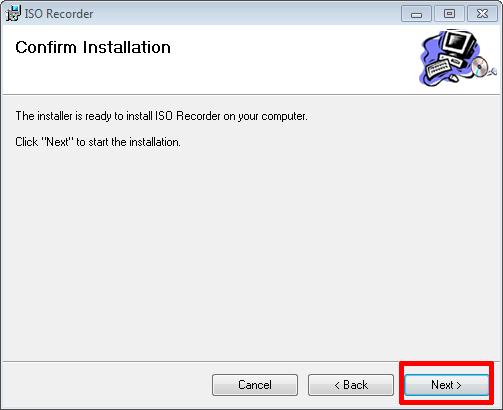
After you have downloaded the correct version, Double-Click the installer program (*.msi) you have download, we will install the Windows 7 64 bit version, which has the filename ISORecorder31x64.msi


We will use the MD5 & SHA-1 Checksum Utility to create a MD5 checksum signature for our freshly created ISO image file. This is important, so we can compare these signatures, once we have completed the transfer to our VMware host servers, and confirm the ISO image file has not been corrupted in transfer.

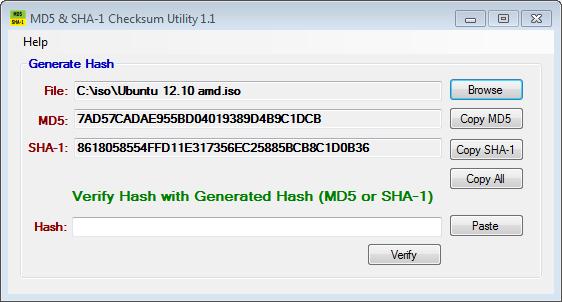
The MD5 checksum for my Ubuntu 12.10 amd.iso is:-
MD5 Checksum: 7AD57CADAE955BD04019389D4B9C1DCB
SHA-1 Checksum: 8618058554FFD11E317356EC25885BCB8C1D0B36
Generated by MD5 & SHA-1 Checksum Utility @ http://raylin.wordpress.com/downloads/md5-sha-1-checksum-utility
Please note the MD5 checksum value for use with the VMware vSphere Hypervisor 5.1 (ESXi 5.1)
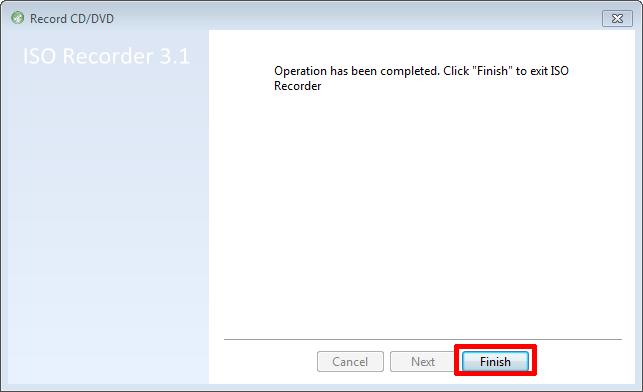
Congratulations you have successfully created your first ISO (*.iso), and created a MD5 checksum signature for use with VMware vSphere Hypervisor 5.1 (ESXi 5.1).
In my next Article in this series, we will show you HOW TO: Upload and Check the MD5 signature of an ISO CD/DVD image to a VMware datastore using the vSphere Client, for use with VMware vSphere Hypervisor 5.1 (ESXi 5.1)
It finally happened on the 1st May 2013. In the Gaming-World, I’ve leveled-up!

My Experts Exchange Savant Certificate

Before 1st May 2013: - VMware Prodigy

After 1st May 2013: Note change! VMware Savant
I’ve now joined a very exclusive club, it was going to happen sooner or later, I’m now a VMware Savant at Experts-Exchange.com. As of this post, there are only 11 out of
hanccocka – VMware (yes the 1st VMware Savant!)
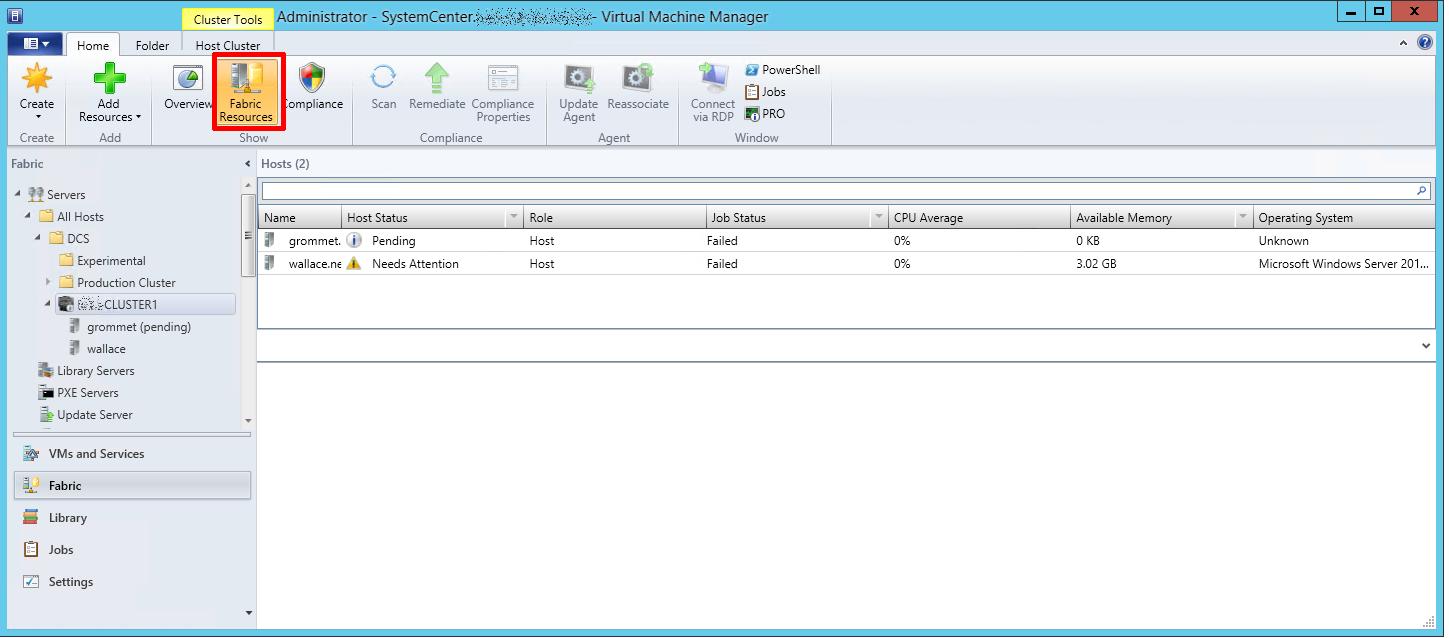
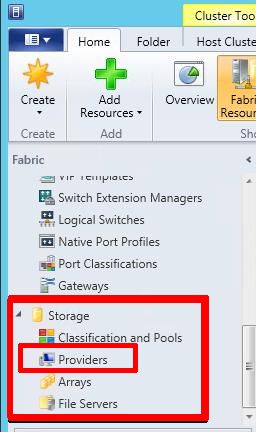
In this article, we will show you HOW TO: Add a Dell EqualLogic PS Series Array (SAN) to System Center Virtual Machine Manager 2012 SP1 as a SMP Provider.
System Center Virtual Machine Manager (SCVMM) 2012 SP1 supports the same storage arrays that were supported in SCVMM 2012, plus the SMP provider. For more information see this SCVMM 2012 Storage and Load Balancer Provider Downloads
Why and What is a SMP Provider? (Andy’s Laymans Definition)
It provides the ability to integrate SCVMM and your storage array, e.g. the ability to create logical units (LUNs) from within SCVMM, traditionally you would login to your SAN, via command line or Dell PS Group Manager using a browser. Integrating into SCVMM, you can create and manage Pools and LUNs from within SCVMM.
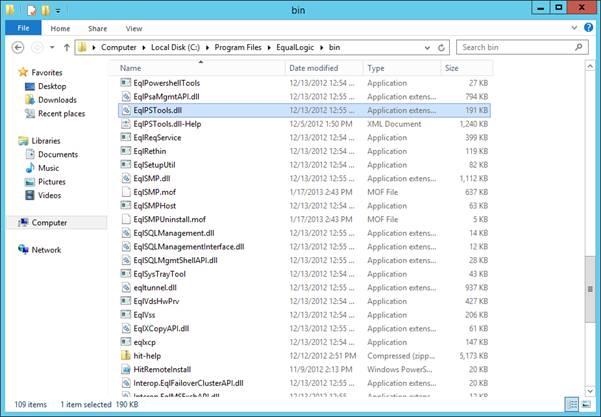
To obtain the Dell EqualLogic Host Integration Tools 4.5.0, requires registration of your Dell EqualLogic PS Series Array with the Dell EqualLogic website, and obtaining a username and password. Then you can proceed and download the required software.
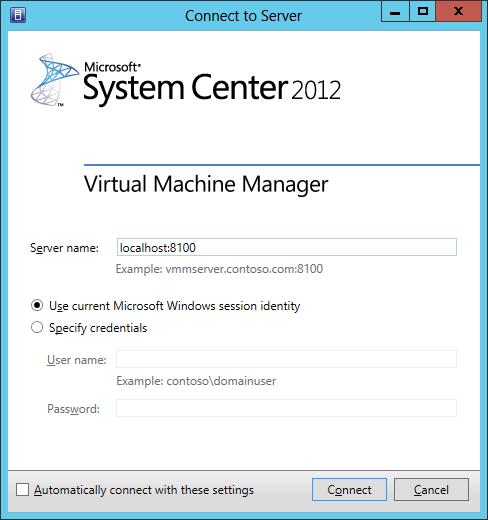
It is beyond the scope of this document, to show how to install Microsoft System Center Virtual Machine Manager 2012 SP1 (SCVMM) on Microsoft Windows Server 2012, and connect to your Dell EqualLogic PS Array. It is assumed that you have already installed Microsoft System Center Virtual Machine Manager 2012 SP1 (SCVMM) on Microsoft Windows Server 2012, and connected to your Dell EqualLogic PS Series Array.

In this tutorial we will complete a very quick and basic setup and by no means exhaustive. Refer to the Dell PS documentation that comes with the HIT KIT for all the available options.
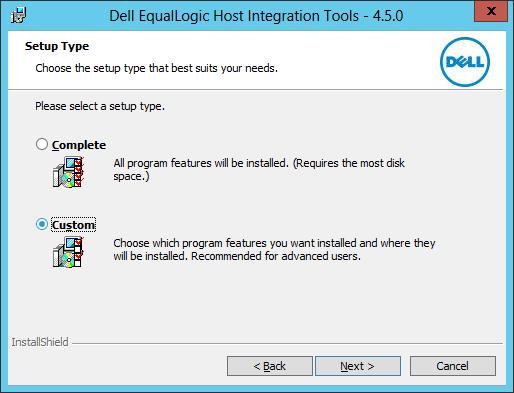
If the server is not accessing the storage directly, DSM installation can be skipped. PowerShell and SMP are required, it can work without ASM but then all configuration must be done through Powershell. It’s probably unlikely that your SCVMM 2012 SP1 server needs to access any VM LUNs.
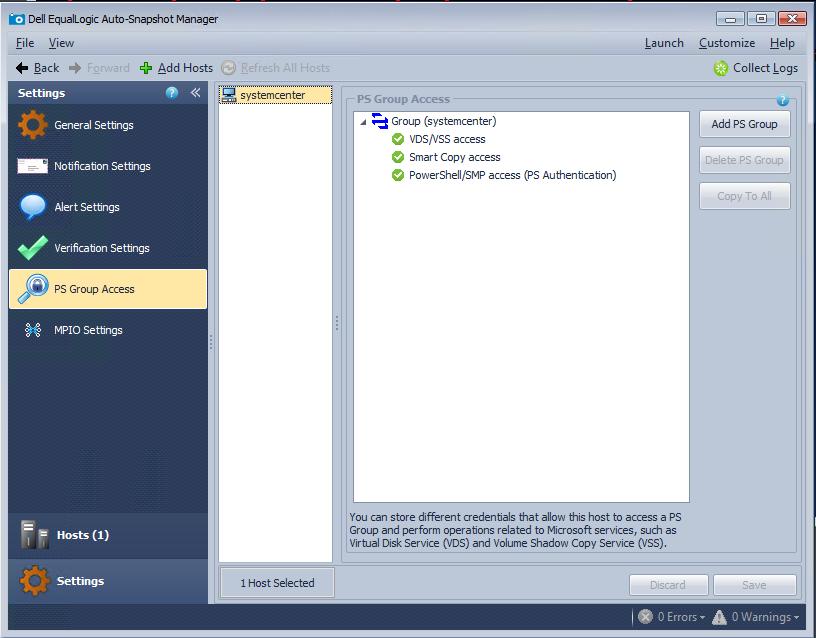
We have discovered recently that if configuration is performed through the Auto Snapshot Manager GUI there is an issue, with the group admin credentials being correctly parsed to the configuration, and therefore we would recommend ALL configuration to be performed via Windows Powershell

Create a new group and assign access, using the PS Group Name, Group IP Address, Management IP Address and grpadmin credentials. The new group name is not to be confused with the group name, that’s already been created on the Array. This is a “label” for the powershell creation process, so its good idea to use the same group name, but the two are not connected in anyway.
The syntax and command to use is
New-EqlGroupAccess -groupname GROUPNAME -GroupWKAddress 10.10.1.1 -MgmtWKAddress aaa.bbb.89.176 -username grpadmin -Password password
It is recommended to have a Group IP Address, in the example above 10.10.1.1, and a Dedicated Management IP Address – aaa.bbb.89.176
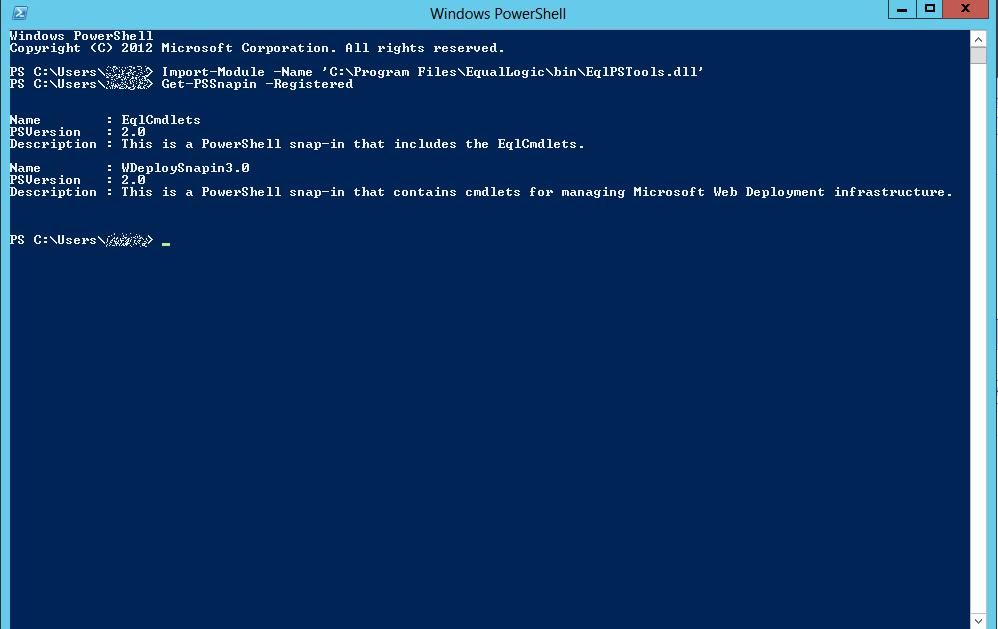
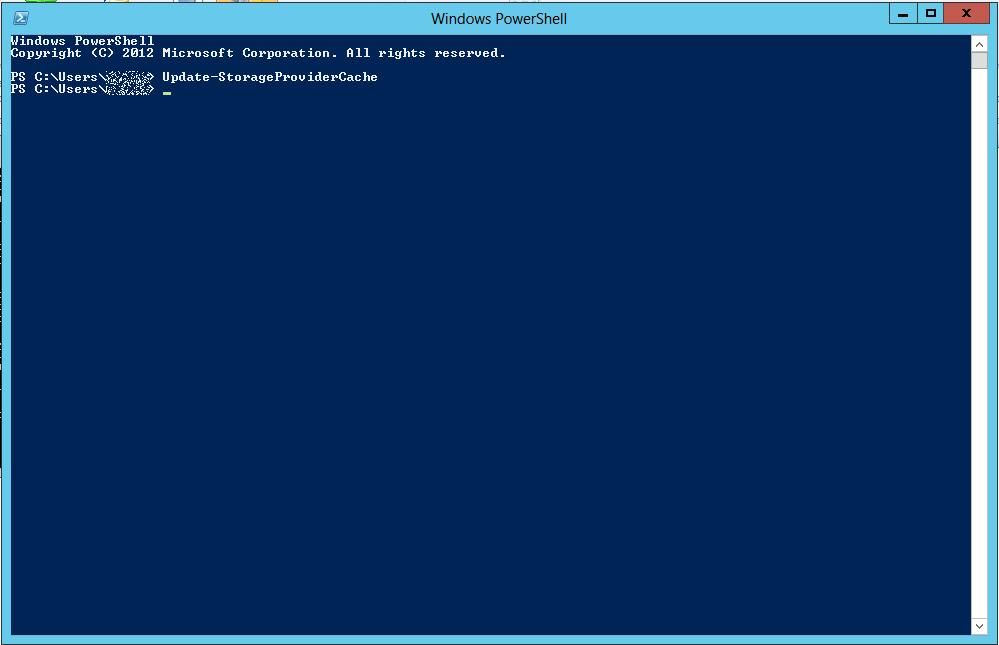
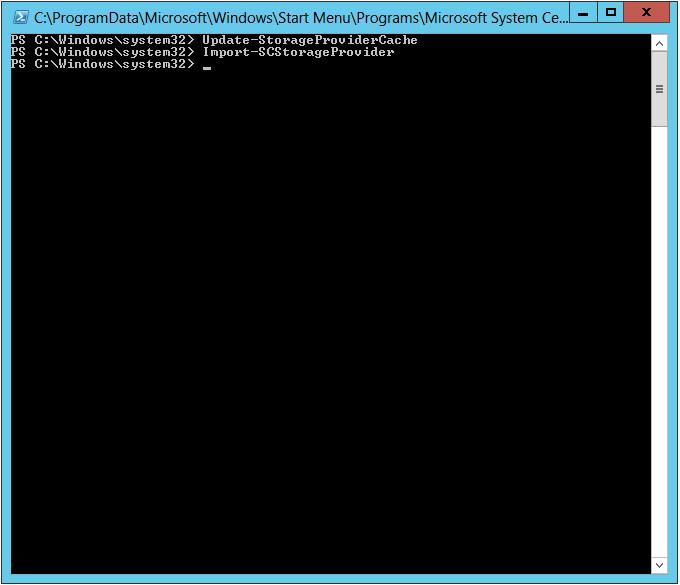
Type the following in the Windows Powershell window.
New-EqlGroupAccess -GroupName Group -GroupWKAddress 10.10.1.1 -MgmtWKAddress aaa.bbb.89.176 -UserName grpadmin -Password grpadmin
![New-EqlGroupAccess -groupname [b]GROUPNAME[/b] -GroupWKAddress 10.10.1.1 -MgmtWKAddress aaa.bbb.89.176 -username grpadmin -Password password](http://filedb.experts-exchange.com/incoming/2013/05_w20/654963/New-EqlGroupAccess1.jpg)

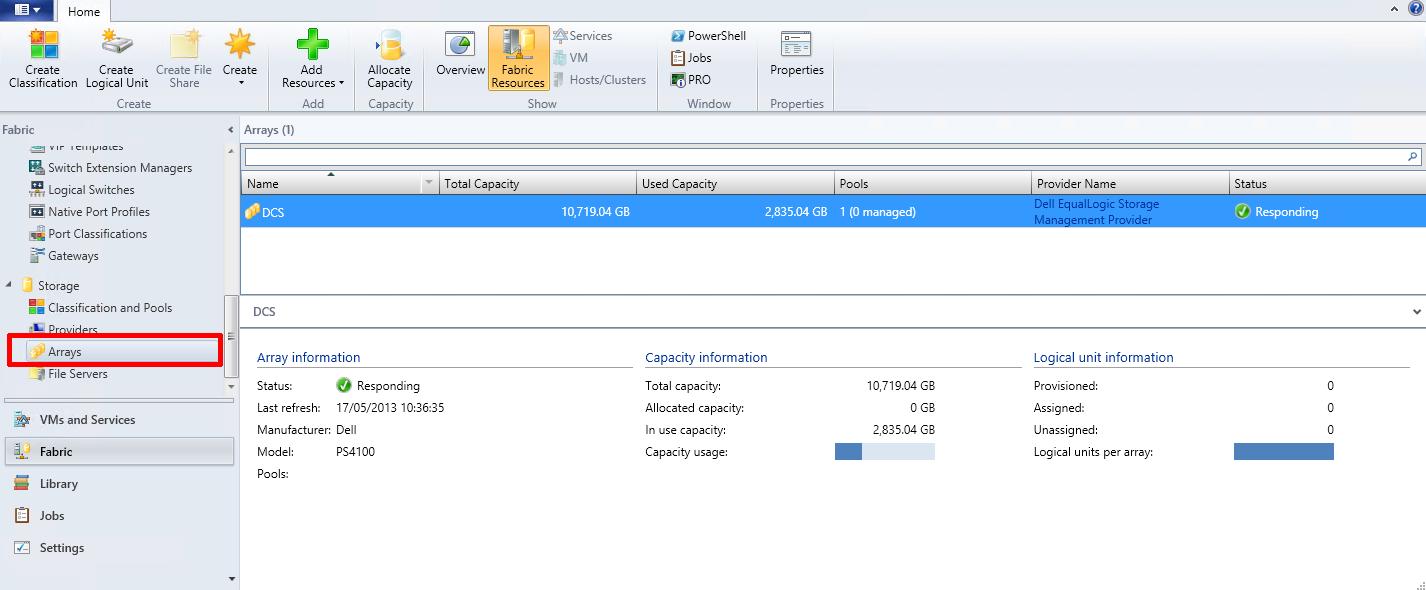
Congratulations, you have successfully Added a Dell EqualLogic PS Series Array (SAN) to System Center Virtual Machine Manager 2012 SP1 as a SMP Provider.
In my next article in this series, we will show you how to assign VMM managed pools, and created logical units in the pools.
Virtual Machine Manager in depth
You can download evaluation System Center trial and Windows 2012 server VHD’s from here
OR
“Poor Man’s Replication of a Physical or Virtual machine to a VMware vSphere Hypervisor Host (ESXi) for FREE”
I have already written three articles on the use of VMware vCenter Converter Standalone 5.x.
VMware vCenter Converter Standalone primary function is to create physical to virtual copies or conversions of physical computers, we often abbreviate this to P2V. VMware vCenter Converter Standalone can also be used on computers that have already been converted to virtual computers, or virtual computers that already exist in a “Cloud Space”, so we can create copies or conversions of an existing virtual computer, we often abbreviate this to V2V
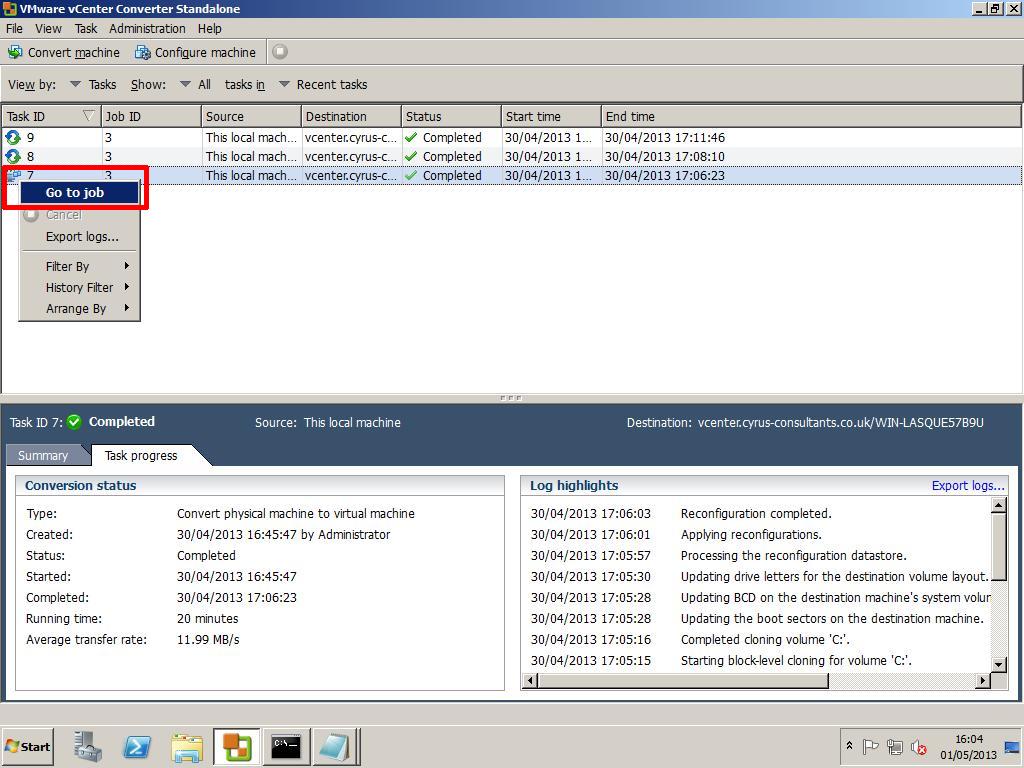
VMware vCenter Converter Standalone is an excellent FREE software tool for creating P2Vs or V2Vs, but there is another often “hidden function” which is rarely used by VMware Administrators. The function is called Synchronize. This function can be used to Synchronize changes between a physical or virtual computer, which has already been P2Ved (V2Ved) to another virtual machine on another VMware vSphere Hypervisor (ESXi) host. The same function can be used, to help unattended “cut over times” when completing a P2V (V2V) in Production, you could create the original P2V (V2V) at 9.00am, and then using synchronize, finally sync all changes made during the day, and “cut over” to the virtual machine out of hours, at 23.00pm.
Some of our clients use this software and function, as a free alternative to replication to a second DR site and ESXi host. The ESXi host could be using the FREE VMware vSphere Hypervisor.
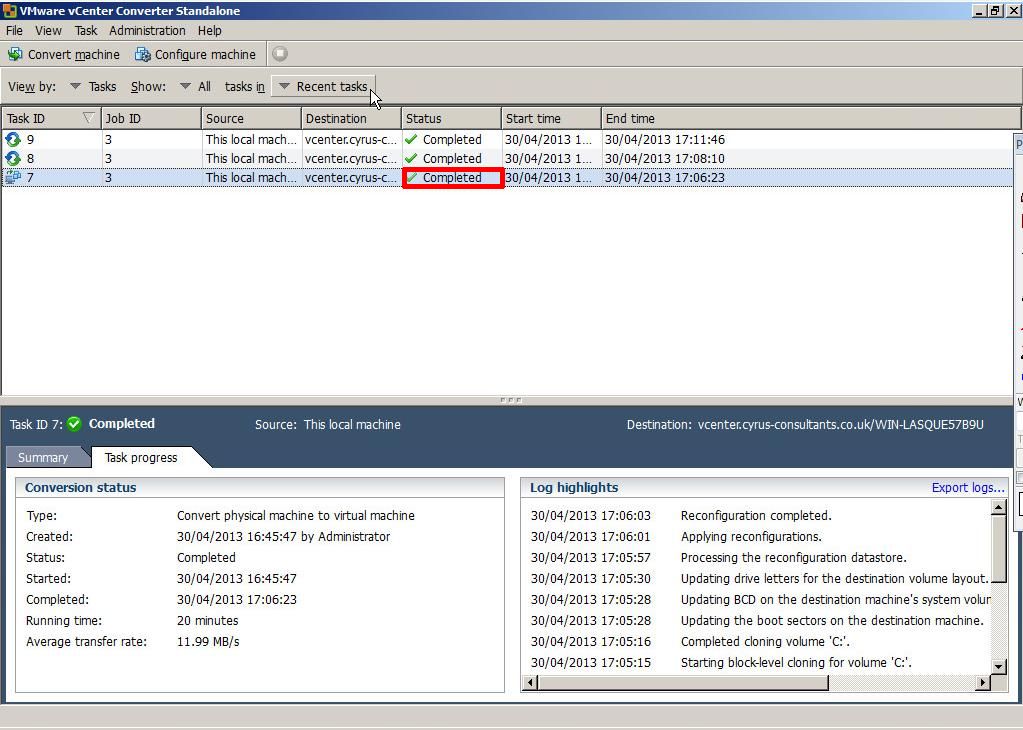
In this article, I’ll show you HOW TO: Synchronize changes when completing a P2V or V2V with VMware vCenter Converter Standalone 5.1. In the example below I’ll be using a virtual machine, creating a V2V and then synchronizing additional changes made to the source virtual machine to the destination VM (our DR copy).
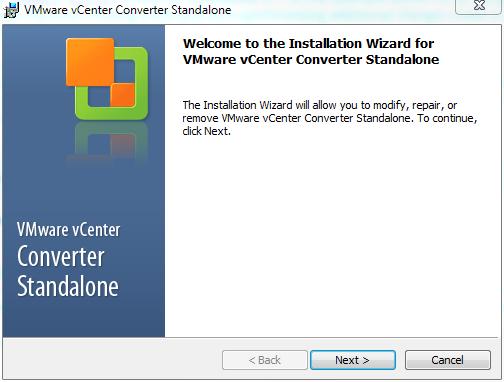
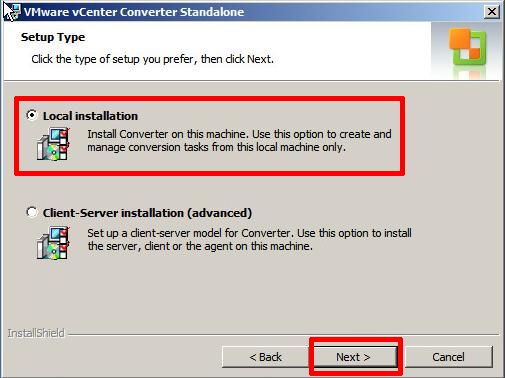
Install VMware vCenter Converter Standalone 5.1 on the computer to be synchronized. In this example, I will be installing VMware vCenter Converter Standalone 5.1 on the virtual machine.

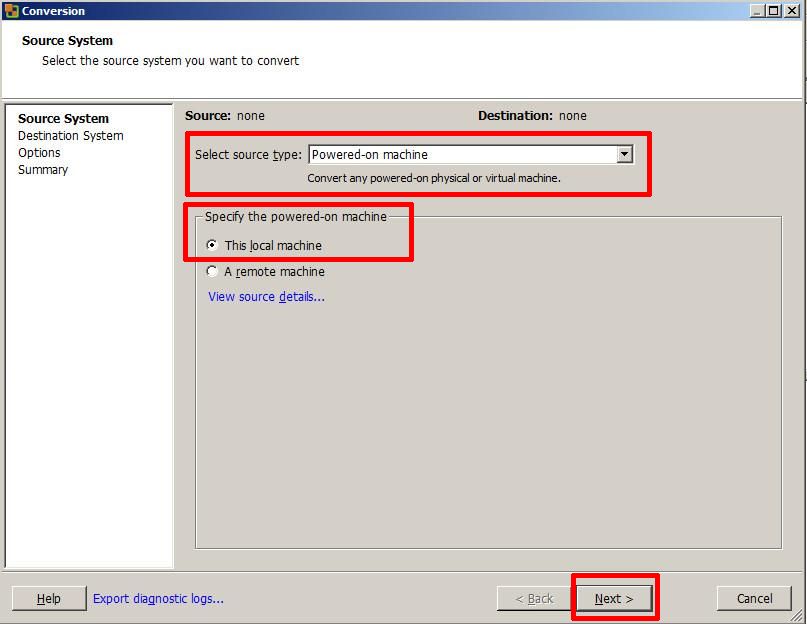
Select source type: Powered-on-machine
Specify the powered-on machine: This local machine
followed by Next to continue, converter will identify the source machine.
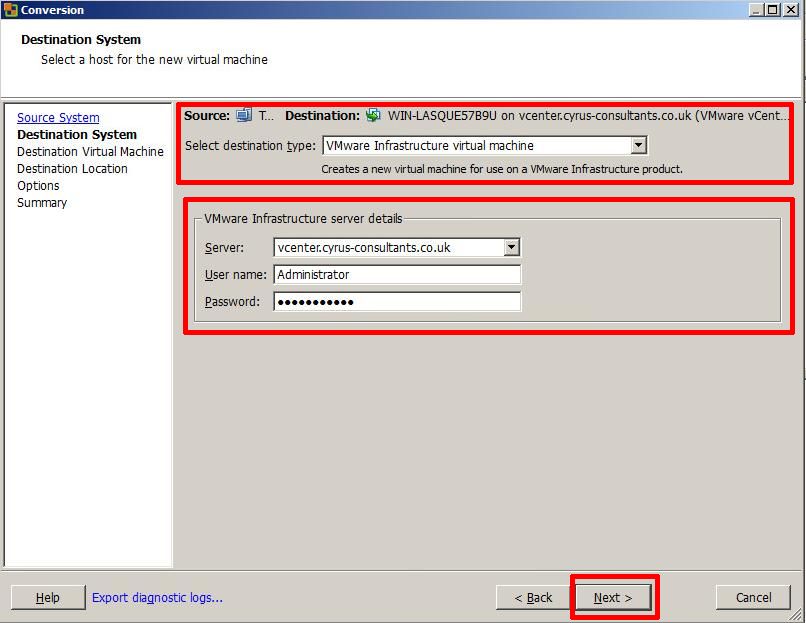
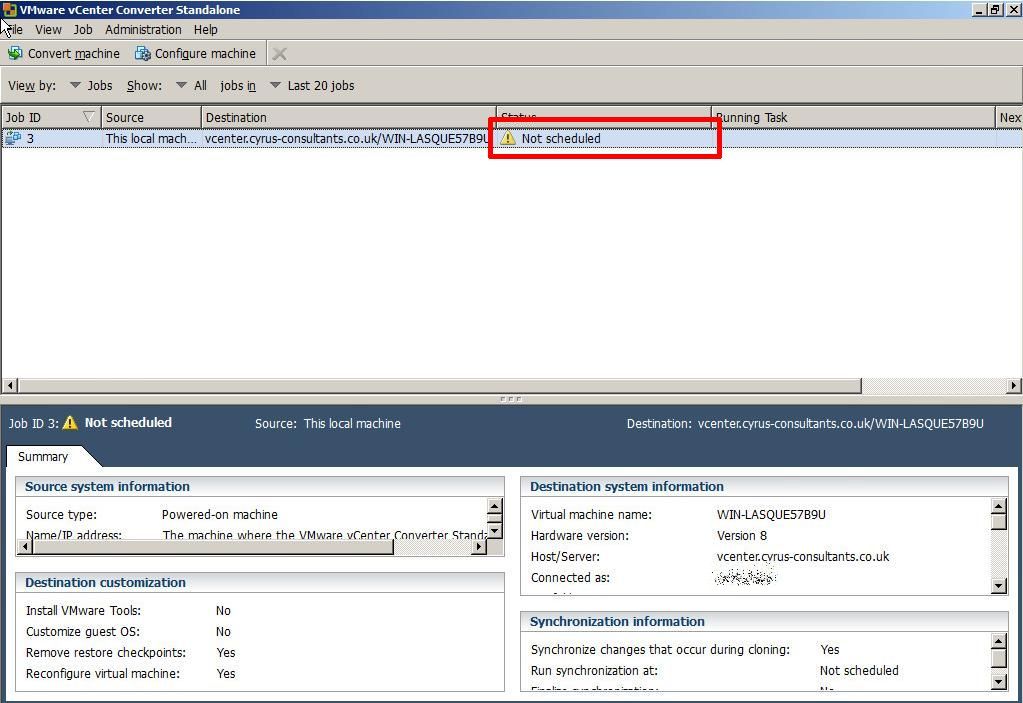
Enter the destination server, username and password, in this example, I’m using our VMware vSphere vCenter server details, but if you wanted to synchronize/replicate to a standalone VMware vSphere Hypervisor (ESXi) host, you would enter the VMware vSphere Hypervisor (ESXi) host details here, e.g. root username and password.

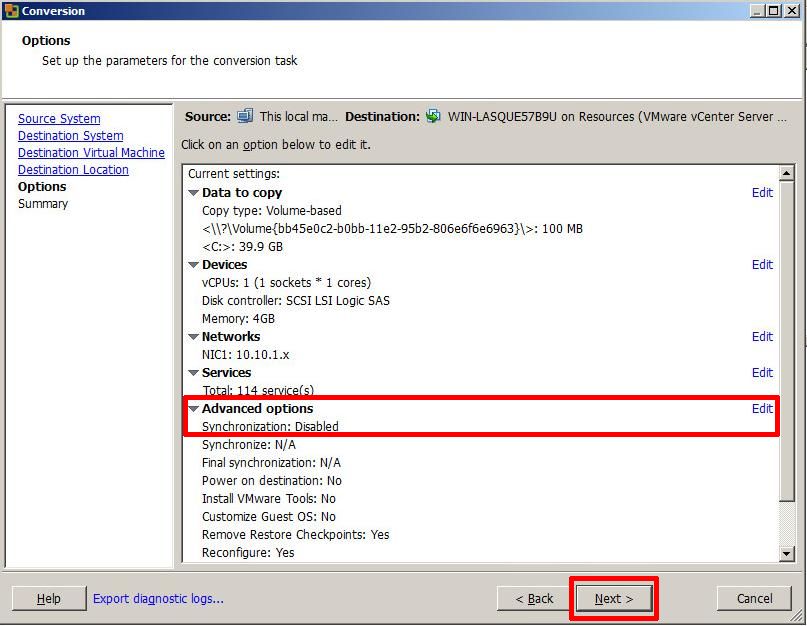
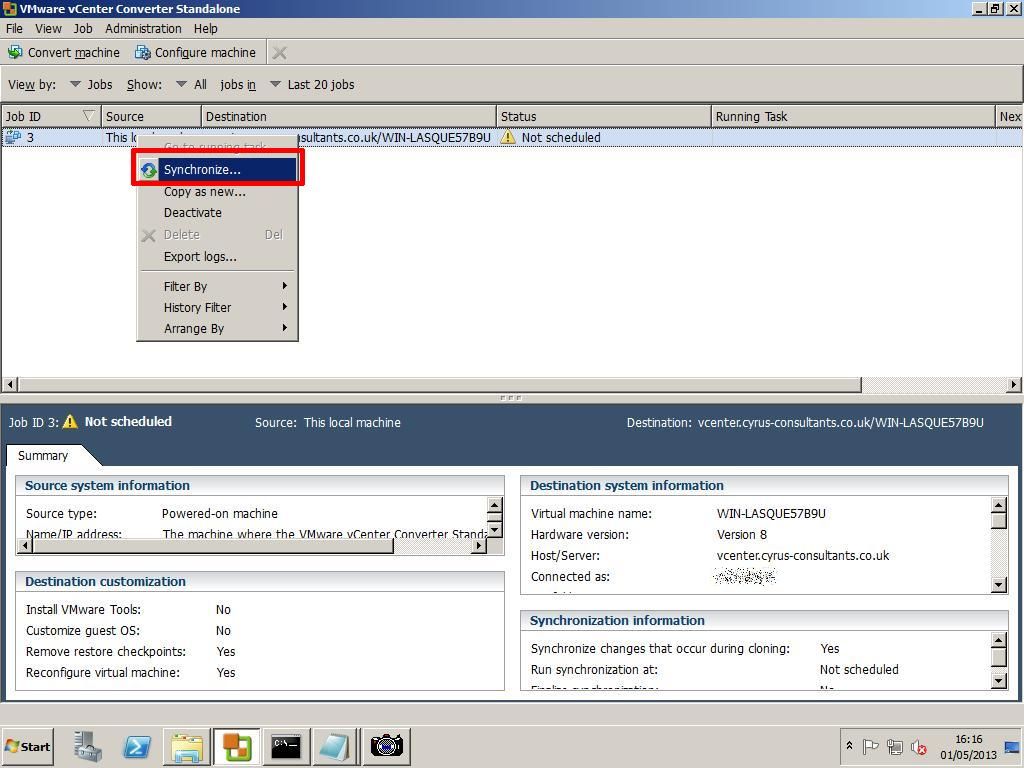
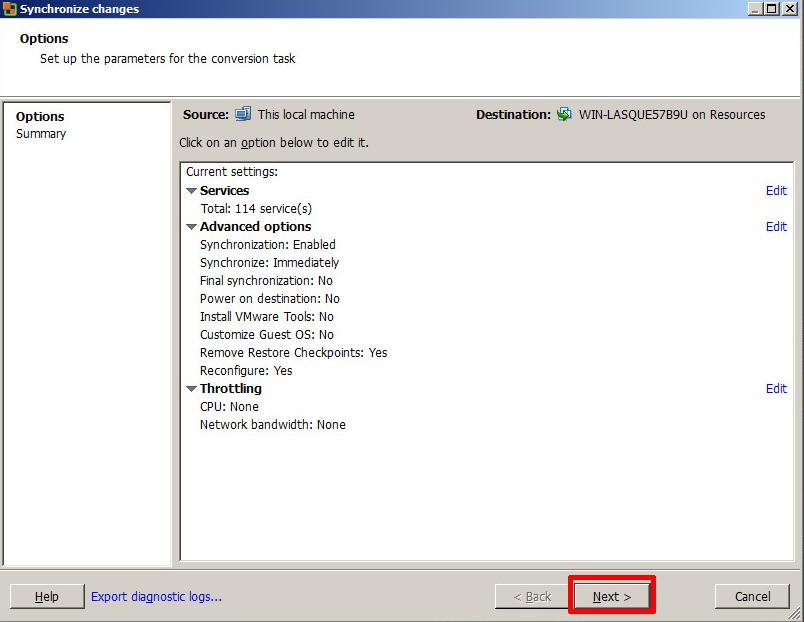
To enable the Synchronize function, you MUST select Edit
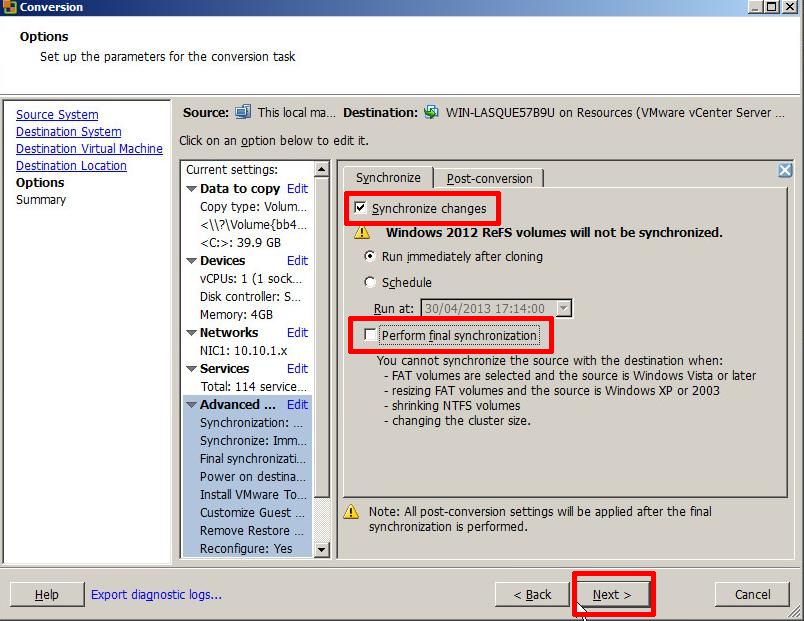
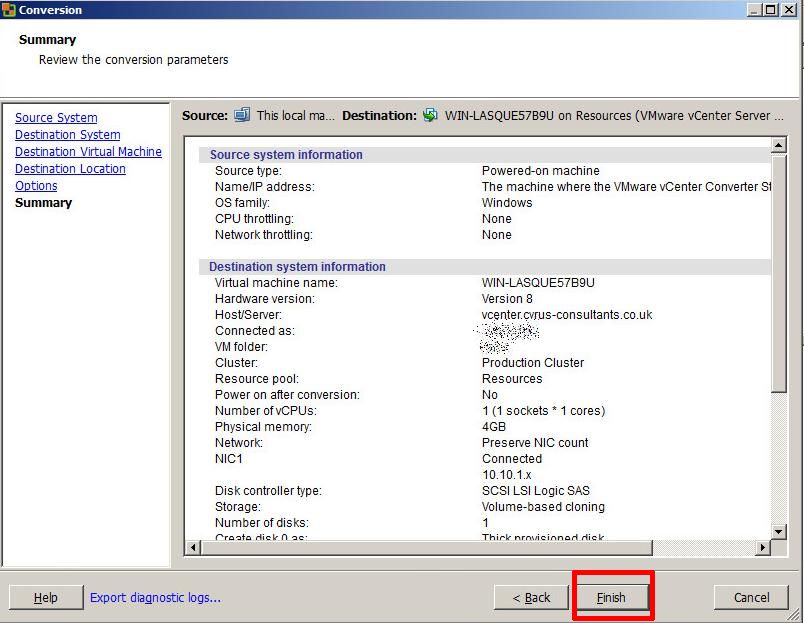
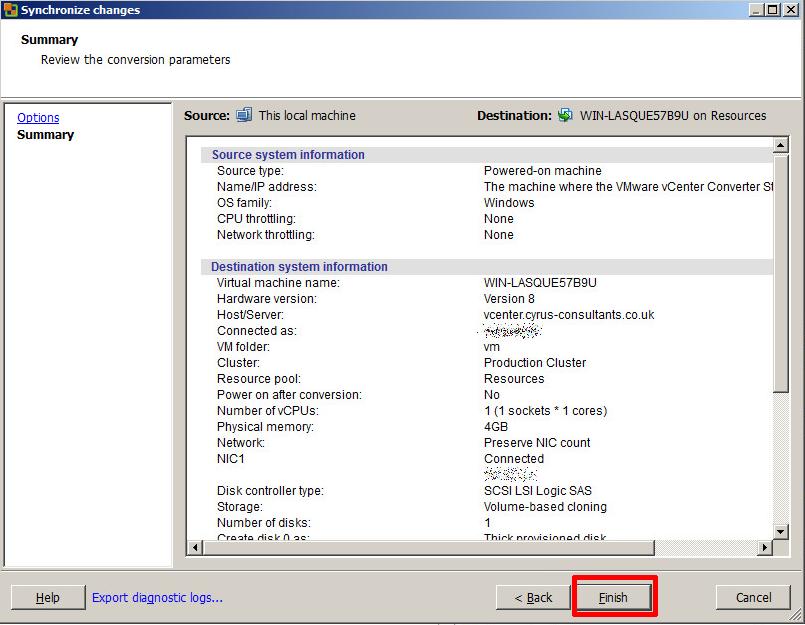
If you wanted to perform, a Scheduled Synchronize, select and set the Schedule Option. Select Next to continue, review the Summary screen, and select Finish.
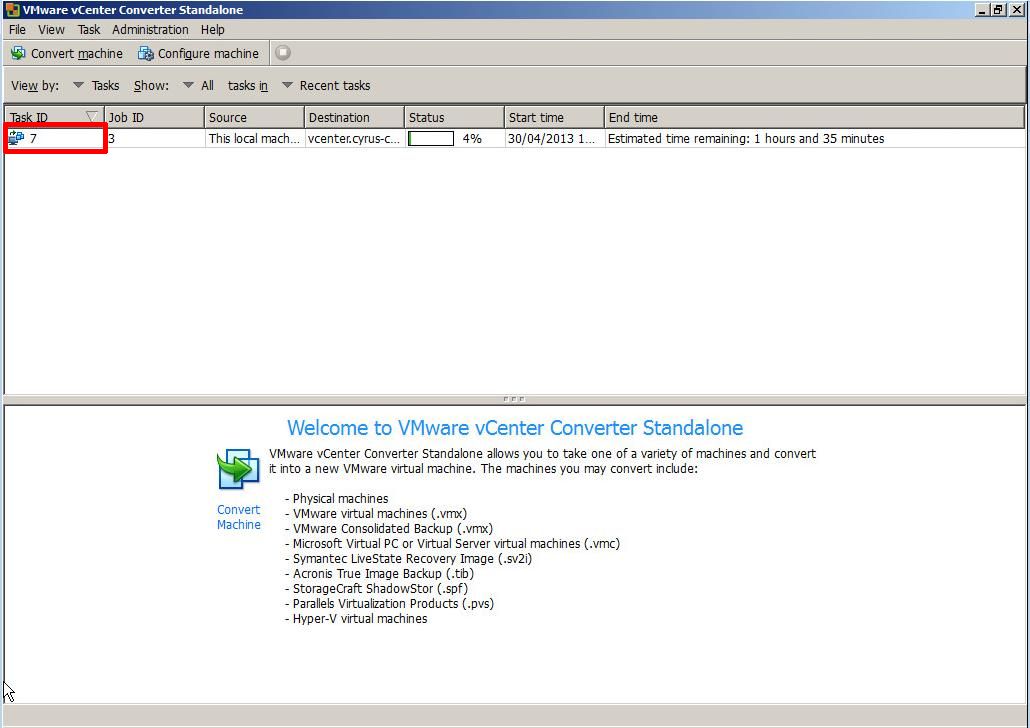

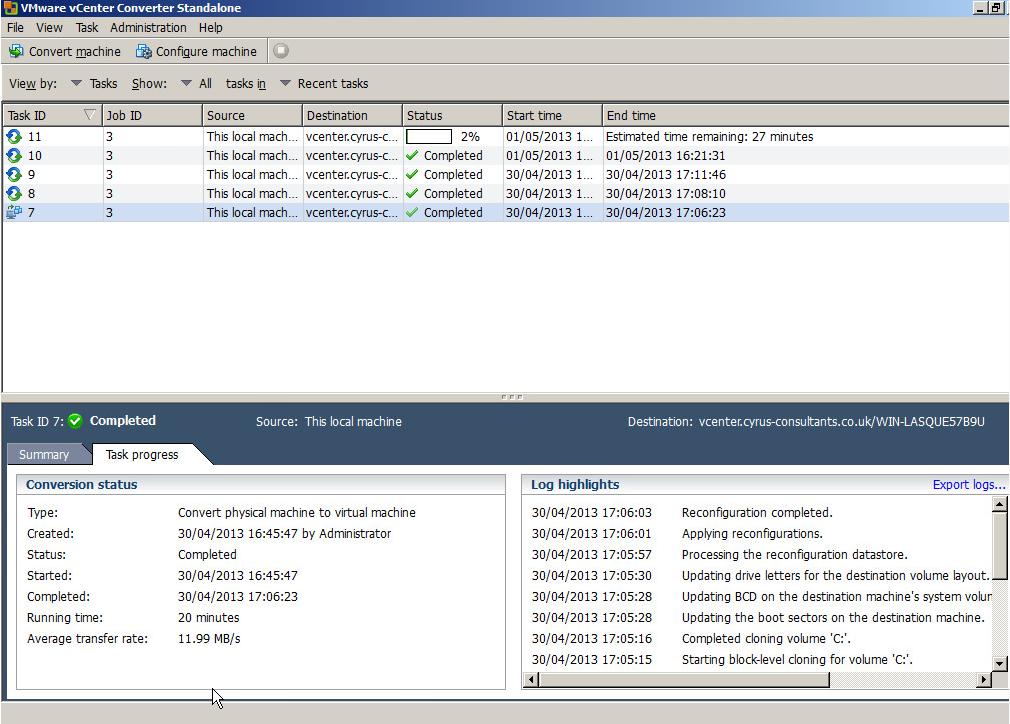
Once the initial P2V (V2V) conversion has completed, or “seeded” a new virtual machine, you can use the Synchronize function to replicate any changes that occur on the source machine to the virtual machine, the source machine could be a physical or virtual machine. (You can check the virtual machine by disconnecting networking, and powering up the virtual machine).
HOW TO: P2V, V2V for FREE – VMware vCenter Converter Standalone 5.1
Also fixes numerous issues with crashing and conversion issues, when converting physical or virtual computers to VMware vSphere vCenter Server 5.1 and VMware Hypervisor ESXi 5.1.

While I would recommend and use VMware vCenter Converter Standalone 5.1, there are other commercial products that do exist, and I have used.
If you have a large estate of physical machines to migrate, these products have a scheduler and can perform automated workflows, but these are commerical products and not FREE like VMware vCenter Converter Standalone 5.1
Symantec System Recovery Server Edition
If the operating system is Windows 2003, Windows 2000 or Windows NT 4.0, select and earlier version of VMware vCenter Converter Standalone version 3.0.3 or 4.0, support for early operating systems has been removed now from v5.1.
if you have recently upgraded to vSphere vCenter Server 5.1, and are looking for the Convert/Import vCenter plugin which existed with 4.x, it’s now longer available, and has been removed, and you will need to use VMware vCenter Converter Standalone 5.1 for your conversions.
Download VMware vCenter Converter 5.1 here
VMware vCenter Converter Standalone 5.1 Documentation
VMware vCenter Converter Standalone 5.1 User Guide
If you have issues, you may want to consult the following articles and guides
Best Practice Video Guide here
Some Videos I’ve develeoped to show the VMware vCenter Converter process.


![[Valid RSS]](http://andysworld.org.uk/images/valid-rss.png "Validate my RSS feed")