Posts Tagged ‘V2V’

HOW TO: Synchronize changes when completing a P2V or V2V with VMware vCenter Converter Standalone 5.1

Friday, May 3rd, 2013
HOW TO:  Synchronize changes when completing a P2V or V2V with VMware vCenter Converter Standalone 5.1

OR

“Poor Man’s Replication of a Physical or Virtual machine to a VMware vSphere Hypervisor Host (ESXi) for FREE”

I have already written three articles on the use of VMware vCenter Converter Standalone 5.x.

VMware vCenter Converter Standalone primary function is to create physical to virtual copies or conversions of physical computers, we often abbreviate this to P2V. VMware vCenter Converter Standalone can also be used on computers that have already been converted to virtual computers, or virtual computers that already exist in a “Cloud Space”, so we can create copies or conversions of an existing virtual computer, we often  abbreviate this to V2V

VMware vCenter Converter Standalone is an excellent FREE software tool for creating P2Vs or V2Vs, but there is another often “hidden function” which is rarely used by VMware Administrators. The function is called Synchronize. This function can be used to Synchronize changes between a physical or virtual computer, which has already been P2Ved (V2Ved) to another virtual machine on another VMware vSphere Hypervisor (ESXi) host. The same function can be used, to help unattended “cut over times” when completing a P2V (V2V) in Production, you could create the original P2V (V2V) at 9.00am, and then using synchronize, finally sync all changes made during the day, and “cut over” to the virtual machine out of hours, at 23.00pm.

Some of our clients use this software and function, as a free alternative to replication to a second DR site and ESXi host. The ESXi host could be using the FREE VMware vSphere Hypervisor.

In this article, I’ll show you HOW TO:  Synchronize changes when completing a P2V or V2V with VMware vCenter Converter Standalone 5.1. In the example below I’ll be using a virtual machine, creating a V2V and then synchronizing additional changes made to the source virtual machine to the destination VM (our DR copy).

1

Install VMware vCenter Converter Standalone 5.1

Install VMware vCenter Converter Standalone 5.1 on the computer to be synchronized. In this example, I will be installing VMware vCenter Converter Standalone 5.1  on the virtual machine.

  • VMware vCenter Converter Standalone 5.1 – Installing

VMware vCenter Converter Standalone 5.1 - Installing

It is a very easy installation, click Next and follow the wizard, agreeing to the terms of the license agreement, select the default installation folder, and select Local installation
  • VMware vCenter Converter Standalone 5.1 – Local Installation

VMware vCenter Converter Standalone 5.1 - Local Installation

Click Next, and follow the installation wizard to the end, and Click Finish.
  • VMware vCenter Converter Standalone 5.1 – Finish

VMware vCenter Converter Standalone 5.1 - Finish

If you left the Tick in the Box for Run Converter Standalone Client now. VMware vCenter Converter Standalone will start, otherwise you will need to click the icon on your desktop.

2

Creating a P2V (V2V in this example) for synchronization

  • VMware vCenter Converter Standalone 5.1 – Welcome Screen

VMware vCenter Converter Standalone 5.1 - Welcome Screen

At the Welcome to VMware vCenter Converter Standalone, welcome screen click the Convert machine button. (This machine could be a physical or virtual machine, VMware vCenter Converter Standalone does not care what machine type it is.)
  • VMware vCenter Converter Standalone 5.1 – Convert Machine

VMware vCenter Converter Standalone 5.1 - Convert Machine

Select the Default option

Select source type: Powered-on-machine

Specify the powered-on machine: This local machine

followed by Next to continue, converter will identify the source machine.

  • VMware vCenter Converter Standalone 5.1 – Specify vCenter Server

VMware vCenter Converter Standalone 5.1 - Specify vCenter Server

Select destination type: VMware Infrastructure machine

Enter the destination server, username and password, in this example, I’m using our VMware vSphere vCenter server details, but if you wanted to synchronize/replicate to a standalone VMware vSphere Hypervisor (ESXi) host, you would enter the VMware vSphere Hypervisor (ESXi)  host details here, e.g. root username and password.

  • VMware vCenter Converter Standalone 5.1 – Specify Destination Machine name

VMware vCenter Converter Standalone 5.1 - Specify Destination Machine name

Specify the destination name of the machine followed by Next
  • VMware vCenter Converter Standalone 5.1 – Specify Destination Location

VMware vCenter Converter Standalone 5.1 - Specify Destination Location

Specify the destination location for the machine followed by Next, if you are using a VMware vSphere vCenter Server and have a VMware Cluster created, you will have additional options to specify which VMware vSphere Hypervisor (ESXi) host to create the new virtual machine, also specify the datastore location. Ensure the virtual machine version matches the original VM, in this example v8.0.
  • VMware vCenter Converter Standalone 5.1 – Enable Synchronize

VMware vCenter Converter Standalone 5.1 - Enable Synchronize

If you click Next at this point, the P2V (V2V) will complete as normal.

To enable the Synchronize function, you MUST select Edit

  • VMware vCenter Converter Standalone 5.1 – Enable Synchronise

VMware vCenter Converter Standalone 5.1 - Enable Synchronise

Ensure Synchronize changes is selected and ticked.

Ensure Perform final synchronization is Un-ticked.

If you wanted to perform, a Scheduled Synchronize, select and set the Schedule Option. Select Next to continue, review the Summary screen, and select Finish.

  • VMware vCenter Converter Standalone 5.1 – Summary Screen

VMware vCenter Converter Standalone 5.1 - Summary Screen

A P2V job will be submitted and the P2V conversion will start.
  • VMware vCenter Converter Standalone 5.1 – P2V Job Submitted

VMware vCenter Converter Standalone 5.1 - P2V Job Submitted

If you click the Task Id, you can check on the Task Progress.
  • VMware vCenter Converter Standalone 5.1 – Task Progress

VMware vCenter Converter Standalone 5.1 - Task Progress

3

Synchronize Changes

Once the initial P2V (V2V) conversion has completed, or “seeded” a new virtual machine, you can use the Synchronize function to replicate any changes that occur on the source machine to the virtual machine, the source machine could be a physical or virtual machine. (You can check the virtual machine by disconnecting networking, and powering up the virtual machine).

  • VMware vCenter Converter Standalone 5.1 – Job Status

VMware vCenter Converter Standalone 5.1 - Job Status

The Job Status should state Completed. Right Click the Task Id and select Go to job
  • VMware vCenter Converter Standalone 5.1 – Go to Job

VMware vCenter Converter Standalone 5.1 - Go to Job

You will notice that the Status states Not Scheduled, this is because we did not set a schedule.
  • VMware vCenter Converter Standalone 5.1 – Not Scheduled

VMware vCenter Converter Standalone 5.1 - Not Scheduled

Right Click the Job Id, and select Synchronize.
  • VMware vCenter Converter Standalone 5.1 – Synchronize

VMware vCenter Converter Standalone 5.1 - Synchronize

Click Next
  • VMware vCenter Converter Standalone 5.1 – Synchronize changes

VMware vCenter Converter Standalone 5.1 - Synchronize changes

Check the Summary page and Click Finish
  • VMware vCenter Converter Standalone 5.1 – Finish

VMware vCenter Converter Standalone 5.1 - Finish

Click the View by Jobs
  • VMware vCenter Converter Standalone 5.1 – Synchronize Task Progress

VMware vCenter Converter Standalone 5.1 - Synchronize Task Progress

You will notice your Synchronize Job is Running, and it will have a new Synchronize icon, next to the job. All changes in the source machine will be synchronized or replicated to the virtual machine.

Congratulations you have successfully created a P2V (V2V) and Synchronized (replicated) your machine to a virtual machine.

Post to Twitter

HOW TO: P2V, V2V for FREE – VMware vCenter Converter Standalone 5.1

Thursday, May 2nd, 2013

HOW TO:  P2V, V2V for FREE – VMware vCenter Converter Standalone 5.1

If you need to complete a Physical to Virtual (P2V), Virtual to Virtual (V2V) conversion to a VMware product (VMware Workstation, Player or vSphere) for FREE, then there is some good news…VMware vCenter Converter Standalone 5.1 was released on 25 April 2013, and this latest version has new support for the following:-

  • Support for virtual machine hardware version 9
  • Guest operating system support for Microsoft Windows 8 and Microsoft Windows Server 2012
  • Guest operating system support for Red Hat Enterprise Linux 6
  • Support for virtual and physical machine sources with GUID Partition Table (GPT) disks
  • Support for virtual and physical machine sources with Unified Extensible Firmware
  • Interface (UEFI)
  • Support for EXT4 file system

Also fixes numerous issues with crashing and conversion issues, when converting physical or virtual computers to VMware vSphere vCenter Server 5.1 and VMware Hypervisor ESXi 5.1.

  • VMware vCenter Converter Standalone v5.1

VMware vCenter Converter Standalone v5.1

While I would recommend and use VMware vCenter Converter Standalone 5.1, there are other commercial products that do exist, and I have used.

If you have a large estate of physical machines to migrate, these products have a scheduler and can perform automated workflows, but these are commerical products and not FREE like VMware vCenter Converter Standalone 5.1

NETIQ Platespin Migrate

Acronis vmProtect

Storagecraft Shadow Protect

Symantec System Recovery Server Edition

If the operating system is Windows 2003, Windows 2000 or Windows NT 4.0, select and earlier version of VMware vCenter Converter Standalone version 3.0.3 or 4.0, support for early operating systems has been removed now from v5.1.

if you have recently upgraded to vSphere vCenter Server 5.1, and are looking for the Convert/Import vCenter plugin which existed with 4.x, it’s now longer available, and has been removed, and you will need to use  VMware vCenter Converter Standalone 5.1 for your conversions.

Download VMware vCenter Converter 5.1 here
VMware vCenter Converter Standalone 5.1 Documentation
VMware vCenter Converter Standalone 5.1 User Guide


If you have issues, you may want to consult the following articles and guides

Best Practice Video Guide here

Some Videos I’ve develeoped to show the VMware vCenter Converter process.

A Tutorial video by me:- Restore a Virtual Machine using the FREE VMware vCenter Converter to VMware vSphere 4.x, 5.0 ESXi 4.x, ESXi 5.0, ESX 4.0

A Tutorial video by me:- Backup VMware vSphere 4.x, 5.0 ESXi 4.x, ESXi 5.0, ESX 4.0 for FREE using VMware vCenter Converter

A Tutorial video by me:- VMware vCenter Converter Standalone 5.0 Convert monolithic sparse to monolithic flat for use with VMware vSphere 4.x 5.0 ESXi 4.x 5.0

Post to Twitter

HOW TO: Improve the transfer rate of a Physical to Virtual (P2V), Virtual to Virtual Conversion (V2V) using VMware vCenter Converter Standalone 5.0

Sunday, January 8th, 2012

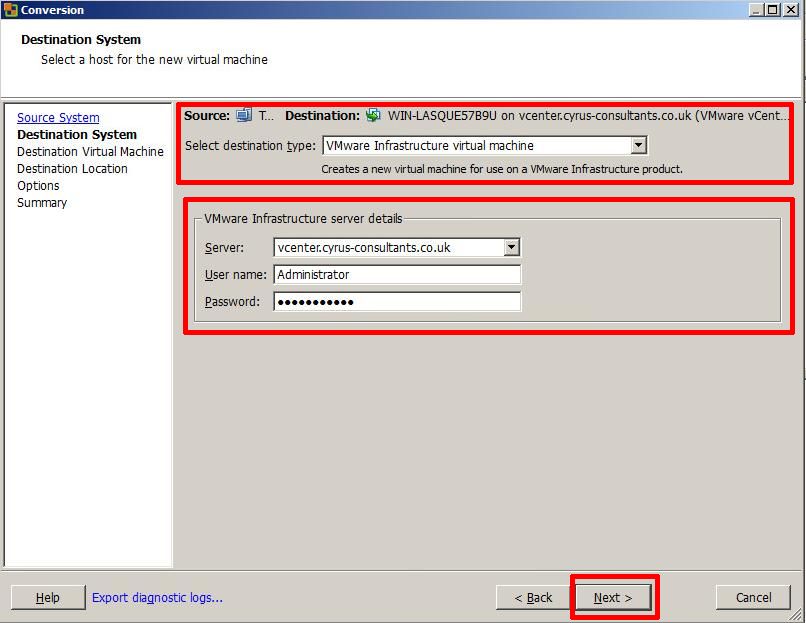
VMware vCenter Converter Standalone 5.0 is a FREE tool available from VMware upon registration, the purpose of this software tool is to easily convert physical or virtual computers, images of computers to VMware virtual machines. Server and Workstation operating systems are supported in the conversion.

Download VMware vCenter Converter Standalone 5.0 here
VMware vCenter Converter Standalone 5.0 Documentation
VMware vCenter Converter Standalone 5.0 User Guide

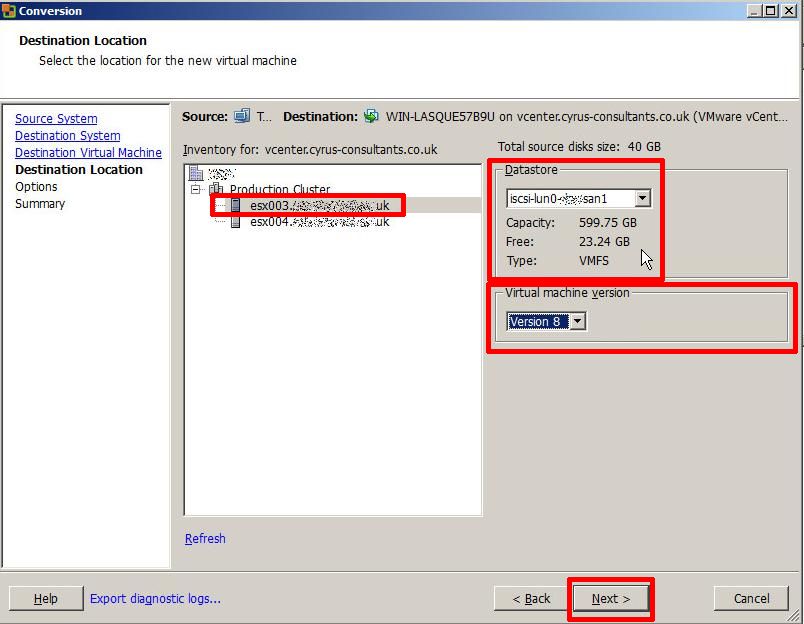
In September 2011, VMware released version 5.0 of VMware vCenter Converter Standalone 5.0, with many new features including partition alignment important for aligning partitions correctly on storage array networks (SAN).

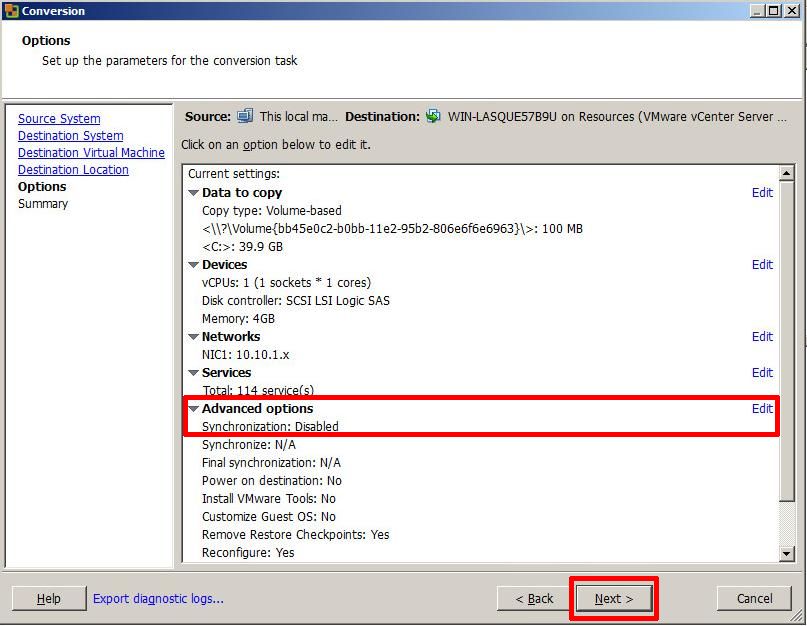
BUT, we’ve noticed that completing conversions using VMware vCenter Converter Standalone 5.0 compared to using VMware vCenter Converter Standalone 4.3, were taking much longer, and the transfer rate of a conversion had become degraded when using version 5.0.

The following modification will improve the transfer rate when using VMware vCenter Converter Standalone 5.0, to similar transfer rates obtained when using VMware vCenter Converter Standalone 4.3 to perform conversions.

It would appear that VMware uses a proprietary VMware protocol called NFC, to image to destination, also by encrypting (SSL) the data payload transfers in version 5.0, this additional overhead causes transfer performance degradation. The result of which is a longer than expected conversion time, when compared to version 4.3.

Turning OFF SSL Encryption in VMware vCenter Converter Standalone 5.0 can improves transfer rates.

(if appropriate for your environment)

To turn OFF SSL Encryption in VMware vCenter Converter Standalone 5.0, please follow the following steps:-

  • Find and Edit converter-worker.xml

this file is location in the following locations

Windows Vista, Windows 7, Windows 2008
%ALLUSERSPROFILE%VMwareVMware vCenter Converter Standalone

Windows XP, Windows 2003, Windows 2000
%ALLUSERSPROFILE%Application DataVMwareVMware vCenter Converter Standalone

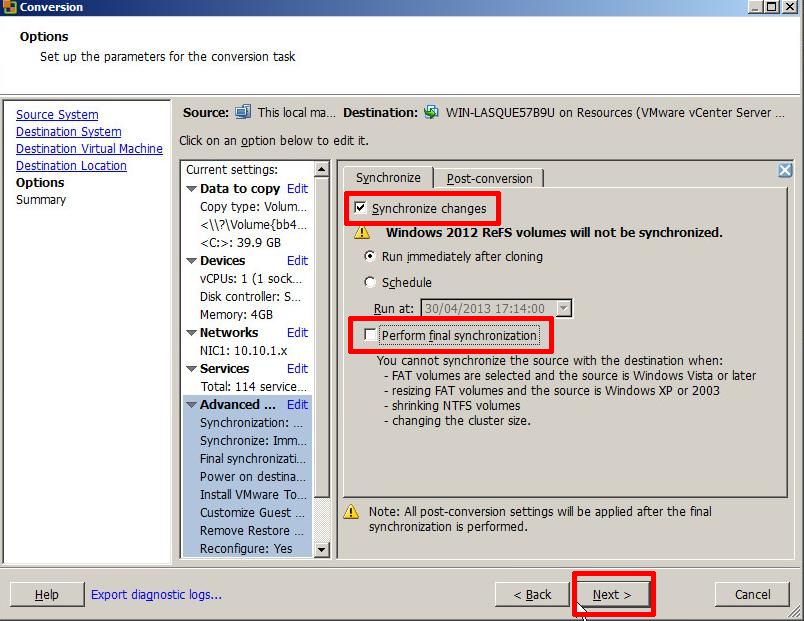
  • Change the SSL Key <useSsl> true </useSsl> to false

You may find it easier to edit the file using Microsoft XML Notepad 2007 to edit the XML file. But Notepad or Wordpad can edit the file, just ensure, you make a copy of the original file for backup before making any alterations. Using Microsoft XMP Notepad 2007, you do not have to scroll the contents of the file, and the <useSsl> section is quicker to find and alter, but whatever tool you find most comfortable to use to edit the file, is okay.

Change

<useSsl> true </useSsl>

to

<useSsl> false </useSsl>

save the XML file.

Using Microsoft XML Notepad 2007

Using Microsoft XML Notepad 2007

Using Microsoft XML Notepad 2007 to change to false

Using Microsoft XML Notepad 2007 to change to false

  • Restart Service

For changes to take effect – Restart “VMware vCenter Converter Standalone Worker” service.

  • Results

We have seen performance increases from at least 2x to 6x. So if you want to half the conversion time at least, then alter the encryption setting. If appropriate for your environment.

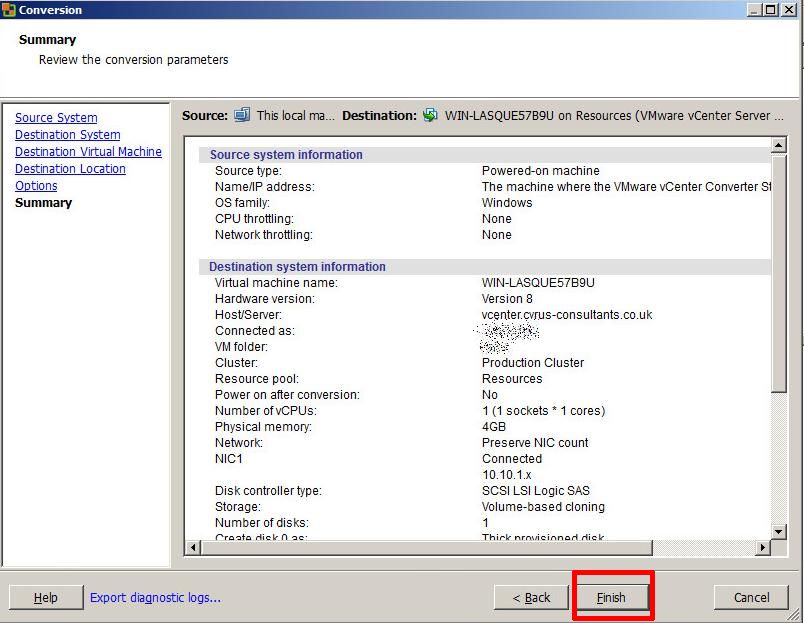
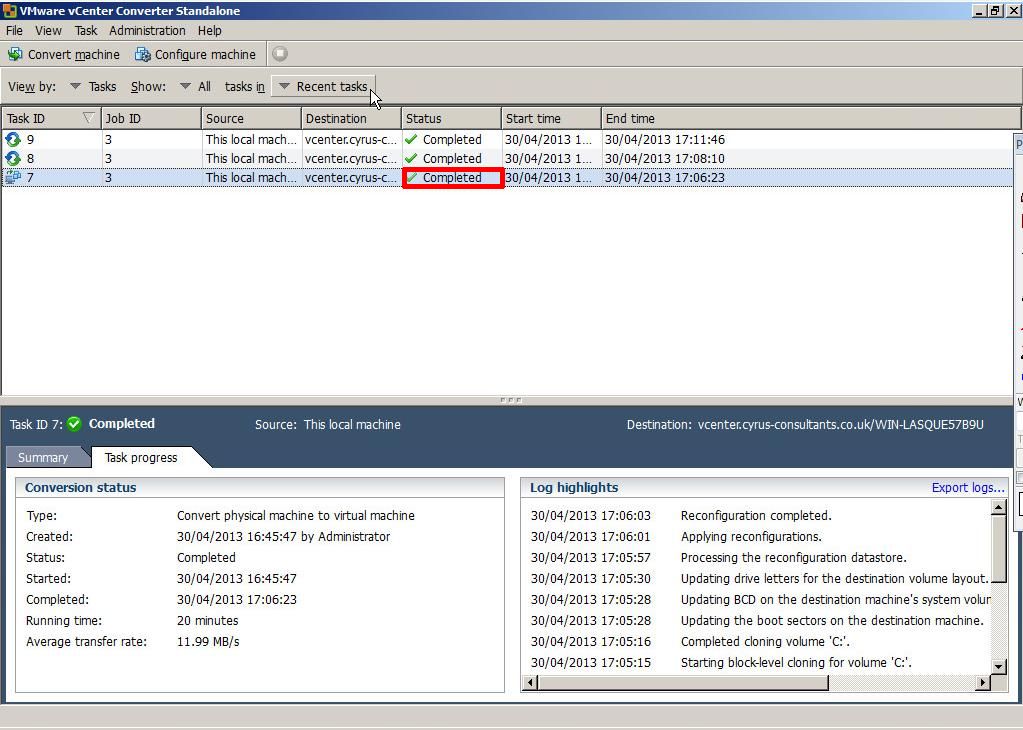
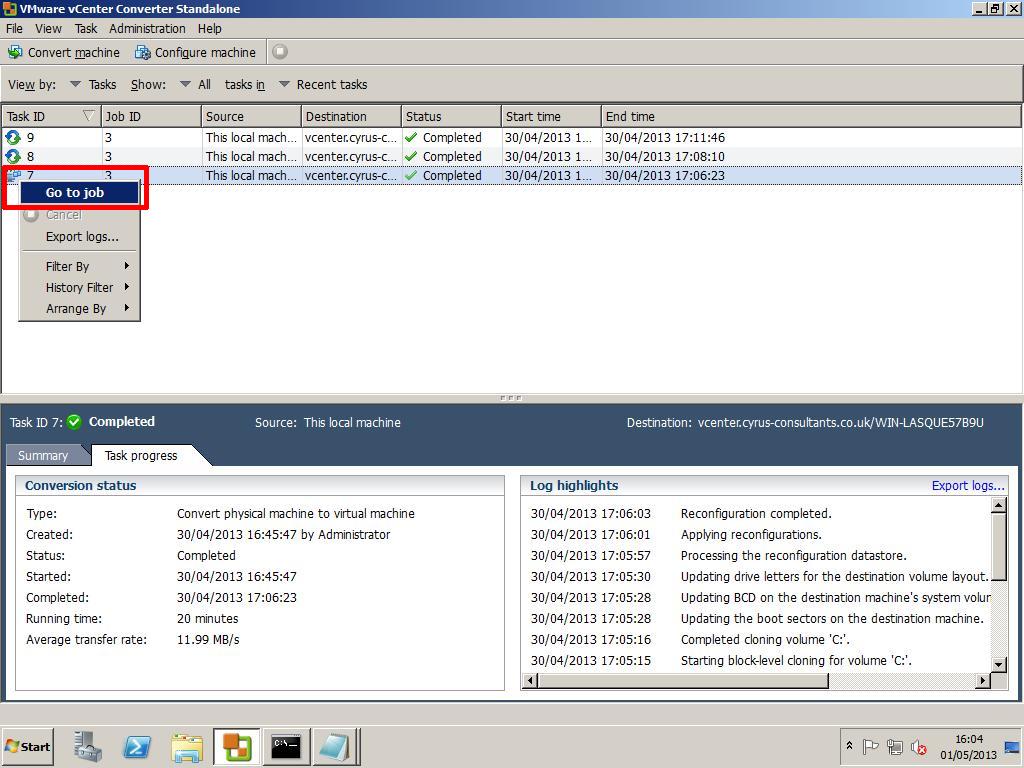
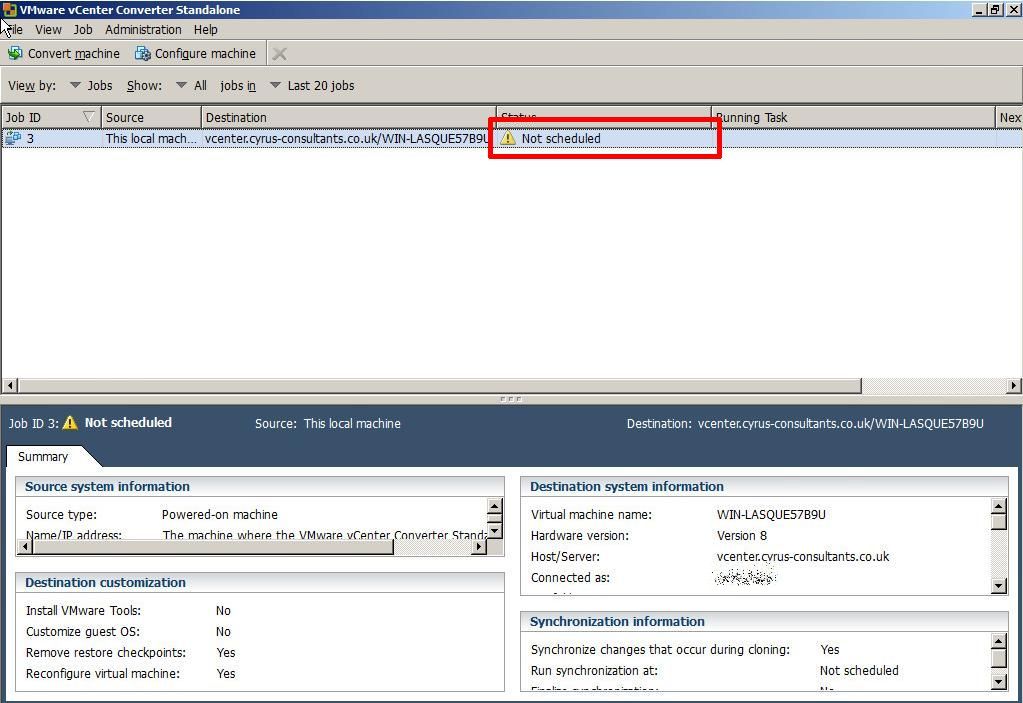
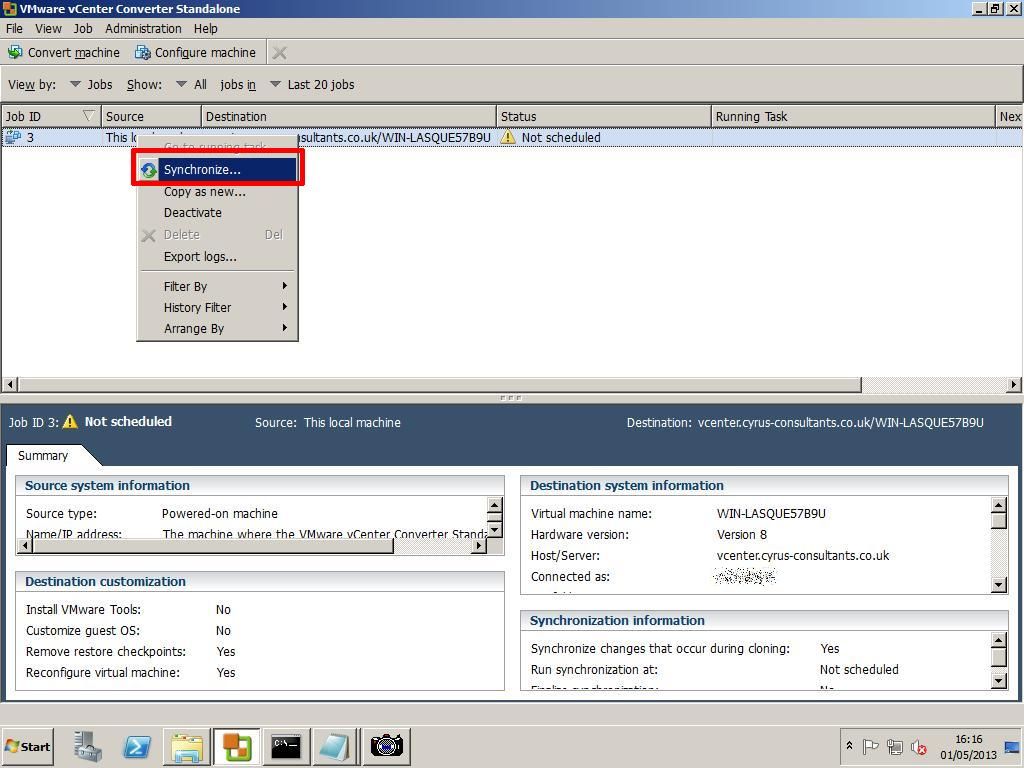
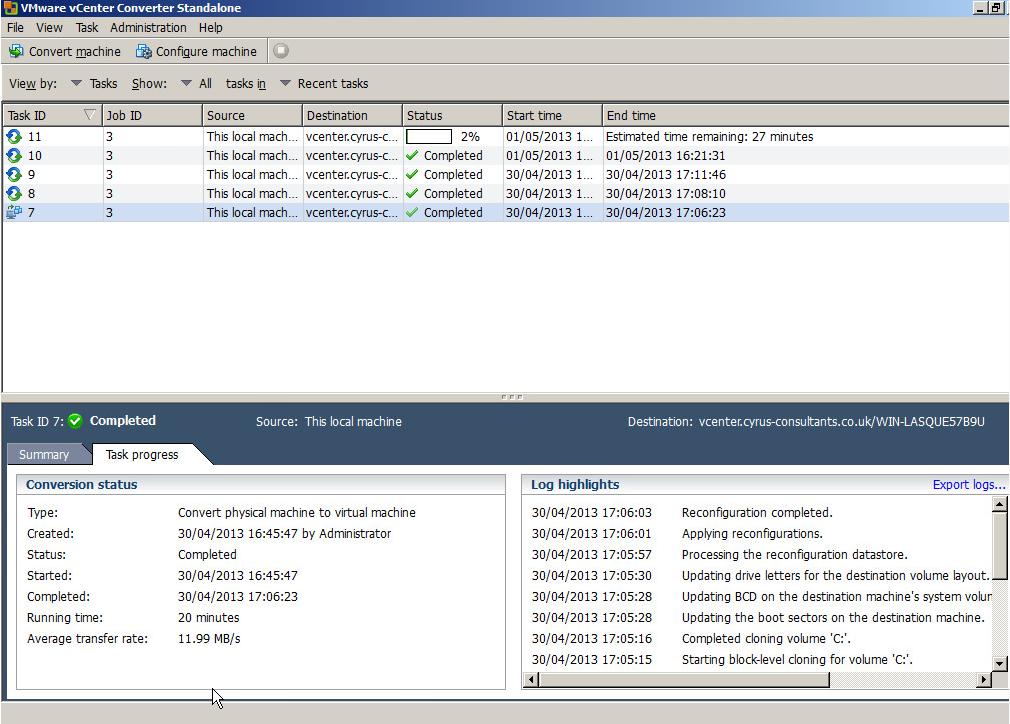
In the following example, a Windows 2003 Server was converted from Virtual Machine to Virtual Machine (V2V) using VMware vCenter Converter Standalone 5.0 installed on the server to be converted. In the first conversion (TaskId10) the SSL Key was left as the default TRUE, and encryption was used. In the second conversion (TaskId11), the SSL Key was set to false.

As can be seen from the following screenshots Average Transfer rate has increased from 2 MB/s to 6 MB/s and the conversion time has reduced from 1hr 38mins to 33mins.
.

Default encryption value of true 2MB/s transfer rate

Default encryption value of true 2MB/s transfer rate

Default encryption value of false 6MB/s transfer rate

Default encryption value of false 6MB/s transfer rate

A performance increase of 60%! just by chaning a value from true to false.

Post to Twitter