Archive for the ‘DIY’ Category

My Dad broke my porch!

Friday, October 29th, 2010

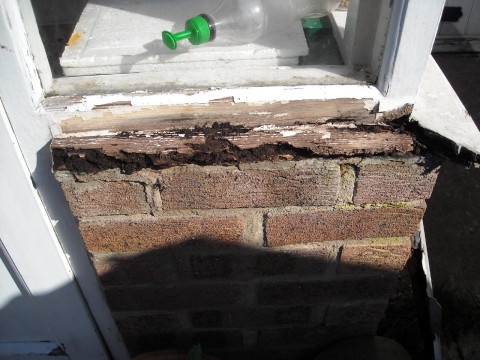
It all started when my Father visited us in March this year. I forgot to mention to him, not to touch the porch, he’d only been standing outside the house for less than 30 seconds, and said “this isn’t looking very good”, and continued to pull off a lump of wood off the porch”

This is the damage he caused

My Dad broke my Porch

My Dad broke my Porch

So in August over the Summer, we called in the joiner to remove the rotten wood, and rebuild the porch. It’s almost but finished, but needs the door gloss-ing with white paint.

Here are the photographs from start to finish of the repair. Use the new slideshow option, it might be quicker!

My Father did contribute a generous £10 towards the repairs!

I’ll upload a final picture of the exterior all painted, apart from the door!

Post to Twitter

Chim chiminey October 2010

Thursday, October 28th, 2010

Chim chiminey
Chim chiminey
Chim chim cher-ee!

long overdue check on the Chim chiminey! These are for you Lindsey!

Post to Twitter

I thought my carpets were clean until I purchased a Dyson

Saturday, January 30th, 2010
The old Electrolux Contour

The old Electrolux Contour

Well it finally had to happen our Electrolux Contour vacuum cleaner which we purchased in 1989, has finally gone to Vacuum Cleaner heaven. It’s typical after just purchasing replacement bags and drive belts, but it would appear that the motor is worn out, and it no longer sucks! When this was first advertised on the TV circa 1989, they showed it holding a dinner plate it had that much suction – not any more! It’s been repaired countless times, and it broke three years ago and we went and purchased an in-expensive Electrolux Cyclone bagless vacuum cleaner- this was rubbish, the filters were always blocking and needed cleaning under a tap every time it was used, so we stopped using it, and I fixed the Electrolux Contour again!

So, we are no longer Dyson virgins, as I purchased a new Dyson DC20 Stowaway later this evening, before taking the Contour vacuum cleaner apart earlier, and in the process damaged one of Lindsey’s ornaments in the lounge. The Carved Gourd now has a hole in it! (and you cannot bring anything home without the cats inspecting it!)

Dyson DC20 in box (Angus)

Dyson DC20 in box (Angus)

Dyson DC20 in box (Tilly)

Dyson DC20 in box (Tilly)

The amount of suction this vacuum cleaner has got is unbelievable, the carpets get sucked up, off the underlay, and it looks like I’m Arnold Schwarzenegger in Terminator!

Dyson DC20 out of the box!

Dyson DC20 out of the box!

“I thought my carpets were clean until I purchased a Dyson”

so thumbs up to another James!

Post to Twitter

Dripping, Noise, Flood and Silence

Friday, January 29th, 2010
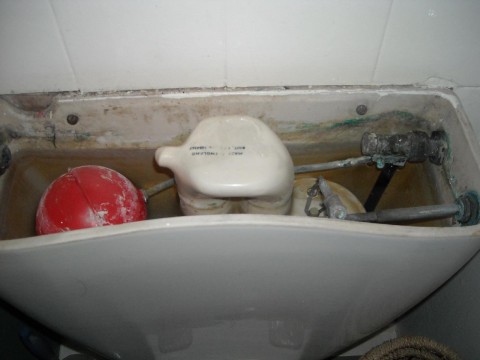
Toilet 'vintage' cistern with old ball-cock and valve

Toilet 'vintage' cistern with old ball-cock and valve

This all started about three and a half years ago, when we first purchased the house, the first DIY job I had was to fix the dripping overflow from the toilet in the bathroom. The toilet cistern is rather narrow, and possibly vintage (or old) because it contains a very large porcelain flush, the disadvantage of this is, there is not much room in the cistern for a replacement ball cock and valve.

After searching in various DIY stores, I couldn’t find replacement part that would fit the cistern, so I just “modified” the brass ball cock arm by bending it slightly to stop the dripping overlow.
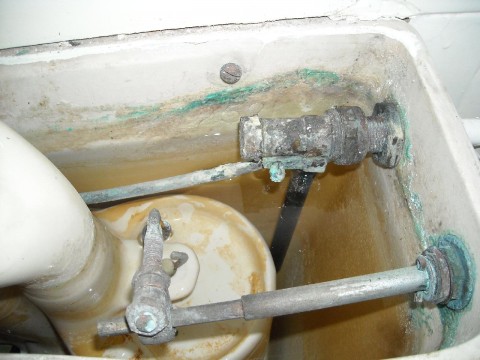
close-up of old ball-cock and valve

close-up of old ball-cock and valve

Many months later, I found some replacement brass fittings, so I purchased three of them, and stored them in the garage until it needed replacing for good.
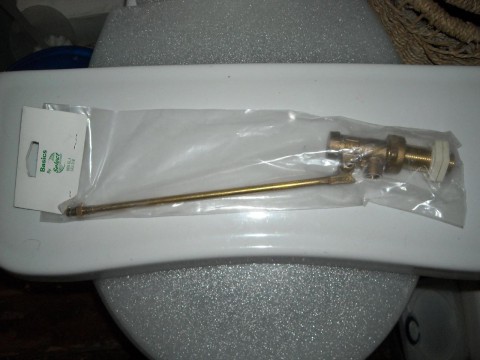
New brass ball cock valve

New brass ball cock valve

Well this DIY bodge job came back to haunt me, because it started dripping again a few months ago. So it was time to replace with the parts in stock in the garage.
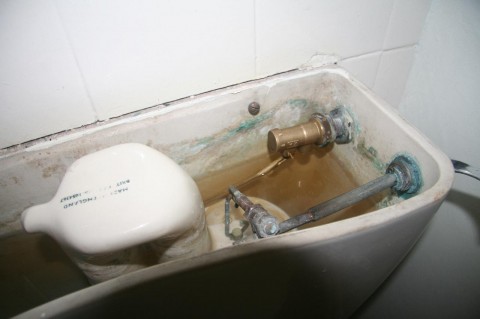
New part fitted

New part fitted

The only problem with the new ball cock and valve fitted, was the shaft was too short, and I couldn’t fit the ball cock to it. Back to the drawing board, so I removed the old shaft, and connected it to the new valve. This worked and stopped the dripping valve, but when the toilet cistern filled, it was horrendously noisy! I later discovered it was the venturi action of the valve that was causing the noise under high pressure. So back to the drawing board and Google. I then discovered Fluidmaster a quiet fill small footprint fill valve, but there isn’t much room in the cistern, so off to Screwfix for the part.
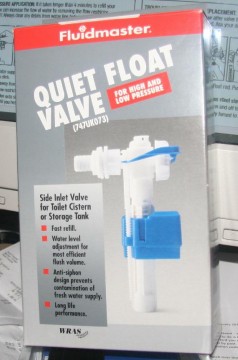
Fluidmaster Quiet Float Valve

Fluidmaster Quiet Float Valve

When was the last plumbing part your purchased, comes in a nice box? with instructions on the back of the box, and an A4 sheet inside!

It didn’t take me very long to fit this new Fluidmaster part, and there was just enough space, a few millimetres clearance from the flush mechanism and walls of the cistern, must make sure there’s enough clearance, and regularly check or will have another flood!

Oh yes the flood, following the instructions, Step 7. IMPORTANT ALWAYS CLEAR ANY DEBRIS FROM WATER LINE TO COMPLETE INSTALLATION. So I shut off the water as instructed, removed the cap, went downstairs, and under the kitchen sink, turn-ed back on the water…… oh #@!? when I returned to the bathroom, water under extreme pressure was hitting the opposite end of the cistern, and water was then travelling vertically, and hitting the ceiling, and then dripping off, I had to run back downstairs and turn off the water! I think it would have been best if the instructions had stated to place the top back on the cistern!

The bathroom was flooded!!! (didn’t have time to take pictures, mopping up the water!).

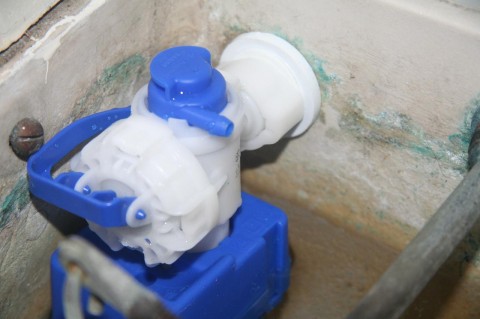
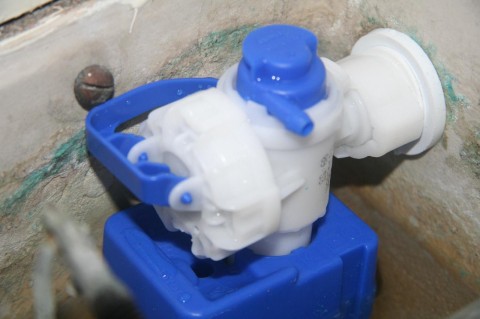
Anyway pictures of the Fluidmaster installed…
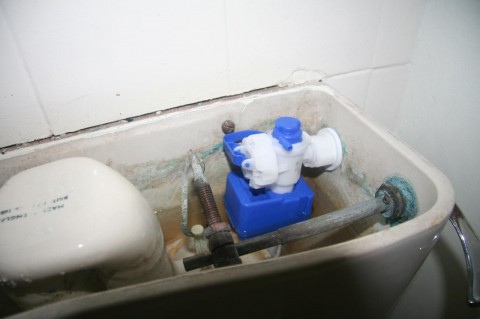
Quiet Float Valve by Fluidmaster
Quiet Float Valve by Fluidmaster
Quiet Float Valve by Fluidmaster

Quiet Float Valve by Fluidmaster

Quiet Float Valve by Fluidmaster

Quiet Float Valve by Fluidmaster

It does what it says on the tin or box in this case, it’s quiet! So no more nosiy toilet! (when it’s filling anyway!).
Post to Twitter

Broken Storage Heater – Fixed

Thursday, January 7th, 2010

The thermal fuselinks obtained from http://www.storageheater.co.uk/ have fixed the night storage heater. Just in time as external night temperatures plument to below -7 degrees C. We walked to the local town again yesterday to obtain coffee for Lindsey. The local roads are no better, and are worse with the overnight snowfall.

the long walk home in a blizzard

the long walk home in a blizzard

But we were lucky, because a nice man in his 4×4 Mercedes Benz with snow tyres gave us a lift back to the hamlet!

Post to Twitter

Broken Storage Heater

Tuesday, January 5th, 2010

I noticed the other day that one of our storage heaters (the only heating we have), was cold as ice.

storage heater thermal fuselink

storage heater thermal fuselink

and this is the reason why! The thermal fuselink has blown, indicating that the storage heater has over heated, and the thermal fuse has blown, a safety feature. I spoke to a very nice man from http://www.storageheater.co.uk/, and ordered some replacement thermal fuselinks (blue!). He also emailed me the service manuals for these Creda storage heaters. The thermal fuselinks arrived very promptly today, Thanks Roger!

So quickly fitted the new fuselink.

new fuselink fitted

new fuselink fitted

closeup of new thermal fuselink

closeup of new thermal fuselink

It has a temperature of 145 degrees C written on it, so I assume this is the temperature at which it blows! Hopefully the room will be warmer this evening, I’ll have to wait for the Ecnomoy 7 electric to come on at 12.30am, to check it’s working!

Post to Twitter

Wireless (WiFi) Remote Control of X10 Modules using USB Remote Access

Sunday, December 20th, 2009
  1. The Active Home Pro software is installed on/in a virtual Windows XP Professional computer, I don’t like cluttering up my main production Workstation which happens to be Vista 64-bit Ultimate.
  2. The CM15PRO Programmable Computer Interface is connected by USB to this computer. The Active Home Pro software is the software that drives the computer interface, I’ve saved the “house file” house.ahx on my NAS (network attached storage) device, so it can be easily shared on my network.
  3. This is the clever Tech bit, USB over Network by Fabula Tech, I’ve been using this software in the virtual work I do for a few years, and it allows you to share a USB device over your network, e.g. you can plug in you USB device on one computer, and connect to it on another via your network. Very handy… USB remote access!
  4. The USB over Network by Fabula Tech is installed on the computer connected to the CM15PRO Programmable Computer Interface. We will call this the server.
USB over network

USB over network

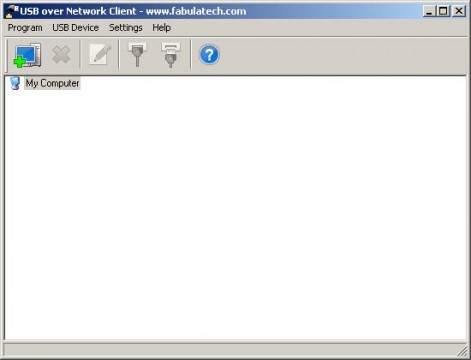
The above snapshot, shows the USB over Network server software running, and the current USB devices attached to the server, which can then be shared, just like any resource, disk, printer etc.

USB over network device shared waiting for connection

USB over network device shared waiting for connection

The device is shared, and is waiting for a client computer to connect to it.

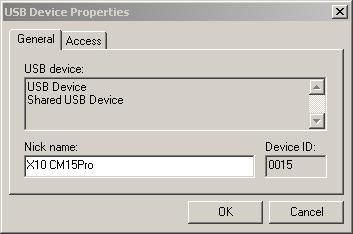
USB device properties

USB device properties

You can give the devices meaningful friendly names, that you’ll remember. On the client computer (remote computer), install another copy of Active Home Pro, making sure the drivers are installed for the CM15Pro. Run the USB over Network client software.

USB over Network client setup

USB over Network client setup

Select USB Device, Add, browser for the computer or enter IP address. You should see, a list of devices that can be connected to.

Client connecting...

Client connecting...

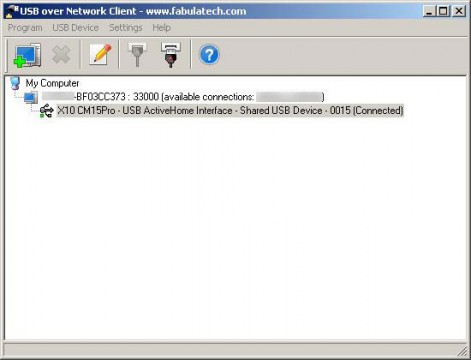
Right click the device, and click connect, if this is the first time you’ve connected to the device, you’ll get the usual, bing-bong tones, and plug N play will start and register the drives.

Now you can use your ActiveHome Pro software on another wireless (WiFi) computer, just open the *.AHX home file, from a shared location.

Client Connected to device

Client Connected to device

Post to Twitter

X10 Computer Control

Saturday, December 19th, 2009

With this blog post comes a warning, this post is for Geeks, Nerds, Techno-freaks, or people that just like 100% Tech! (you’ve been warned!).

This isn’t new Tech, the X10 protocol was invented 30 years ago, the X10 protocol sends packets of information across house hold mains wiring to receivers to turn items on or off. Computer software is then used to build macros and timers, which can be downloaded to the standalone programmable computer interface to instruct various modules (appliances) to turn on or off, so no need for a computer to be left on and running. What X10 can do for you is limited only by your imagination or programming skills!
I’ve recently invested in X10 computer control, because

  1. various appliances which need timers.
  2. take more advantage of Economy 7 and reduce electrical consumption.
  3. and I like my tech!

okay, I could do this with manual/electronic timers from a well known DIY store, but there would be no fun, but on a serious note, the timers I’ve been purchasing in the last few years, have all failed, the manual segment timers (which I need for the fish house, because digital timers will not start the ballast units on the lighting circuit, because digital timers will not start-up fluorescent tubes). Also various other projects, and I also wanted to create a moonlight light in the fish house, a ceiling rose light which comes on before tank lighting (goes off), and then on before tank lighting goes off – since I’ve turned off fish house main lighting 2 x 70 watt tubes, the fish frighten to easily from dark –> light (vice versa).

So I’ve purchased a Marmitek CM15PRO standalone programmable computer interface, and various X10 Modules, the modules I’ve purchased are plugin modules which plug in to a standard UK 13Amp socket, your appliance then plugs into this socket, you can also get DIN rail modules, wall switches, micro modules as well, and wired modules, and also lamp modules which plug into bayonet or edison screw light fittings. The modules I’ve purchased are:-

  1. AM12 Appliance / Switch Module
  2. AM12W Appliance / Switch Module (Wired)
  3. LM15 Bayonet Lamp module

The following screen shot shows all the modules (appliances) in the house, that are currently being computer controlled. The green light currently indicates they are on. Macros and timers vary the on and off times for every module.

Active Home Professional Software

All Rooms in the house with modules

Screen shot of the software, rooms can be created to organise your modules.

ActiveHome Professional screen shot

ActiveHome Professional screen shot

Here are some pictures of the computer interface and the actual modules in use:-

Now if you think this Tech is OTT, it gets worse, I’ve also found that sometimes I need to be able to control these modules when I’m not at my main production workstation. I could purchase an X10 remote control to send signals to the transceiver to send to the units, but hey that’s too easy, lets find a Tech way to do it!

I leave this to another exciting Geek, Nerdy, Techno-freak blog entry here!

Post to Twitter

eaga ShowerSmart – Get yours FREE and Save the Planet!

Friday, July 3rd, 2009
eaga ShowerSmart unit

eaga ShowerSmart unit

I’ve just done some quick DIY (5 minutes)  in the bathroom and fitted an eaga ShowerSmart, and the good news is they are free of charge to UK householders. I applied for mine so long ago, I forgot about it!

It’s a small metal unit, which restricts the flow of water through your shower head, saving water and energy.

Read and apply for one here at http://www.shower-smart.co.uk/

The eaga ShowerSmart is suitable for use with non-electric mixer showers or bath/shower mixer taps, provided they run off the mains water pressure.

It’s supplied with two washers, good instructions, and a small plastic bag which you use to check if your shower is in-efficient.

eaga shower unit fitted on our old shower!

eaga shower unit fitted on our old shower!

Post to Twitter

Compost frame (After)

Wednesday, April 22nd, 2009

(sorry folks got distracted, the Chairperson of the newly formed Allotment Association came to collect some of my Tomatoe plants!)

After some cutting with the jigsaw, hammering of nails, and stapling here we have the new lid.

Compost Lid

Compost Lid


it sits on top of the composter

Composter

Composter


I’ve recently dug out over 500 litres of organic compost, which has been used in the garden. Here’s a picture of compost corner.


Compost Corner

Compost Corner

Two plastic composters made from recycled plastic, and a 1m x 1m square wooden composter, the wood has started to rot, so this will need replacing in the next year or so.

Post to Twitter