Honey Bees coming and going from beehive – day 22 after the swarm arrived at this hive. Weather today was warm and overcast, at least 20 degrees C, and humid.

Honey Bees - Day 22 - After swarm arrived in my beehive
Honey Bees coming and going from beehive – day 22 after the swarm arrived at this hive. Weather today was warm and overcast, at least 20 degrees C, and humid.
Honey Bees - Day 22 - After swarm arrived in my beehive
Are you up all night…….
fantastic….you will notice a Supertramp rift in the song from the later 70s!

I thought I'd pimp my car with a CloudCred sticker! - NICE!
My new badge…what more can I say here it is:-

The Kenya holiday photographs have now been uploaded to our Holiday Photograph Album.

or directly here :- https://andysworld.org.uk/album/Kenya/index.html
Lindsey has sorted, and out of the original 1000+ photographs taken, these are the best 40%!
These photographs are straight from the camera, and re-sampled and reduced for viewing on the website, so they are not the original 12MegaPixel images, they have not been retouched either!
These were all taken with our new CANON PowerShot SX50 HS bridge camera
No email as yet, but I’ve just heard via twitter, my name appears on the vExpert 2013 title holders announced in this document published yesterday evening?
vExpert 2013 awardees announced
Thanks again John Troyer, Corey Romero, and the VMware Social Media & Community Team
![]()
Many of you are probably thinking, my blog has turned into a VMware site, so here are some pictures of the strawberry plants, down on the allotment, I’m still working on. These were planted out last year, and the weather has been so cold, I’ve now covered and cloched two rows, so I’ll hopefully have some strawberries a little earlier.


Just finished weeding my asparagus patch, more photos to come.
If you would like to read the other articles in this series, they are listed here for your convenience.
HOW TO: Install and Configure VMware vSphere Hypervisor 5.1 (ESXi 5.1)
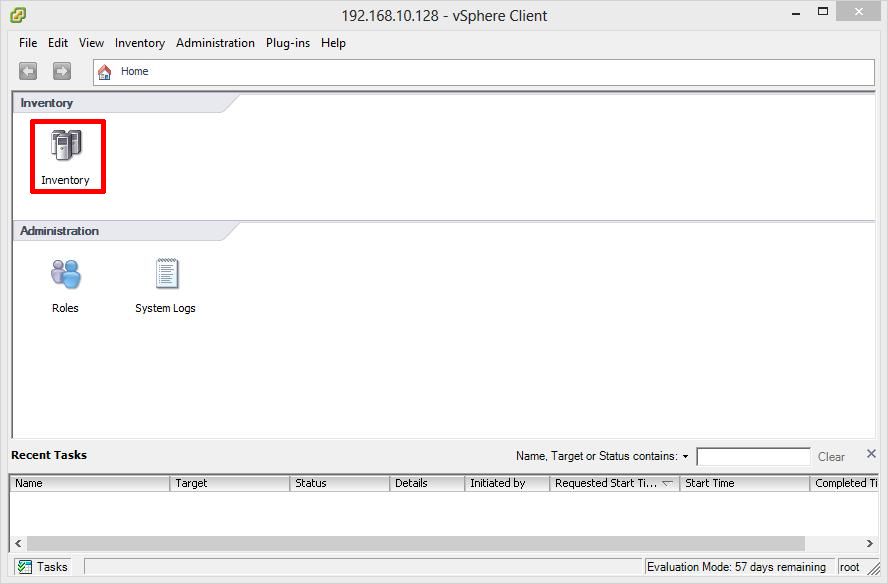
HOW TO: Connect to the VMware vSphere Hypervisor 5.1 (ESXi 5.1) using the vSphere Client
In this series of basic VMware articles for the Novice, I’ll be showing you the basic VMware skills required to install, configure and deploy virtual machines using VMware’s FREE VMware vSphere Hypervisor (ESXi).
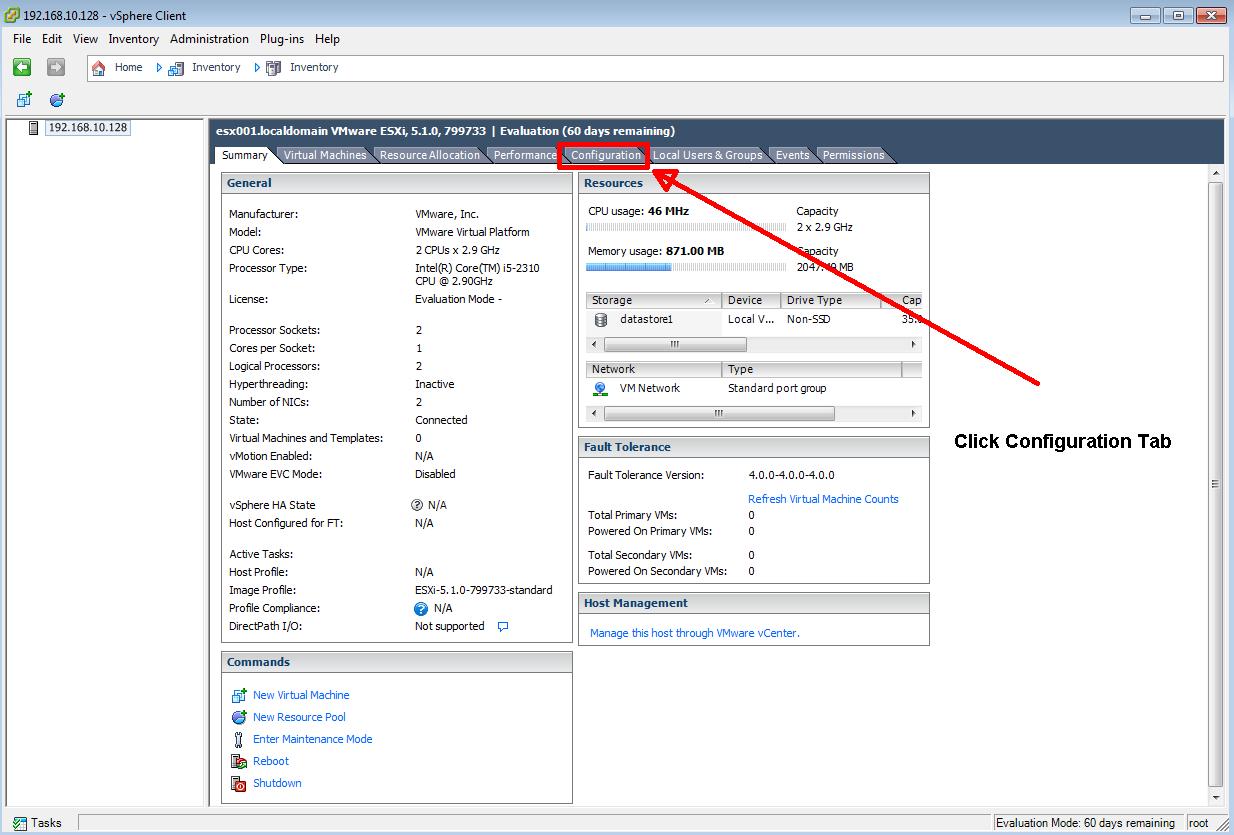
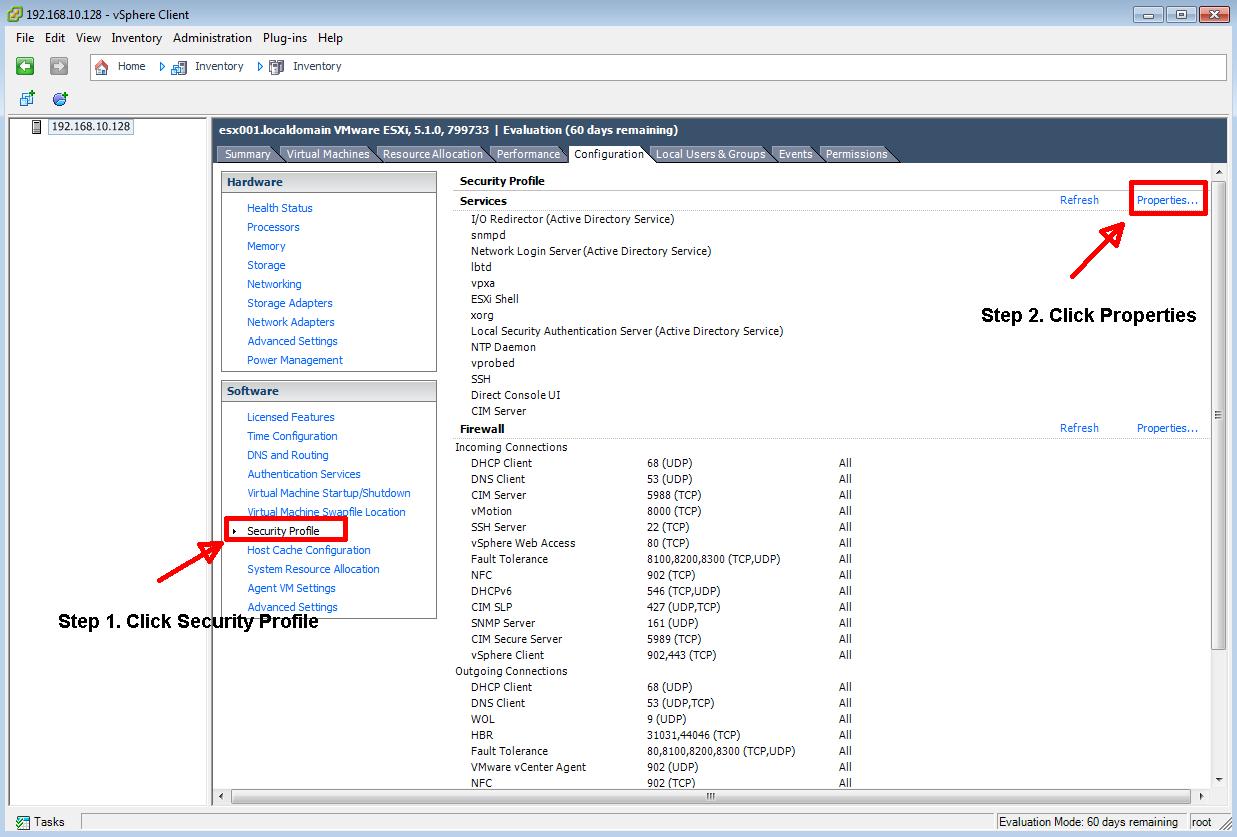
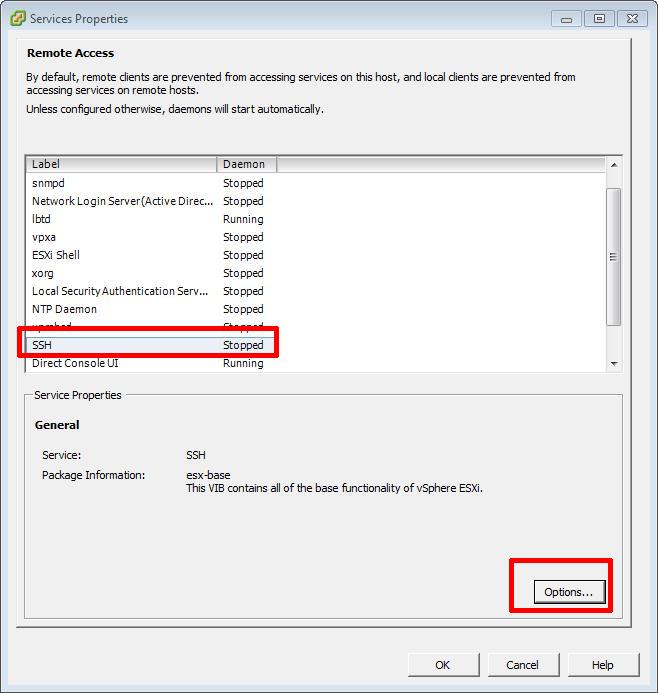
In this article we will show you HOW TO: Enable SSH Remote Access on a VMware vSphere Hypervisor 5.1 (ESXi 5.1) so you can remotely connect to the VMware vSphere Hypervisor 5.1 (ESXi 5.1) server remotely via SSH (PuTTY).
Please refer to my Andysworld! article on HOW TO: Connect to the VMware vSphere Hypervisor 5.1 (ESXi 5.1) using the vSphere Client
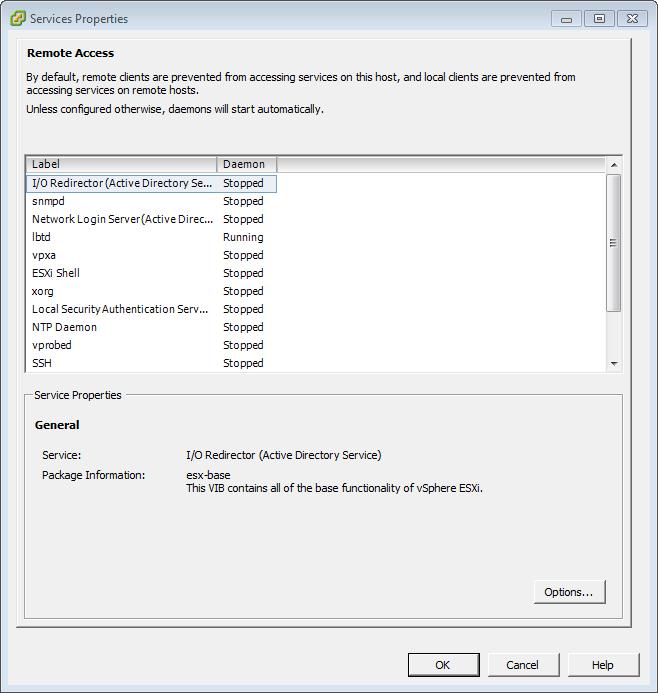
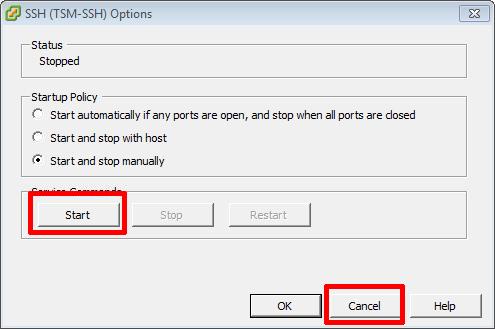

Confirm using PuTTY, you can connect to the server successfully.
In vSphere 4 1, 5.0 and 5.1, when you have enabled Remote SSH management of hosts from the vSphere Client, you may notice that that a Configuration Issues warning yellow box appears on the Summary page of the host ESXi server.

This Configuration Issues warning yellow box only appears when Remote SSH and/or ESXi shell has been enabled.
Please refer to my Andysworld! Article on HOW TO: Suppress Configuration Issues and Warnings Alert displayed in Summary status for ESXi 4.1 U2 or ESXi 5.0 after enabling SSH or ESXi Shell
Congratulations, you have successfully Enable SSH Remote Access on a VMware vSphere Hypervisor 5.1 (ESXi 5.1)
HOW TO: Install and Configure VMware vSphere Hypervisor 5.1 (ESXi 5.1)
HOW TO: Connect to the VMware vSphere Hypervisor 5.1 (ESXi 5.1) using the vSphere Client
In this series of basic VMware articles for the Novice, I’ll be showing you the basic VMware skills required to install, configure and deploy virtual machines using VMware’s FREE VMware vSphere Hypervisor (ESXi).
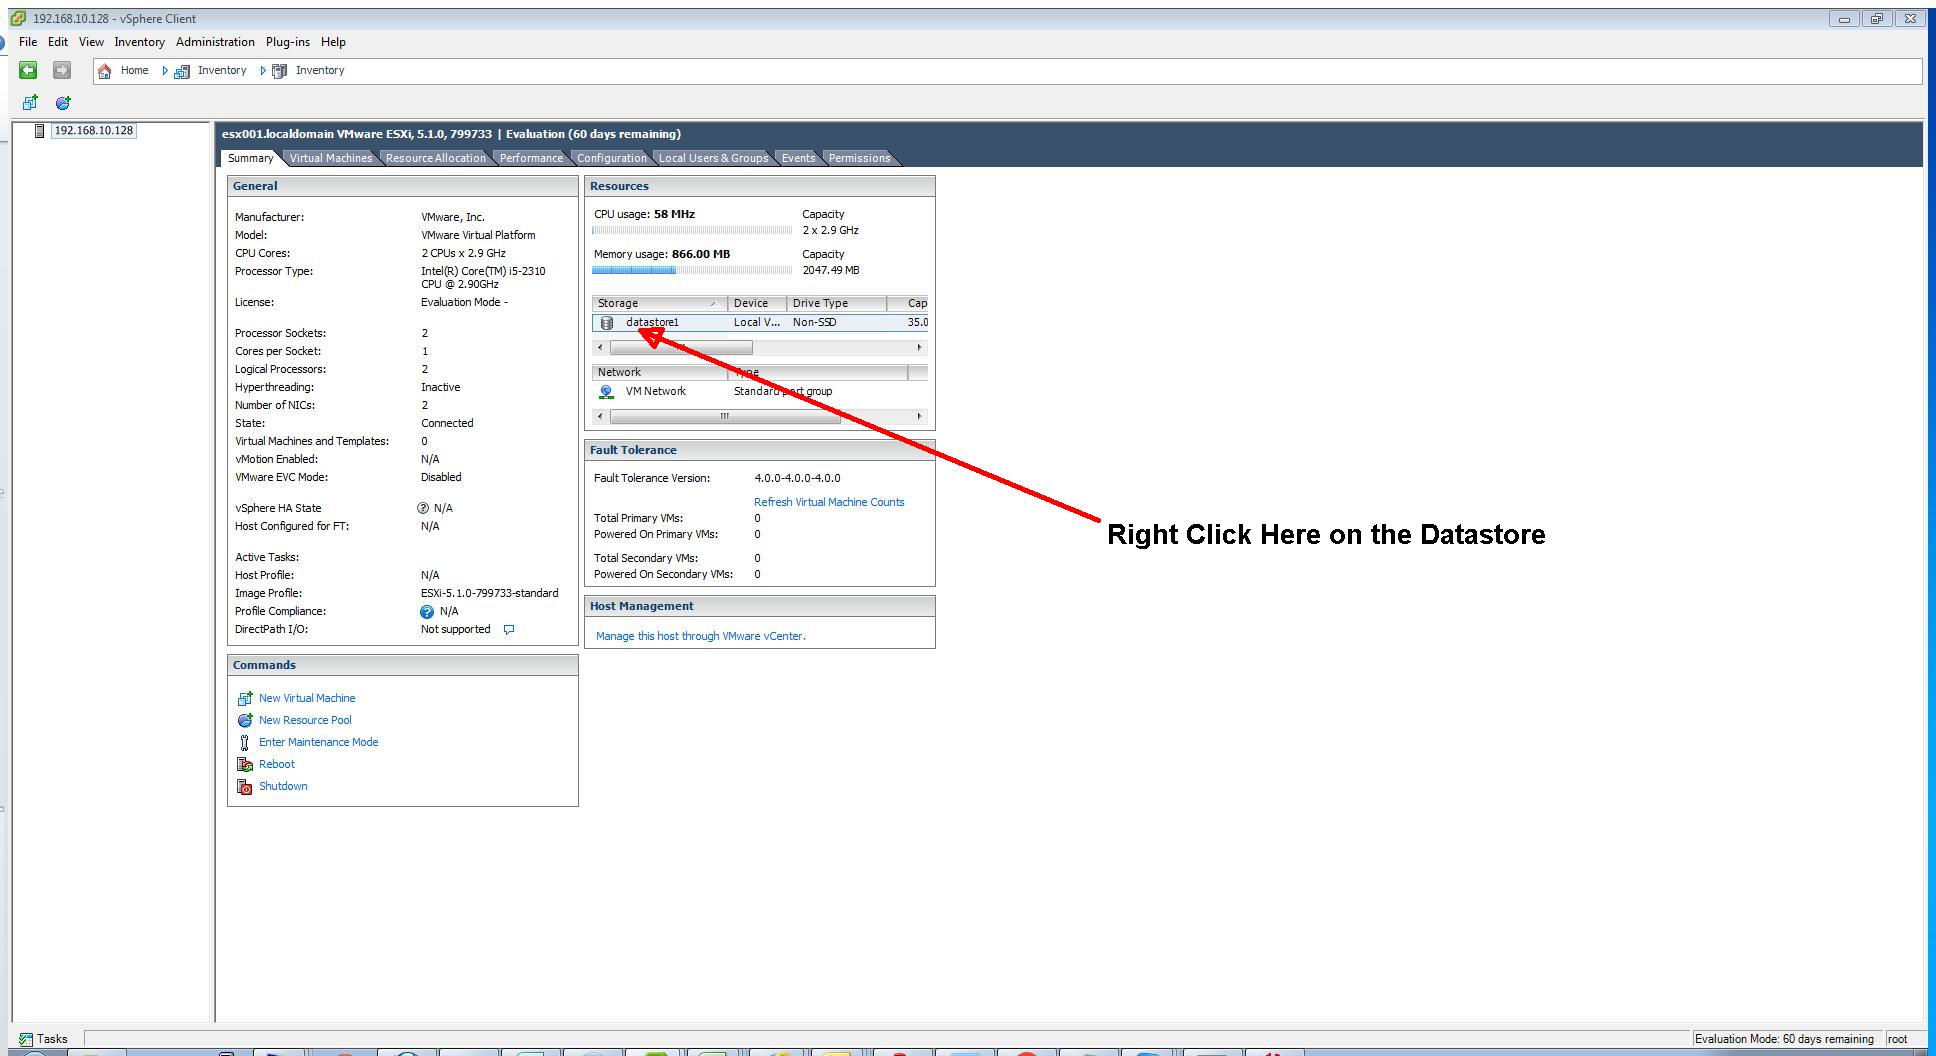
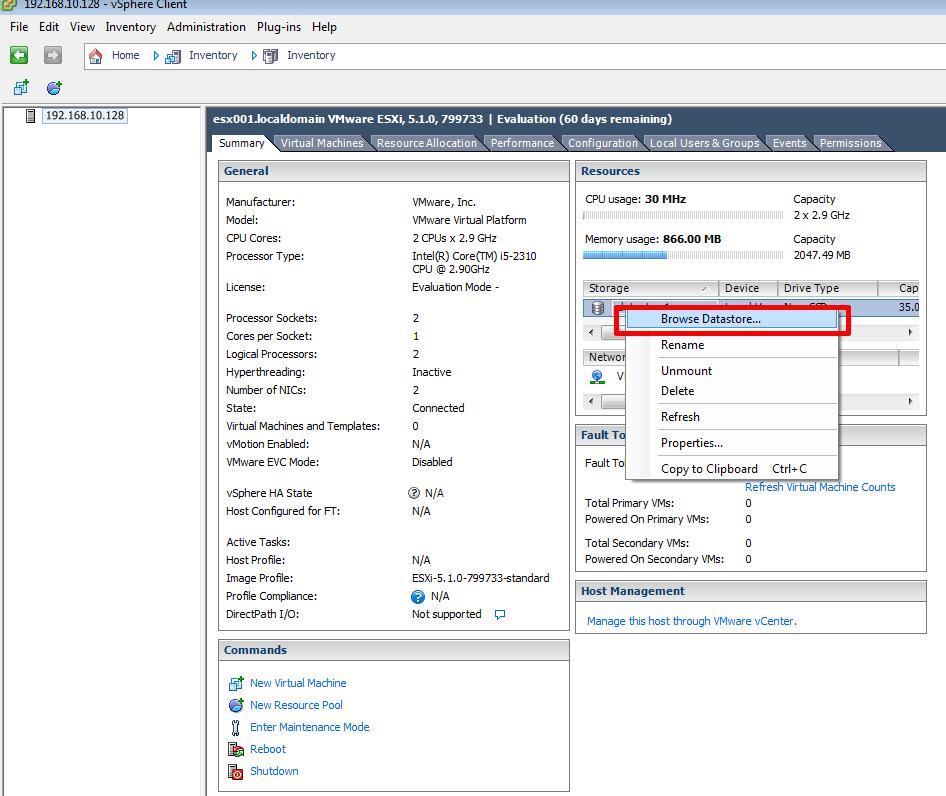
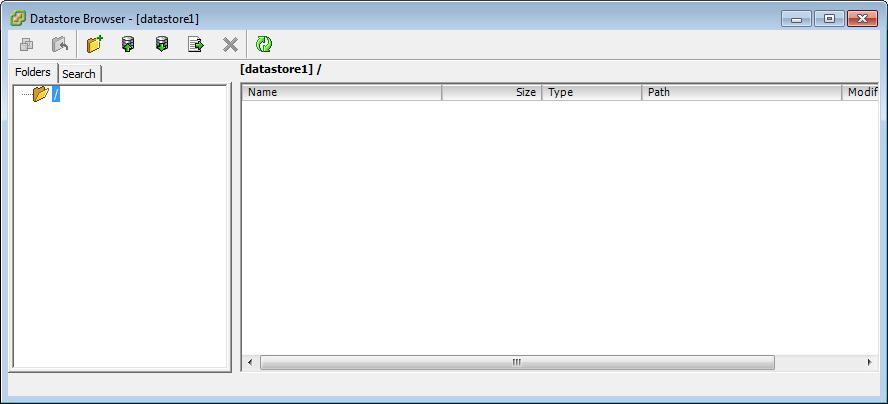
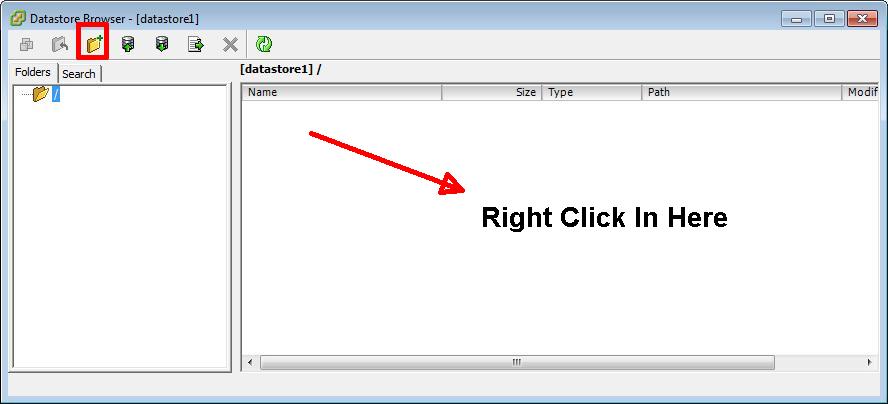
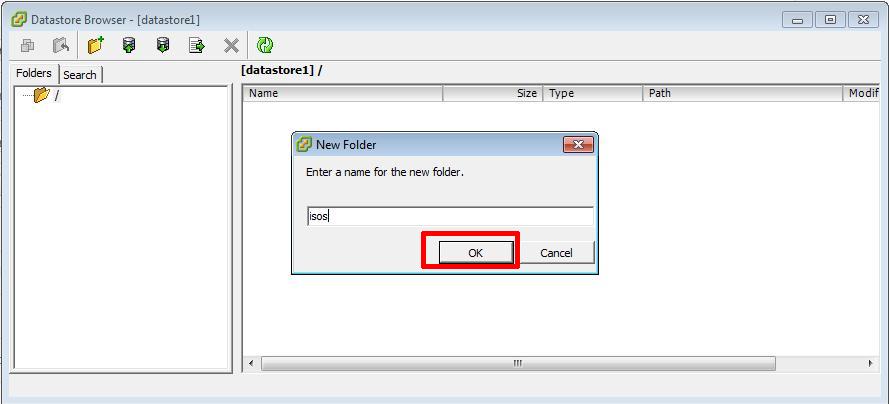
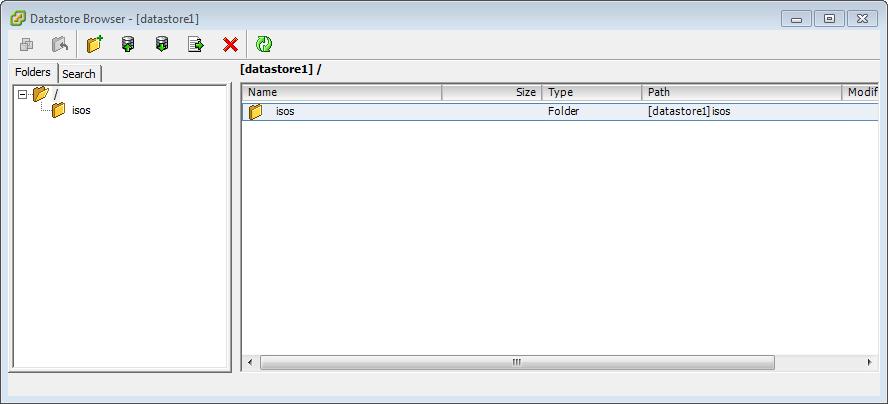
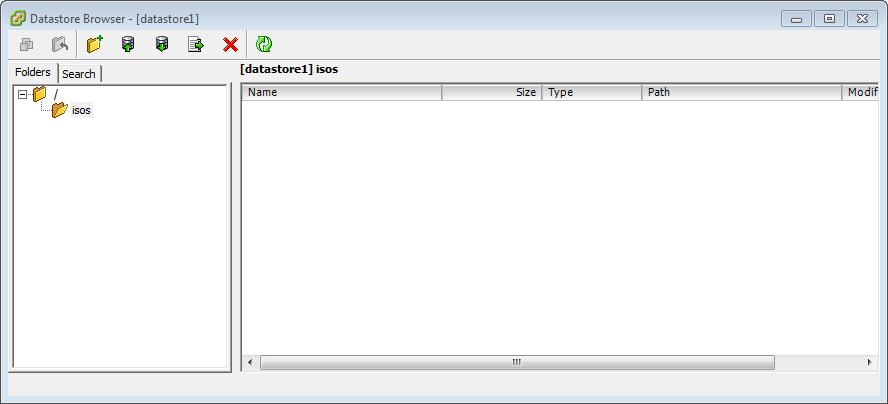
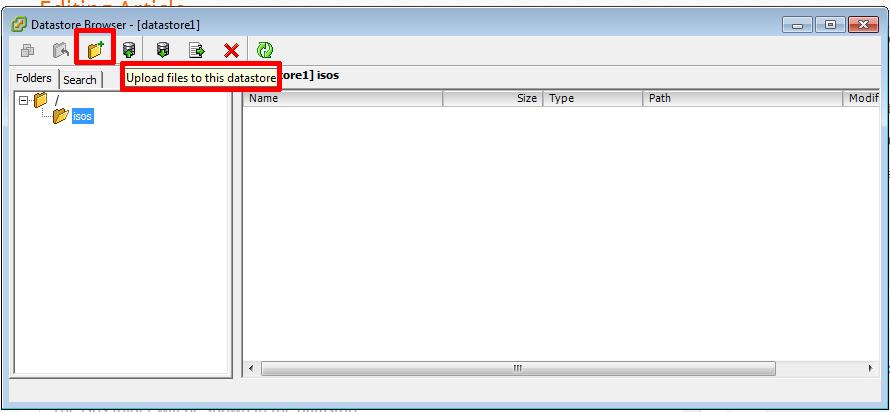
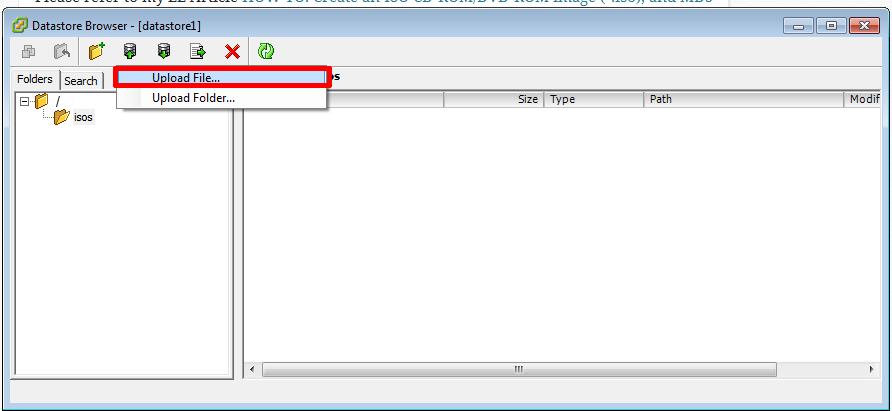
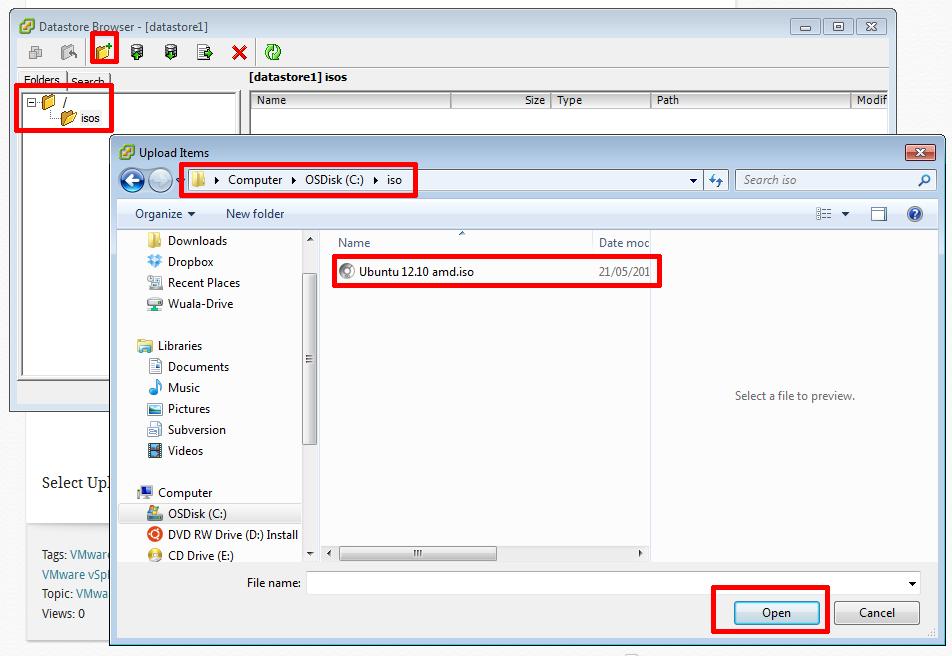
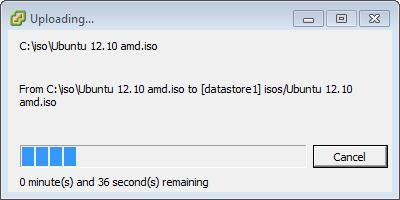
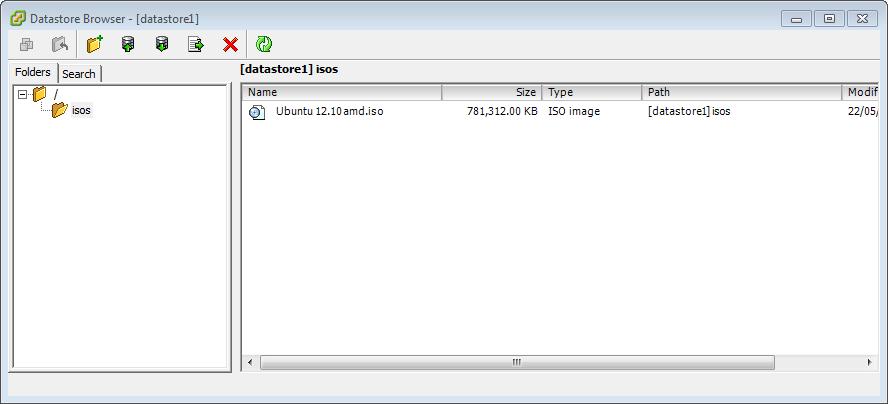
In this article we will show you HOW TO: Upload an ISO CD-ROM/DVD-ROM image to a VMware datastore for use with VMware vSphere Hypervisor 5.1 (ESXi 5.1) using the vSphere Client, and checking its MD5 checksum signature is correct. There are other third party tools, that can be used to upload ISO image files, these include:-
The above applications, require additional installation and configuration, in this article we will use the VMware vSphere Client.
Please refer to my EE article on HOW TO: Connect to the VMware vSphere Hypervisor 5.1 (ESXi 5.1) using the vSphere Client

Please refer to my Andysworld! Article HOW TO: Create an ISO CD-ROM/DVD-ROM image (*.iso), and MD5 checksum signature, for use with VMware vSphere Hypervisor 5.1 (ESXi 5.1)

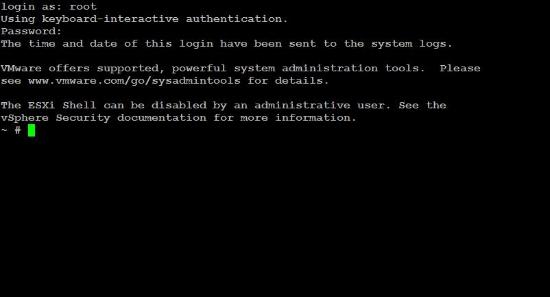
To complete the following step SSH must be enabled and running on your VMware vSphere Hypervisor 5.1 (ESXi 5.1) host server, if SSH is not running you will receive a connection refused message.
To Enable SSH on your VMware vSphere Hypervisor 5.1 (ESXi 5.1) host server, please see my Andysworld! article HOW TO: Enable SSH Remote Access to a VMware vSphere Hypervisor 5.1 (ESXi 5.1)
Connect to the VMware Hypervisor ESXi server via SSH. Using PuTTY a free telnet and SSH client or another SSH client Login and Connect to the VMware Hypervisor ESXi server, using IP address or hostname of the VMware Hypervisor ESXi server, using root username and password credentials. This can also be performed if you have access to the console.

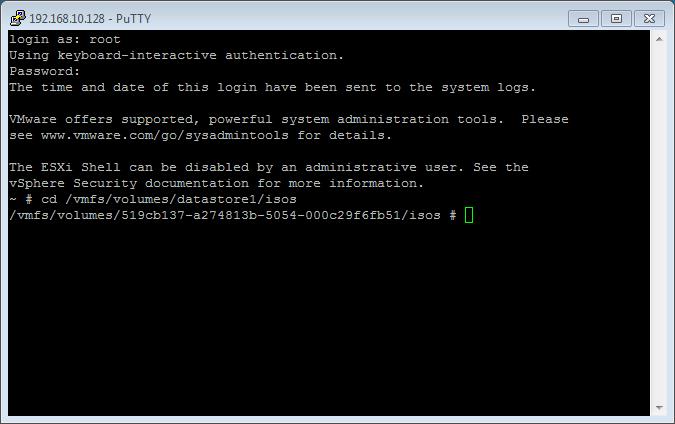
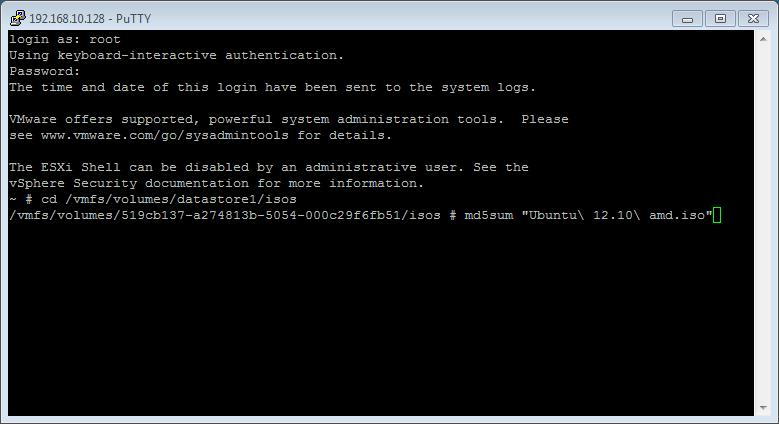

type md5sum Ubuntu 12.10 amd.iso in the SSH session window. After several minutes, and the time taken, depends on the size of the ISO image file, and speed of host processor and storage, a MD5 checksum signature will be displayed. The number displayed next to the filename – 7ad57cadae955bd04019389d4b
If you would like to read the other articles in this series, they are listed here for your convenience.
HOW TO: Install and Configure VMware vSphere Hypervisor 5.1 (ESXi 5.1)
HOW TO: Connect to the VMware vSphere Hypervisor 5.1 (ESXi 5.1) using the vSphere Client
In this series of basic VMware articles for the Novice, I’ll be showing you the basic VMware skills required to install, configure and deploy virtual machines using VMware’s FREE VMware vSphere Hypervisor (ESXi).
This article will show you how to create an ISO CD-ROM/DVD-ROM image (*.iso), and MD5 checksum signature, for use with VMware vSphere Hypervisor 5.1 (ESXi 5.1).
What is an ISO? (Andy’s Laymen Definition)
An ISO is an image or bit copy of a CD-ROM/DVD-ROM, the ISO is a file, similar to a compressed archived file, this *.iso file contains the data from a CD-ROM/DVD-ROM. The ISO file is a virtual CD-ROM/DVD-ROM. Using an *.iso file has many advantages, some are listed below:-
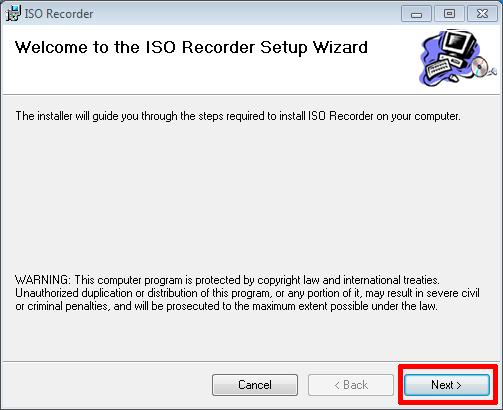
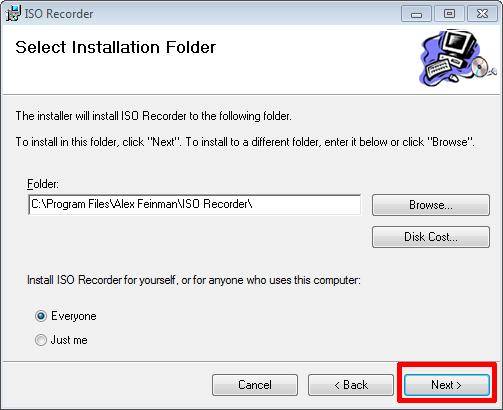
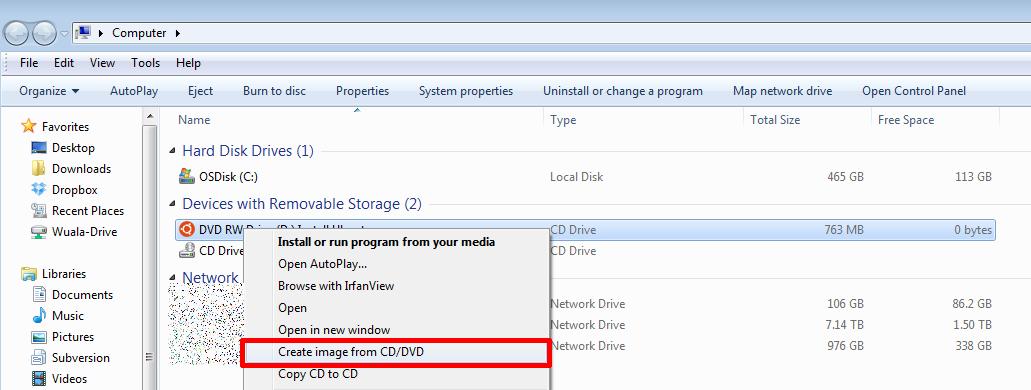
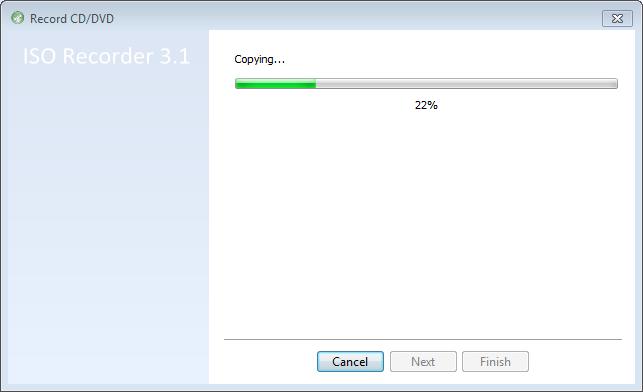
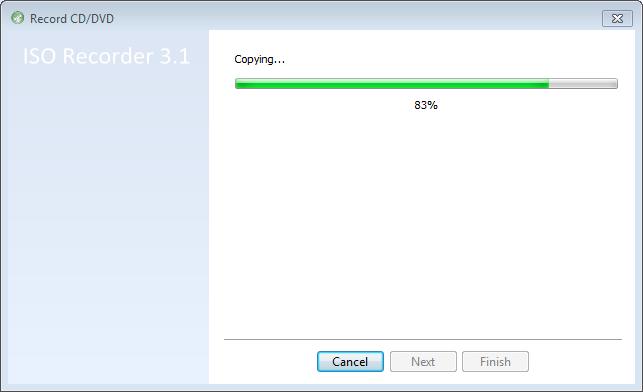
Download ISO Recorder from http://alexfeinman.co/isorecorder.htm We like to use ISO Recorder, because it is a small lightweight application, which integrates into the shell of your OS (operating system). e.g. you right click the CD-ROM/DVD-ROM reader and the option is there to create an ISO.
There are several versions of ISO Recorder to download, ensure you download the correct version for your OS, and the correct version for your processor, as there are 32-bit and 64-bit versions available.
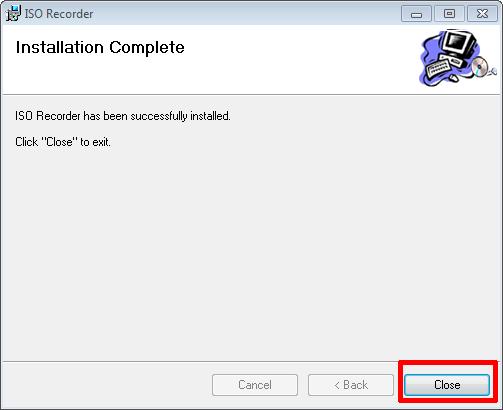
After you have downloaded the correct version, Double-Click the installer program (*.msi) you have download, we will install the Windows 7 64 bit version, which has the filename ISORecorder31x64.msi


We will use the MD5 & SHA-1 Checksum Utility to create a MD5 checksum signature for our freshly created ISO image file. This is important, so we can compare these signatures, once we have completed the transfer to our VMware host servers, and confirm the ISO image file has not been corrupted in transfer.

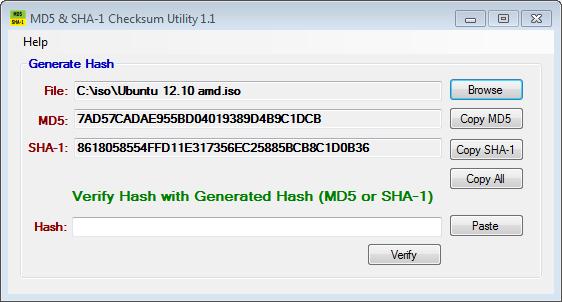
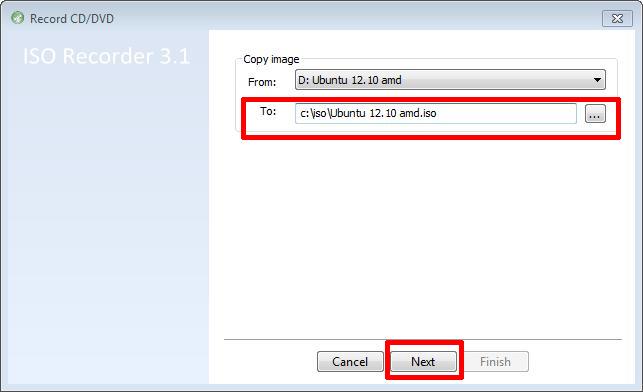
The MD5 checksum for my Ubuntu 12.10 amd.iso is:-
MD5 Checksum: 7AD57CADAE955BD04019389D4B9C1DCB
SHA-1 Checksum: 8618058554FFD11E317356EC25885BCB8C1D0B36
Generated by MD5 & SHA-1 Checksum Utility @ http://raylin.wordpress.com/downloads/md5-sha-1-checksum-utility
Please note the MD5 checksum value for use with the VMware vSphere Hypervisor 5.1 (ESXi 5.1)
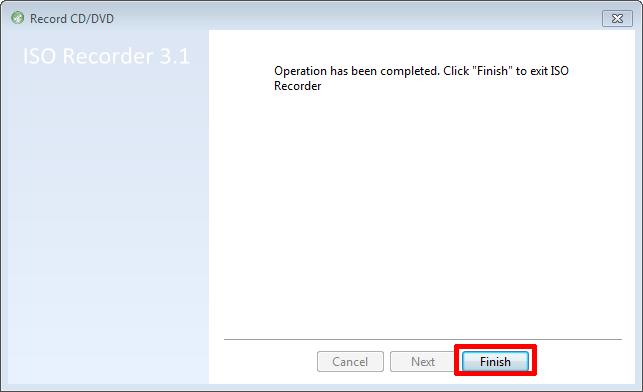
Congratulations you have successfully created your first ISO (*.iso), and created a MD5 checksum signature for use with VMware vSphere Hypervisor 5.1 (ESXi 5.1).
In my next Article in this series, we will show you HOW TO: Upload and Check the MD5 signature of an ISO CD/DVD image to a VMware datastore using the vSphere Client, for use with VMware vSphere Hypervisor 5.1 (ESXi 5.1)
![[Valid RSS]](http://andysworld.org.uk/images/valid-rss.png "Validate my RSS feed")