Posts Tagged ‘VMware ESXi 4.1’

HOW TO: Backup an ESXi installation on an USB Flash Drive or SD card, for security or redundancy.

Tuesday, January 10th, 2012

How to Backup ESXi installation on a USB flash drive or SD card.

Requirements

1. A valid ESXi installation on a USB flash drive or SD card.
2. A copy of Winimage for Windows.
3. A Windows computer.
4. Optional Blank DVD for making backup.
5. Optional USB flash drive or SD card for flash backup.

1

Download Winimage from the Internet

Using your internet browser, Internet Explorer or Mozilla, download a copy of Winimage from http://www.winimage.com/download.htm.

WinImage is a shareware product. You may copy, distribute, and try it for free, but if you use for longer than the evaluation period, you must register. You will receive a valid license, a registration code and the latest release.

2

Install Winimage

Install Winimage as per the vendors instructions on your Windows computer you need to backup the USB flash drive or SD card.

3

Insert the ESXi USB flash drive or in USB port on computer

Insert the ESXi USB flash drive or SD card inserted in a card reader into the computer you have installed Winimage on.

4

Start Winimage

Winimage Startup

Winimage Startup

Start Winimage from the Start Menu on your Windows computer.

5

From the disk menu

Create Virtual Hard Disk

Create Virtual Hard Disk

From the disk menu, in Winimage, select Creating Virtual Hard Disk Image from Physical Drive.

6

Select the USB flash drive or SD card

See picture below

Select a physical drive in the list

Select a physical drive in the list

Select the USB flash drive or SD card, from the list, in this example, I’m using a Flash LUXIO USB flash drive.

7

Select Create Fixed Size Virtual Hard Disk

Select usb flash drive

Select usb flash drive

Select the Fixed Size Virtual Hard Disk, ensure there is a dot in this selection. This ensures that the saved backup image is exactly the same size as the flash drive, you are copying example 2GB for a 2GB USB flash drive, 4GB fort a 4GB flash drive.

8

Click OK

Click OK

9

Specify a disk location and select Save

Select save location

Select save location

Once you have specified a location, a progress bar will continue on screen showing the progress of the copy.

Progress Bar

Progress Bar

10

Partiton to connect to

When prompted to connect to partition, click okay and Exit Winimage

11

The USB flash drive or SD contents will be saved as a complete image.

The contents will be saved to disk.

12

Complete.

The operation is complete and you can exist Winimage, and Safely remove your USB flash drives or SD cards, from the computer, by selecting the Safely remove hardware icon, in the system Smart tray.

13

Backup to DVD

If you image size is less than the size of a DVD (4.5GB), I also backup the USB/SD card installation image to a DVD, and if you have a spare USB flash drive, it doesn’t hurt writing the contens to another USB flash drive or SD card. (and make sure you label with date, time, and version and build of ESX, and what server it is for!)

Post to Twitter

Tweaking ESXi 4.1U1 – Adding un-supported hardware to VMware vSphere ESXi 4.1 U1 – Adding a QLE-220 to ESXi 4.1 U1

Monday, September 19th, 2011

I’ve decided to write this article, because I get many queries about ESXi does not “see my network interface card, or storage controller.”

How do I add this mass storage controller, network interface card,  fibre channel HBA to ESXi?

Usually storage controllers, network interface cards are already supported within VMware vSphere ESXi 4.1 U1, they been tested and verfied by Vendors and VMware, ESXi 4.x can have limited support for hardware, check the HCL to check it it’s supported. But with a few tweaks, you can successfully add the unsupported storage,  network interface card to ESXi 4.x.

This is un-supported by VMware, your mileage and stability of your OS could be affected. Unfortunately, this cannot be discussed on some IT Technology websites, due to breach of their policy, possibly it is classified as “hacking” – this is a grey area.

I have some Qlogic QLE-220 4GB Fibre Channel PCI-Express cards, these are not listed on the VMware Hardware Compatibility List. You can quickly deduce if the hardware is not supported because ESXi 4.x, will not load the drivers at Bootup, and the devices will be missing from Network or Storage Adaptors.

From previous experience I know that the Qlogic QLE-220 uses the same driver as the qla2xxx.o (module driver), the reason it is not recognised in ESXi 4.x, is because the PCI ID is not present in the “simple.map” file on ESXi. (you may need to add you module!)

ESXi 4.1 U1 Storage Adaptors listed in vSphere GUI Client before tweak

ESXi 4.1 U1 Storage Adaptors listed in vSphere GUI Client before tweak

A. Finding the PCI ID
I need to find the PCI ID for the un-supported network or storage device. The PCI ID can be obtain in two ways, you could check the The PCI ID Repository, and check if the device has been added and available (Qlogic QLE-220 is here http://pci-ids.ucw.cz/read/PC/1077/5432). The PCI ID is in two parts, the first four characters are the Vendor ID, and the second four characters are the Device ID. But as I’ve got to install this in the ESXi server, it can be verfied by using the lspci -v command. With these devices, ESXi is able to recognize the devices and thus includes the device name.

output from lspci -v

output from lspci -v

from the output of lspci -v
000:002:00.0 Fibre Channel Serial bus controller: QLogic Corp SP232-based 4Gb Fibre Channel to PCI Express HBA
Class 0c04: 1077:5432

Vendor Id: 1077, Device Id: 5432

B. Adding the device to the mapping file
These values needed to be added to files called “simple.map and pci.ids”, which is contained in a file called oem.tgz. This is how we add the vendor and device id

  1. cd /tmp/
  2. mkdir -p oem/etc/vmware
  3. cd oem/etc/vmware
  4. cp /etc/vmware/simple.map simple.map
  5. vi simple.map (add PCI IDs as found above)
  6. simple.map modify

    simple.map modified with vendor id and device id

  7. Exit vi – press ESC and enter :wq
  8. cp /etc/vmware/pci.ids pci.ids
  9. vi pci.ids (this file is self-explanotory, it’s the description of the controller)
  10. pci.ids already contains a description for my device!

    pci.ids already contains a description for my device!

  11. Exit vi – press ESC and enter :wq
  12. cd /tmp/oem
  13. tar -cvzf oem.tgz etc
  14. cp oem.tgz /bootbank/oem.tgz
  15. restart ESXi host.

At ESXi bootup, you will see the driver load, Fibre Channel adaptors always take a while to load the modules.

The following vSphere GUI client Storage Adaptors screenshots confirms the drivers have been loaded

ESXi 4.1 U1 Storage Adaptors listed in vSphere GUI Client after tweak

ESXi 4.1 U1 Storage Adaptors listed in vSphere GUI Client after tweak

I just need to find some fibre cable, 4GB FC Switches, and spare LUNs for testing!

At the ESXi console you can also use esxcfg-module -l (-q) to check for the module loaded (driver). You can also use this to load the module for testing.

I’ll be investigating ESXi 5.0 later this week.

UPDATE A few hours this afternoon (Tue 20th), tweaking ESXi 5.0, to provide support for the Qlogic QLE-220, and understanding how to add un-supported hardware to ESXi 5.0.

See here

Post to Twitter

How to boot a Server or Workstation from a USB Flash drive or USB External Hard disk

Sunday, August 28th, 2011

All the HP ProLiant MicroServers I’ve purchased without CDROM/DVDROM drives, so how did I manage to install all the operating systems, Microsoft Windows Server 2008 R2, Oracle Solaris 11 Express, FreeNAS, VMware ESXi 4.0 and ESXi 5.0 quickly and easily onto the servers.

Well quite simply, I made  my USB External Hard Disk bootable, and copied the ISOs onto the USB External Hard Disk, connected to the HP ProLiant MicroServers, and booted the ISO CDROM from the USB External Hard Disk.

This has the following advantages

1. The read time is much faster than conventional CDROM/DVDROM and USB flash drive.

2. No requirement to burn an ISO image to a CDROM.

3. Keeps all your ISOs in one place.

If you’ve downloaded the software already from the internet, as a download, you already have the ISO ready to configure, otherwise download and install ISORecorder, a brilliant little application, which just creates an ISO image.

Next you’ll need one of the follow applications, and these applications will do the rest, just make sure you set the computer’s BIOS to boot from USB!

1. UNetbootin (Download Link)

UNetbootin

UNetbootin

2. YUMI Multiboot MultiSystem (Download Link)

YUMI Multiboot MultiSystem

YUMI Multiboot MultiSystem

Post to Twitter

Microsoft Windows NT Workstation 4.0 and Microsoft Windows NT Server 4.0 on VMware ESXi 5.0

Friday, August 26th, 2011

I’ve categorised this blog post as Vintage, well I think Microsoft Windows NT Workstation 4.0 and Microsoft Windows NT Server 4.0, deserve Vintage status, it’s over 15 years since it’s release, and I still remember the day, when I was the only Senior Analyst in a new job, that had installed Windows New Technology, so the first task of the day (week) was to sit with a pile of floppy disks, because they had not purchased the CDROM version, and install on 10 computers, I was still waiting for my “Top Secret Security Clearance” to be approved, so I was locked in the Datacentre! On reflection now, it would seems a very odd place to lock someone on a Ministry Of Defence site, that did not have clearance! If I needed to take a comfort break, I had to be escorted around the site!

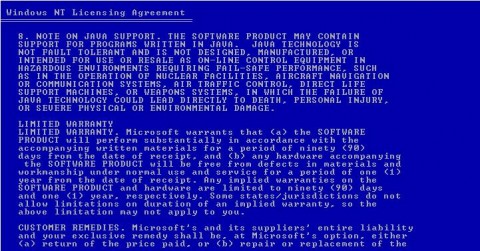
Windows NT 4.0 License Agreement

Windows NT 4.0 License Agreement

If you’ve never read the Windows NT 4.0 License Agreement, it states 8. “…. Java Technology is not fault tolerant and is not designed, manufactured, or intended for use or resale as on-line control equipment in hazardous environments or nuclear facilities, aircraft navigation or communication systems…..”.

So Windows NT Workstation 4.0  is not supposed to be used for a messaging system? (best not say anymore about that!).

Windows NT Workstation 4.0 and Microsoft Windows NT Server 4.0 install so fast in a virtual environment, after many many many, manual installations and deployments on physcal servers and workstations, installation is over in 60 seconds. (it’s just rather anyonying that SP6 is require to install VMware Tools!, all of 32MB!).

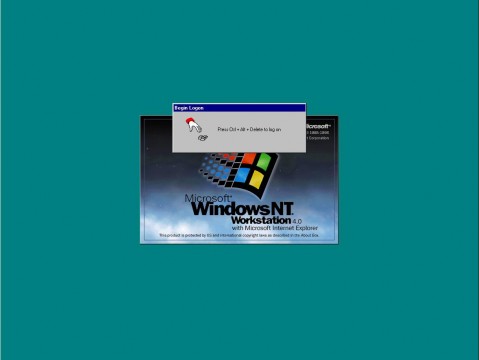
Windows NT Workstation 4.0

Microsoft Windows NT Workstation 4.0

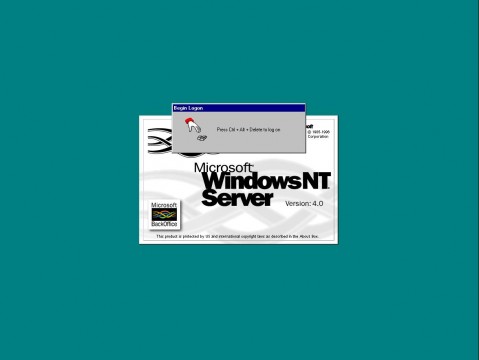
Microsoft Windows NT Server Version : 4.0

Microsoft Windows NT Server Version : 4.0

You are probably wondering at this point, why am I installing and testing Microsoft Windows NT Workstation 4.0 and Microsoft Windows NT Server 4.0 on VMware ESXi 5.0!

Ah, well good reason, Boot Ferrule Man, who works in the Semiconductor Industry, one of their semiconductor robots, lets call him “Cheese”, which is controlled by an NT 4.0 PC with SSD installed in 1995, has gone wrong! So I’m just testing the media! (well okay, ISOs, the media is archived!).

Told you it had a reason!!!

and final shout-out, All the very Best Steve. I wish you and your family well.

Post to Twitter