This morning I had a delivery from Experts Exchange.

What's in the box ?

This is what's in the box!
The reason for so many shirts, I give them to friends, staff colleagues, and students! If you want a shirt just ping me an email!
This morning I had a delivery from Experts Exchange.
What's in the box ?
This is what's in the box!
The reason for so many shirts, I give them to friends, staff colleagues, and students! If you want a shirt just ping me an email!
I’ve been given the nod, I can publish this…..
Want to get a head start, and look and test the next VMware vSphere release, VMware vSphere Public Beta Program
Click the link and Join Here
VMware vSphere Public Beta Program
Participants are expected to:
• Online acceptance of the Master Software Beta Test Agreement will be required prior to visiting the Private Beta Community
• Install beta software within 3 days of receiving access to the beta product
• Provide feedback within the first 4 weeks of the beta program
• Submit Support Requests for bugs, issues and feature requests
• Complete surveys and beta test assignments
• Participate in the private beta discussion forum and conference calls
vSphere Beta Program Overview
We are excited to announce the upcoming VMware vSphere Beta Program. This program enables participants to help define the direction of the most widely adopted industry-leading virtualization platform. Folks who want to participate in the program can now indicate their interest by filling out this simple form. The vSphere team will grant access to the program to selected candidates in stages. This vSphere Beta Program leverages a private Beta community to download software and share information. We will provide discussion forums, webinars, and service requests to enable you to share your feedback with us.
You can expect to download, install, and test vSphere Beta software in your environment or get invited to try new features in a VMware hosted environment. All testing is free-form and we encourage you to use our software in ways that interest you. This will provide us with valuable insight into how you use vSphere in real-world conditions and with real-world test cases, enabling us to better align our product with your business needs.
Some of the many reasons to participate in this beta opportunity:
• Receive early access to the vSphere Beta products
• Interact with the vSphere Beta team consisting of Product Managers, Engineers, Technical Support, and Technical Writers
• Provide direct input on product functionality, configurability, usability, and performance
• Provide feedback influencing future products, training, documentation, and services
• Collaborate with other participants, learn about their use cases, and share advice and learnings
Here is the replacement processor for my HP ProLiant MicroServer Gen8. It has taken me a while to track this one down. It has a TDP of only 17 watts, compared to the stock Intel Celeron G1610T, which has a TDP of 35 watts.
These are like rocking horse dodo…
It’s an Intel Xeon E3-1220L V2, it’s a low power, 17 watt, 2 Core, 4 Thread Xeon with Intel VT-d.
I’m waiting for my thermal compound, before I install it.

For being awarded Top Contributor 2014 at Experts Exchange, my prize, not only the usual T-shirts, and trophies, but also an all expensive paid trip to VMworld Europe 2015!
So it’s not all about T-Shirts!

This is the email from Melanie Spatola, Community Manager at Experts Exchange.

There’s an article here written by Brian Clausen, CEO, Experts Exchange – How to Get the Most Career Value From Social Networking, and here The Benefit of a Global, Online Peer Network, which are interesting reading!
So in 2015, I’ve been Awarded
VMware vExpert 2015 (again, fifth year this year, 2011-2015)
![]()
Experts Exchange Top Contribution Award 2014 (this is a new award, but it’s like a supercharged Expert of the Year 2014, or MEGA Expert of the Year 2014, so again four years in a row, 2014-2011)
Microsoft IT Pro New Year’s Honours List 2015
Now you are all probably thinking, oh no not more T-Shirts, my prize and award for being the Top Contributor 2014 at Experts Exchange, is an all expensive paid, sponsored trip to VMworld Europe 2015 in Barcelona.

In my previous Experts Exchange Articles, most have featured Basic and Intermediate VMware and Virtualisation Topics.
If you would like to read my Basic VMware articles, they are listed at the end of this article for your convenience.
This article will show you HOW TO: Deploy and Install the VMWARE vCenter Server Appliance 6.0, also known as the vCenter Linux Appliance, or VCSA 6.0.
You cannot trial the VMWARE vCenter Server Appliance 6.0, you must have a license for VMware vSphere vCenter Server 6.0 to download the appliance from VMware. Previous versions of the VMWARE vCenter Server Appliance were supplied as a ready made OVF for download, this procedure has now changed in version 6.0, and a ISO (DVD image) now has to be downloaded.
Download the VMware-VCSA-all-x.y.z-abcdefg.iso (DVD image) from VMware. The filename used in this tutorial is called VMware-VCSA-all-6.0.0-2175370.iso, the build number and filename are likely to change when generally available.
Burn or Mount the VMware-VCSA-all-6.0.0-2175370.iso (DVD image) on your Administration workstation.
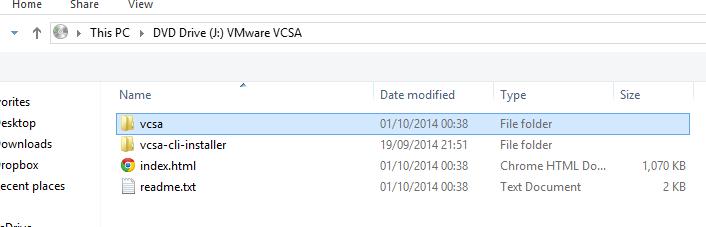
In the VCSA folder on the DVD, install the VMware-ClientIntegrationPlugin-6.0.0.exe before you begin. (You will need to close your browser).
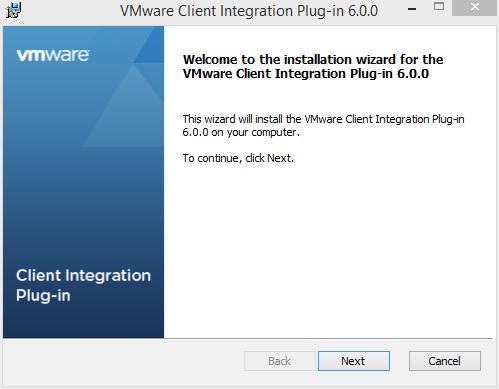
Double click the VMware-ClientIntegrationPlugin-6.0.0.exe application.
 Click Next to start the installation.
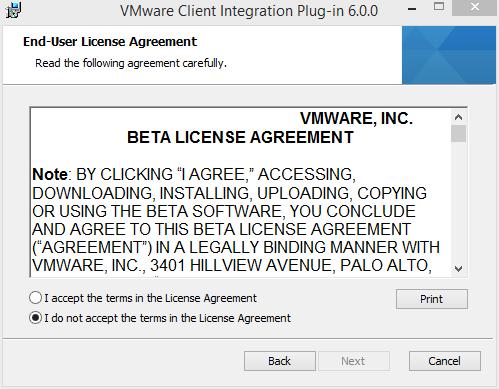
 Accept the End User License Agreement, and Click Next to continue.
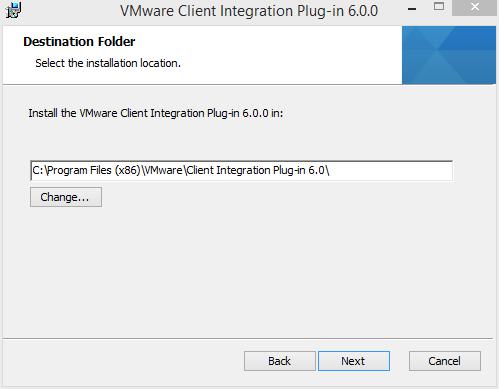
 You can change the program location if required, click Next to continue.
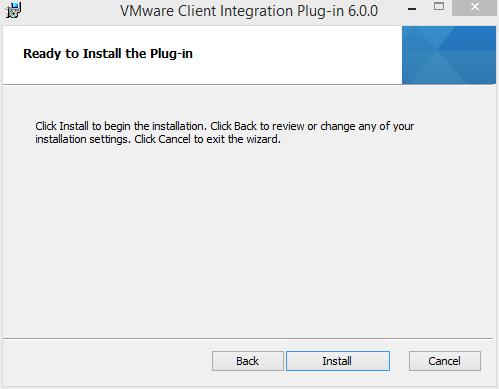
 Click Install to start the installation
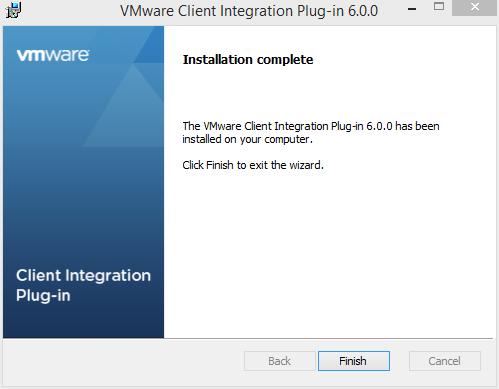
Click Finish to complete the installation.
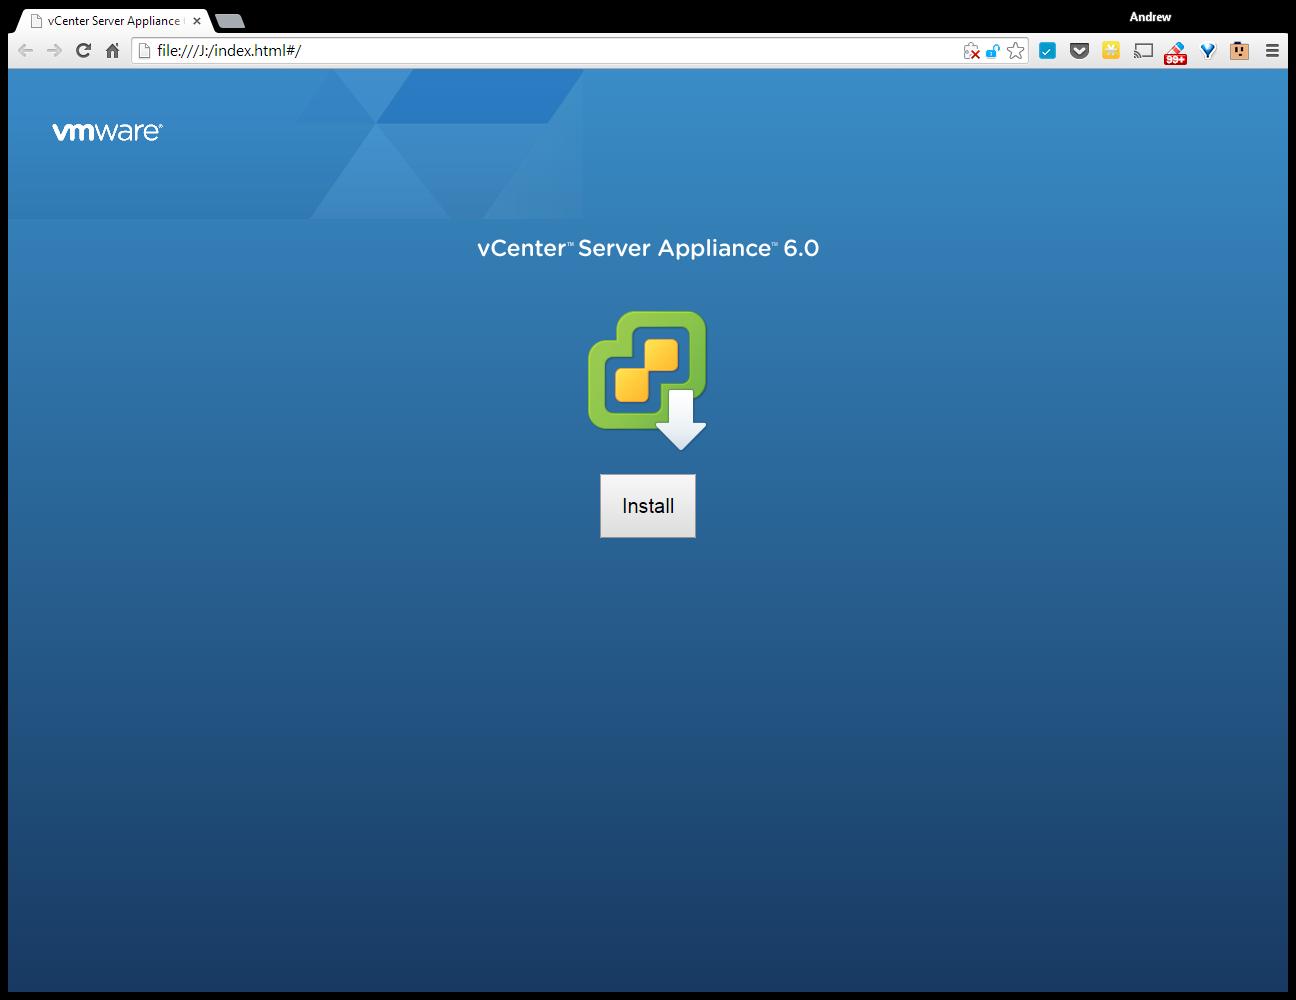
Double Click the index.html file in the root of the DVD.
 Ensure pop up blockers to no block the Client Integration Plugin.
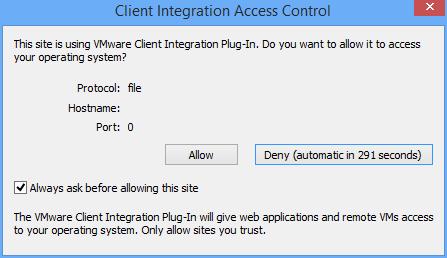
 Select Allow, so the VMware Client Integration Plug-In can access the operating system.
 Select and Click Install
Accept the End User License Agreement, and Click Next to continue.
Enter the FQDN or IP Address of an VMware vSphere ESXi Host Server.
Click OK, if a certificate warning is displayed. (this is likely if your certificate does not match your FQDN).
Enter the name for the VMWARE vCenter Server Appliance 6.0 or accept the defaults. Enter and remember the password for the appliance.
Select and use an Embedded Platform Services Controller. Click Next to continue.
Setup and Configure Single-Sign-On. (Remember the password!). Enter a password, for Single Sign-On, Domain Name, and Site Name, I would recommend, using vsphere.local for the domain name, and remembering the password! Click Next to continue.
Select the appliance size.
In this tutorial, we are going to deploy a tiny appliance, but make sure you have 2 vCPU and 8GB of memory in the ESXi host server.
Select a datastore to install the appliance, and select Next to continue.
It will check the datastore for storage space
Select and use an Embedded vPostgres database
Enter network settings for the appliance, we have specified a static IP Address, and a FQDN of vcsa6.cyrus-consultants.co.uk. We also selected an external NTP server for time synchronisation, and enabled SSH.
Review the settings, and click Finish to start the installation and deployment of VMWARE vCenter Server Appliance 6.0.
The appliance is deployed
Packages are deployed
the appliance is configured
Starting Services
Installation Completed. Click the link provided to connect to vCenter Server Appliance via your browser.
Enter your Administrator@vsphere.local username and password.
 You are connected to vCenter Server
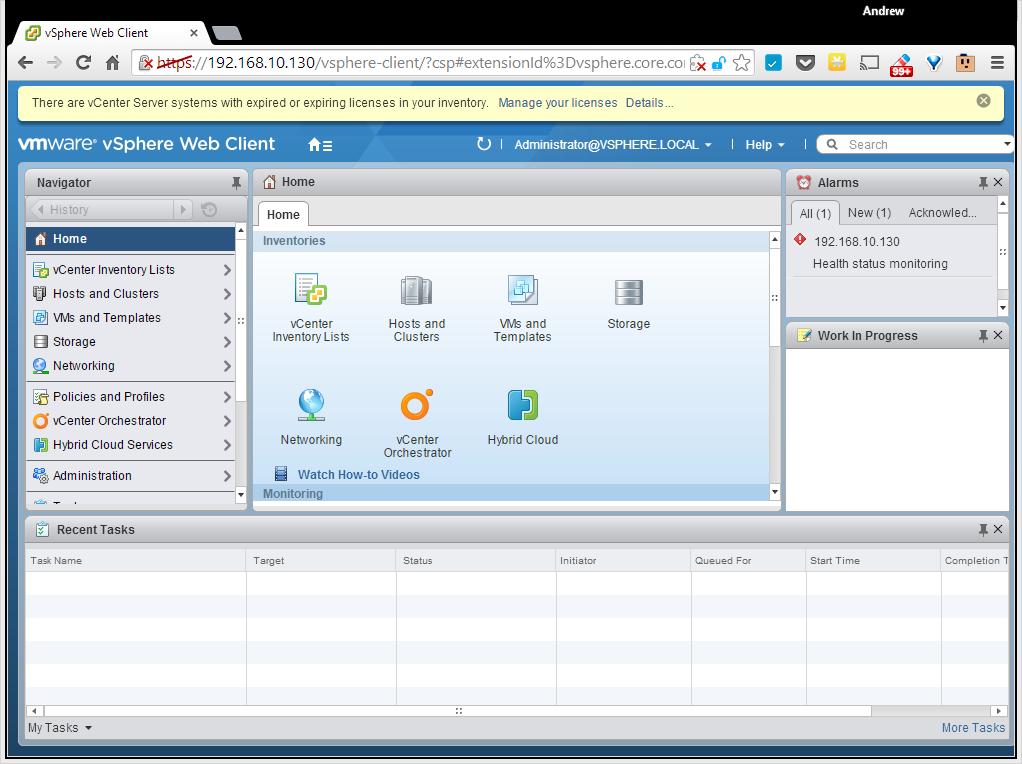 Congratulations you have successfully deployed and installed the VMWARE vCenter Server Appliance 6.0.
Basic VMware Articles Series:
During this series of articles VMware released VMware vSphere 5.5 and VMware vSphere Hypervisor ESXi 5.5. These articles are also applicable to VMware vSphere Hypervisor ESXi 5.0 and 5.5. For consistency, I have used VMware vSphere Hypervisor ESXi 5.1 throughout this series.
In my previous Experts Exchange Articles, most have featured Basic and Intermediate VMware and Virtualisation Topics.
If you would like to read my Basic VMware articles, they are listed at the end of this article for your convenience.
This article will show you how to install and configure the VMware vSphere Hypervisor 6.0 on a computer.VMware vSphere Hypervisor 6.0 is also known as ESXi 6.0.
The FREE version of ESXi 6.0 is limited to 32GB per server.
A full list of the ESXi 6.0 Hardware Requirements can be found in the VMware ESXi 6.0 Install Guide.
Check the VMware Hardware Compatability Lists (HCL), to discover if your computer is certified for use with ESXi 6.0.
If your computer is not listed on the VMware HCL, it may still be possible to install and run VMware ESXi 6.0 on your laptop, desktop, or server. The HCL exists because the server vendor and VMware have certified and tested ESXi 6.0 will function correctly, on the servers listed on the HCL.
Open the following link in your web browser https://my.vmware.com/web/vmware/evalcenter?p=free-esxi5&lp=default
Click the License and Download Tab
 Click Create an Account, to Create an Account and Login to the VMware Download Center. VMware will email you an Activation link which needs to be opened to create the account.
The following page will be displayed when you have successfully logged into the VMware Download Center.
 Pay special attention to the FREE License information which is displayed, and record this License Number, this will be required in a later article.
Click the download link for VMware ESXi 6.0 (CD ISO) Installable to download the software required to install ESXi 6.0 and also download the VMware vSphere Client 6.0. The VMware vSphere Client 6.0 software is the client software that allows us to connect and manage the ESXi 6.0 server, this will be required in a later article.
Either use the Download Manager or Manually Download button (which uses your web browser). The CD ISO is only 301MB so should not take too long to download. We have a very slow internet connection, at approx 350 kB/sec, and it takes us approximately 10 minutes to download.
Once the downloads have been completed using your favourite MD5 and SHA1 checksum utility, confirm the downloads have been downloaded correctly, using the published MD5 and SHA1 checksums from the VMware website. We use the MD5 & SHA-1 Checksum Utiliy 1.1 from http://raylin.wordpress.com/downloads/md5-sha-1-checksum-utility/.
Many VMware vSphere Hypervisor 6.0 installations fail due to corrupt downloads.


Write (Burn) the VMware-VMvisor-Installer-6.0.0-2159203.x86_64.iso downloaded in Step 1, to a blank CDROM, using your favourite CD writing software. We use ISO Recorder (http://alexfeinman.com/isorecorder.htm). If you are using remote server utilities, e.g. HP iLo or Dell iDRAC,. you can attach the virtual CDROM drive in the server to the VMware-VMvisor-Installer-6.0.0-2159203.x86_64.iso ISO, so there is no requirement to write a CDROM.
This is a step which is often missed, ensure the BIOS BOOT order is set to BOOT from the CDROM Device or ATAPI device in the server, otherwise the computer will not BOOT from the CDROM.
Power on the Computer, the computer will BOOT from the CDROM, and the following BOOT screen will be displayed
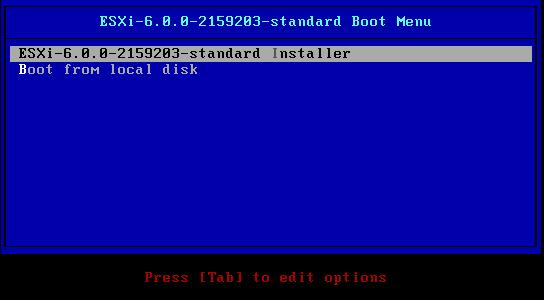 The default option is to BOOT ESXi-6.0.0-2159203-standard Installer after 10 seconds, hit any key will pause the BOOT process.
 At the Welcome to the VMware ESXi 6.0.0 Installation screen Hit Enter to Continue the installation.
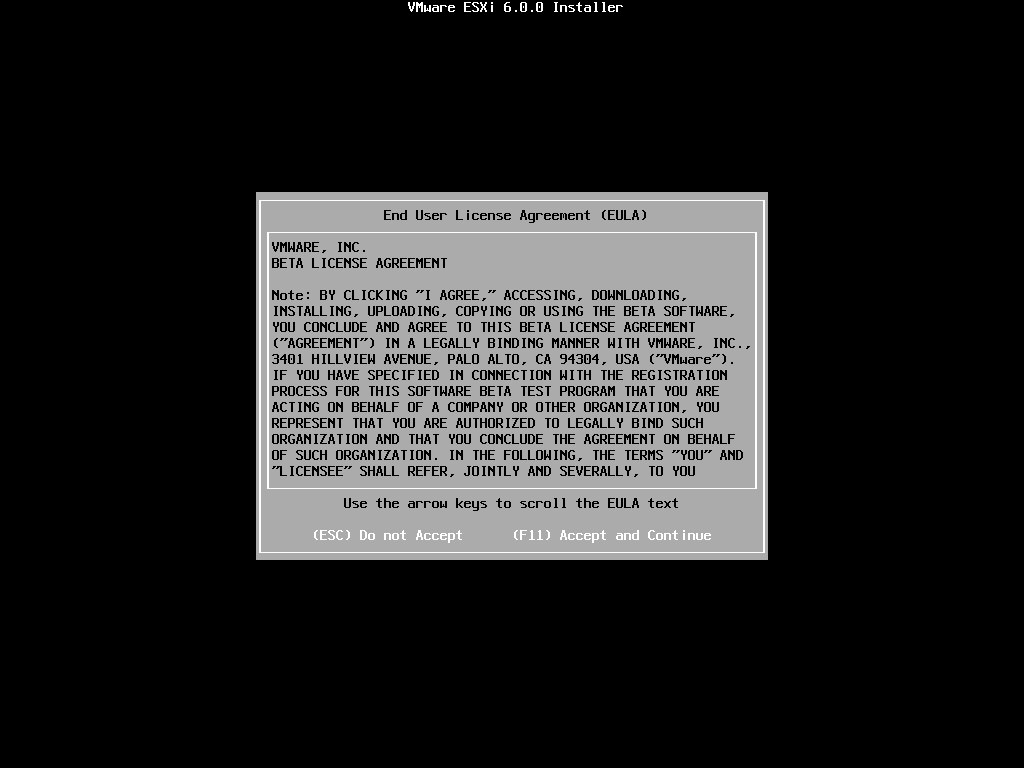
Press F11 (Function Key 11) to Accept the VMware End User License Agreement (EULA)
 The ESXi installer will scan the computer storage controller for available devices to install ESXi.
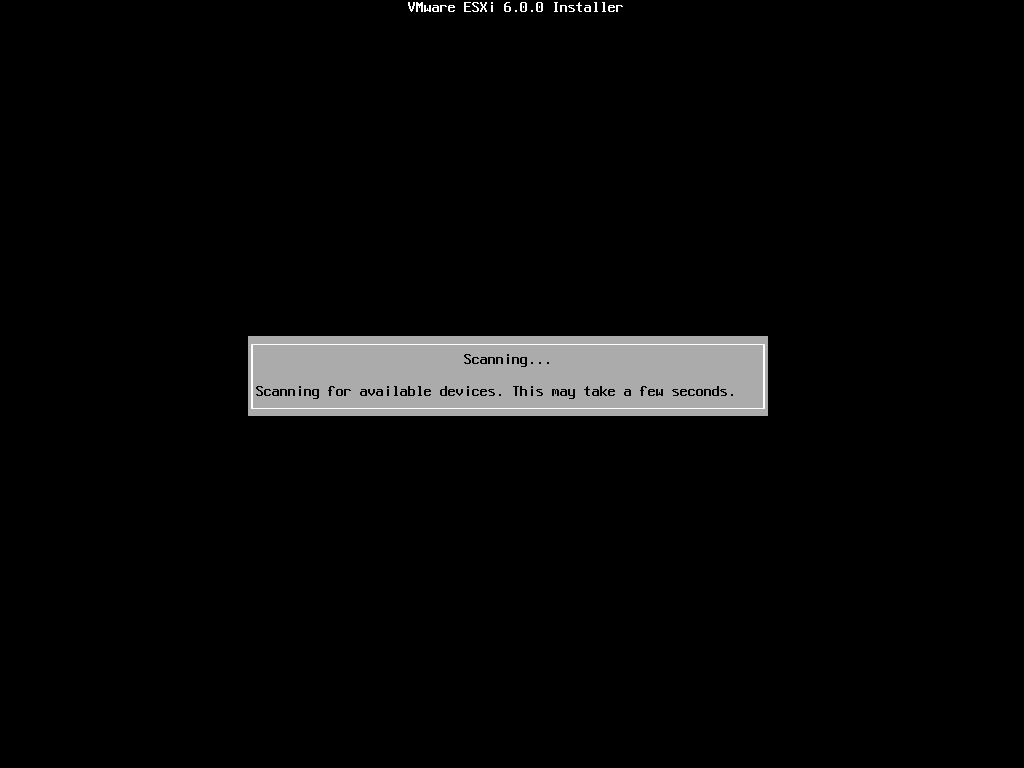 ESXi can be installed on a USB flash drive, SD card attached to the computer, local SATA, local RAID Array, or Fibre Channel or iSCSI LUN. All these are supported options. As the footprint for ESXi is very small only 1GB is required for the ESXi OS installation.
We have written an EE Article here on How to Backup an ESXi installation on an USB Flash Drive or SD card, for security or redundancy. After you have completed the ESXi 5.1 installation, shutdown the server, remove the USB flash drive or SD card, and duplicate it using our EE Article.
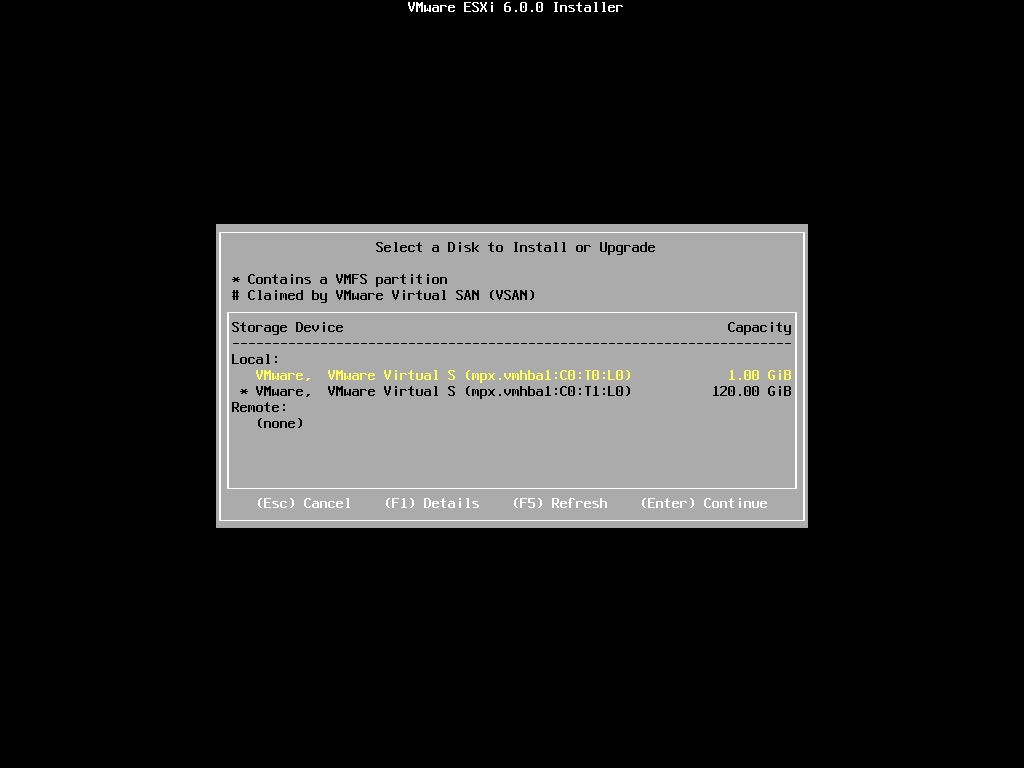
When prompted select a disk to install ESXi on, in the following example, we have two disks connected to this computer, a single 1GB disk, and a 120GB disk. We are going to use the small disk for the OS. (this simulates the USB flash drive!). The larger 120GB disk will be used later for the storage of virtual machines.
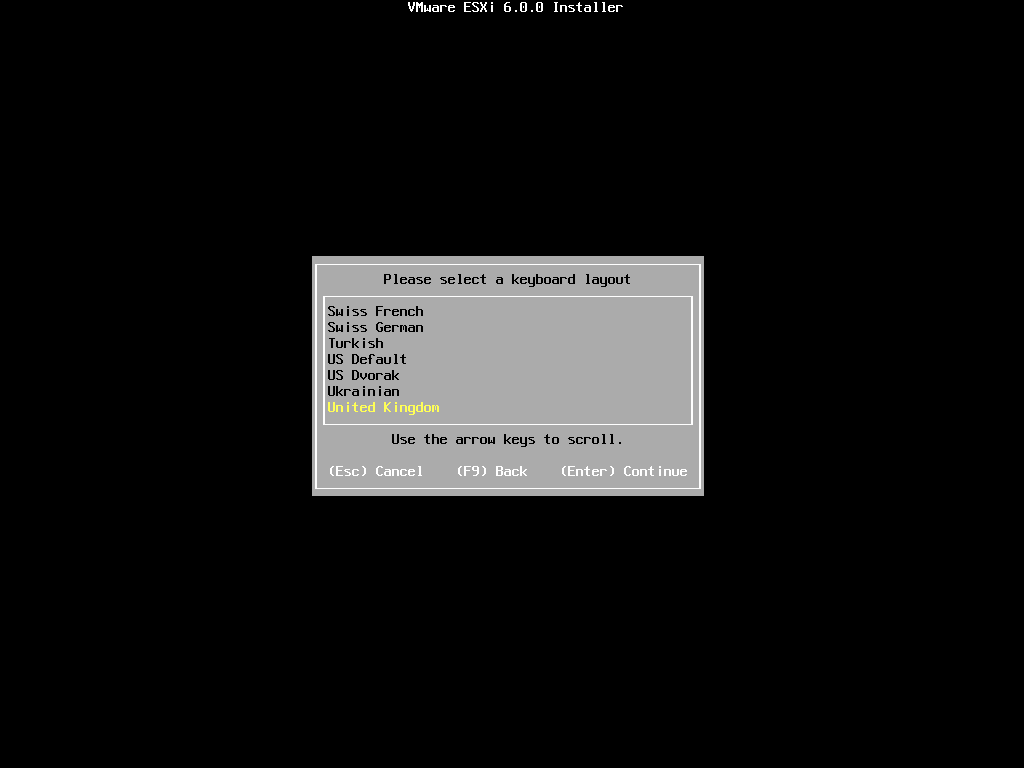
 When prompted, select the keyboard layout and hit Enter to continue. The default keyboard layout is US Default.
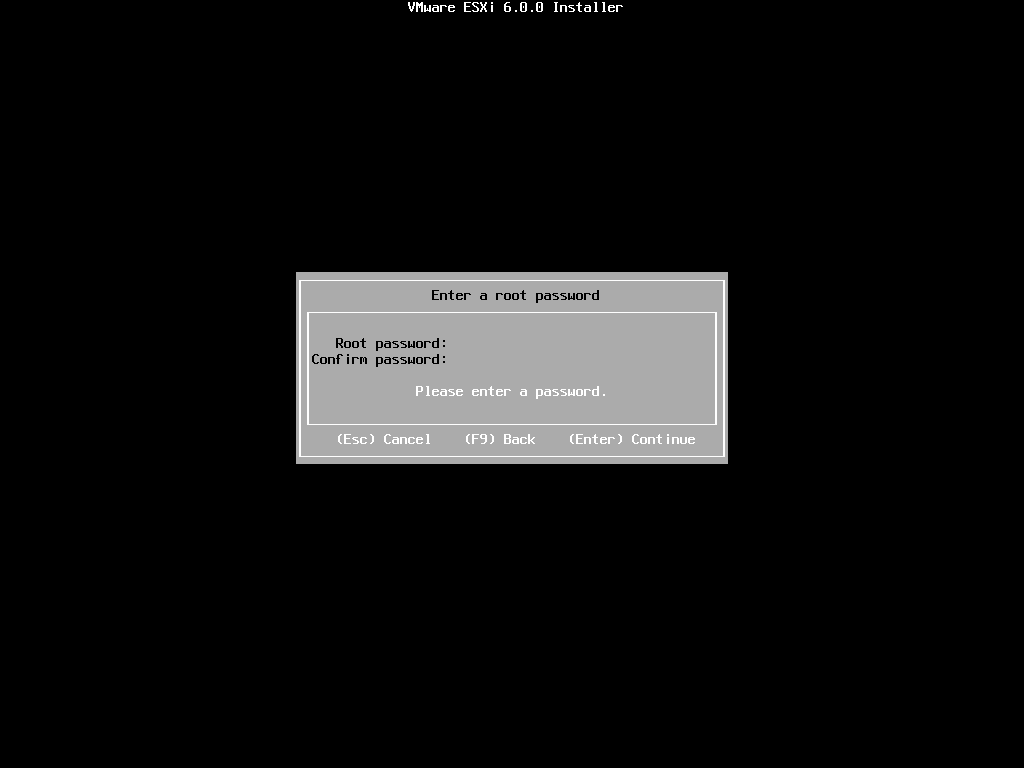
When prompted enter a root password, confirm the password and hit Enter to continue
 The following will be displayed
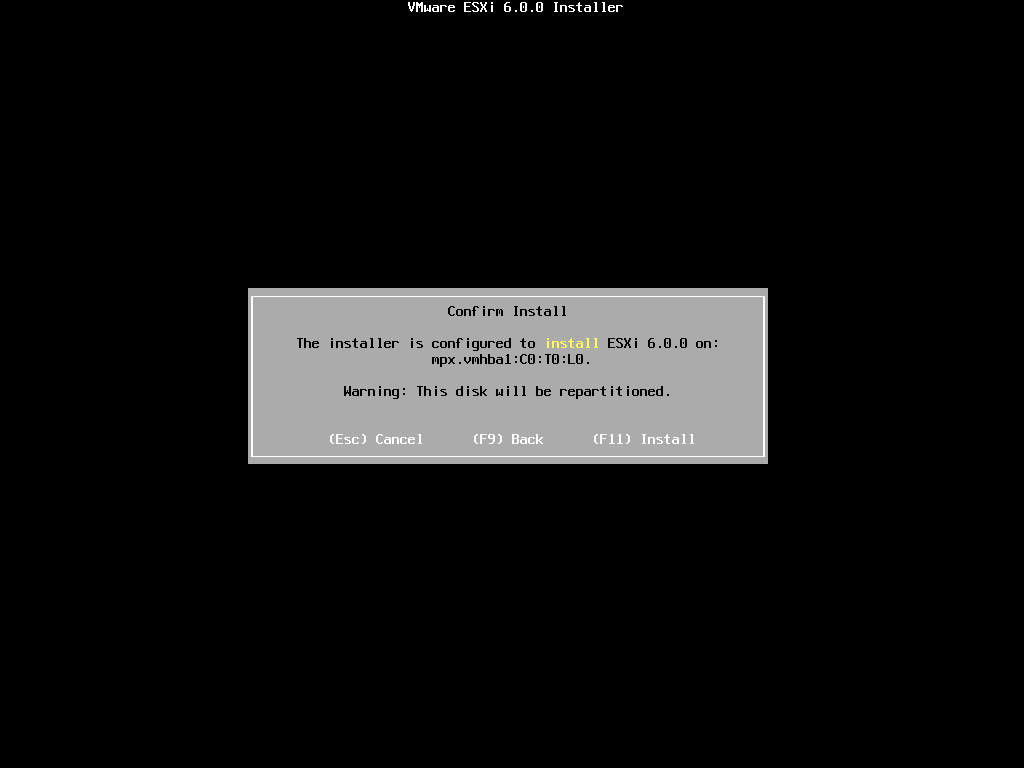
 When prompted Confirm the Installation on the selected disk and press F11 (Install)
– Function Key 11
All data will be erase, as the disk will be repartitioned.
 The Progress Bar will confirm installation progress.


 The installation only takes approximately 5-10 minutes, depending upon speed of storage. When the installation has completed the following screen will be displayed.
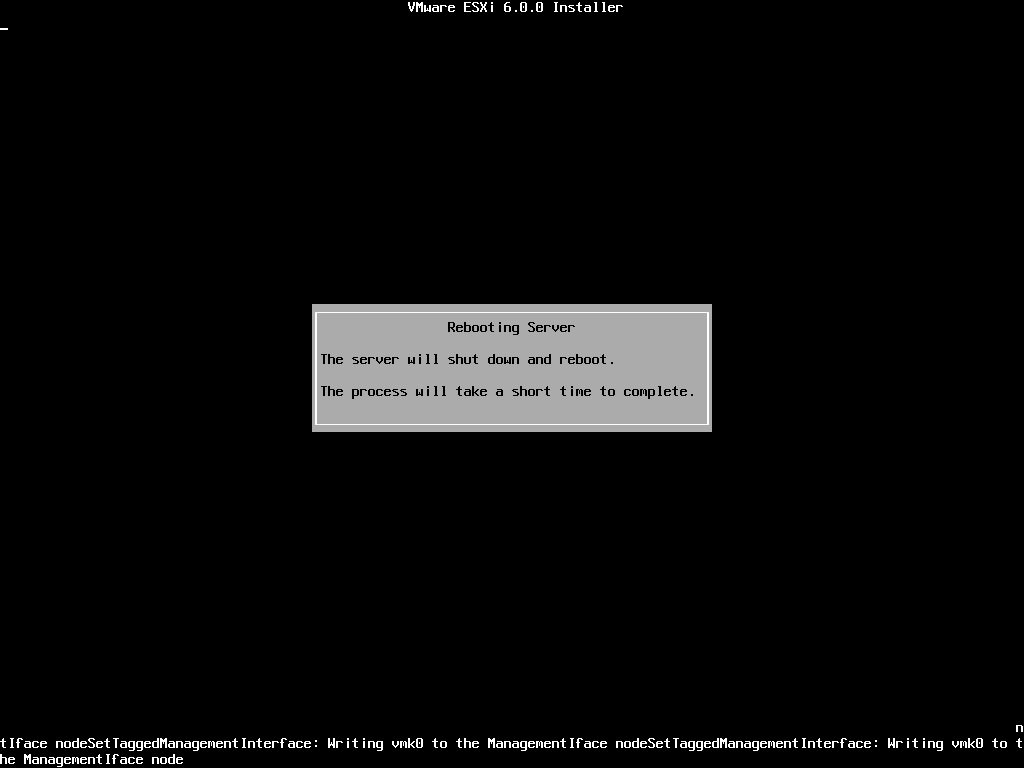
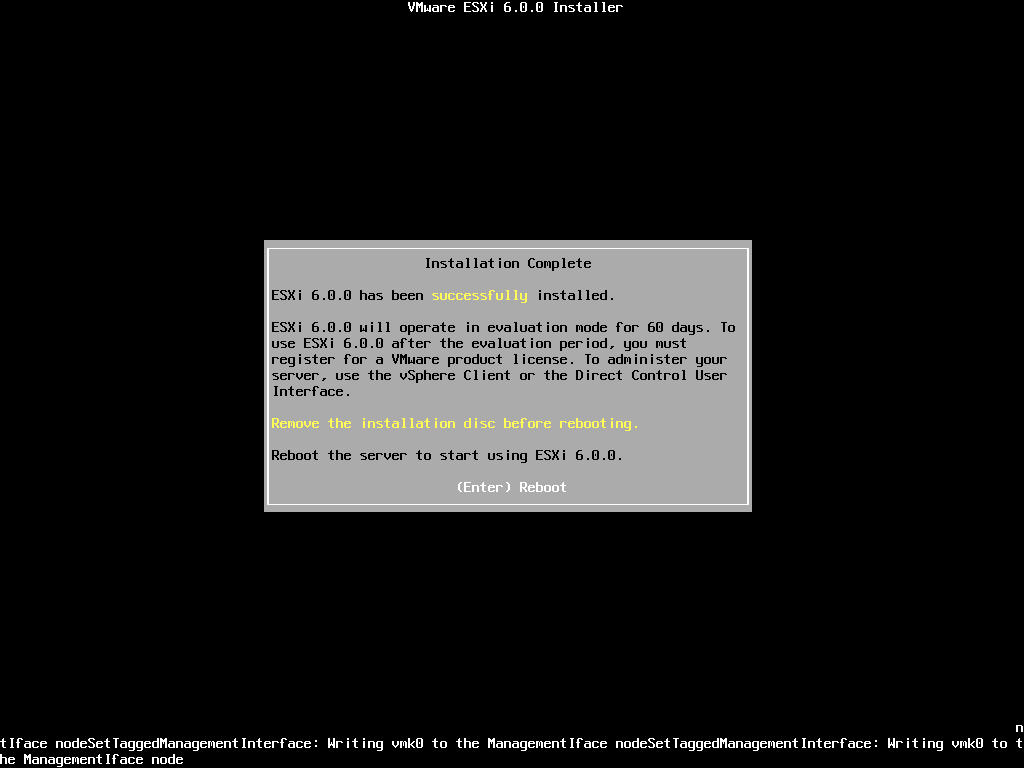 Remove the CDROM installation disk before rebooting. Hit Enter to Reboot. After hitting Enter the follow screen will be displayed and the computer will reboot.
 ESXi 6.0 will operate in evaluation mode for 60 days. This is the same mode as a FULLY LICENSED ESXi 6.0 server. If you wish to evaluate all the bells and whistles that ESXi 6.0 has to offer, do not register your FREE license. for 60 days, this will allow you to evaluate ESXi 6.0 server fully. On day 59/60, Apply your FREE license to continue using the product, or you will not be able to power on any virtual machines.
The following screen is displayed when VMware ESXi 6.0 first boots
The server is fully booted when it displays the following screen
 The default server configuration is to use DHCP, if you do not have a DHCP server issuing IP Addresses on your network you will need to assign an IP Address. We recommend you use a static IP Address for your ESXi Host Server.
Press F2 to Customize System, you will be prompted to enter the root username and password.
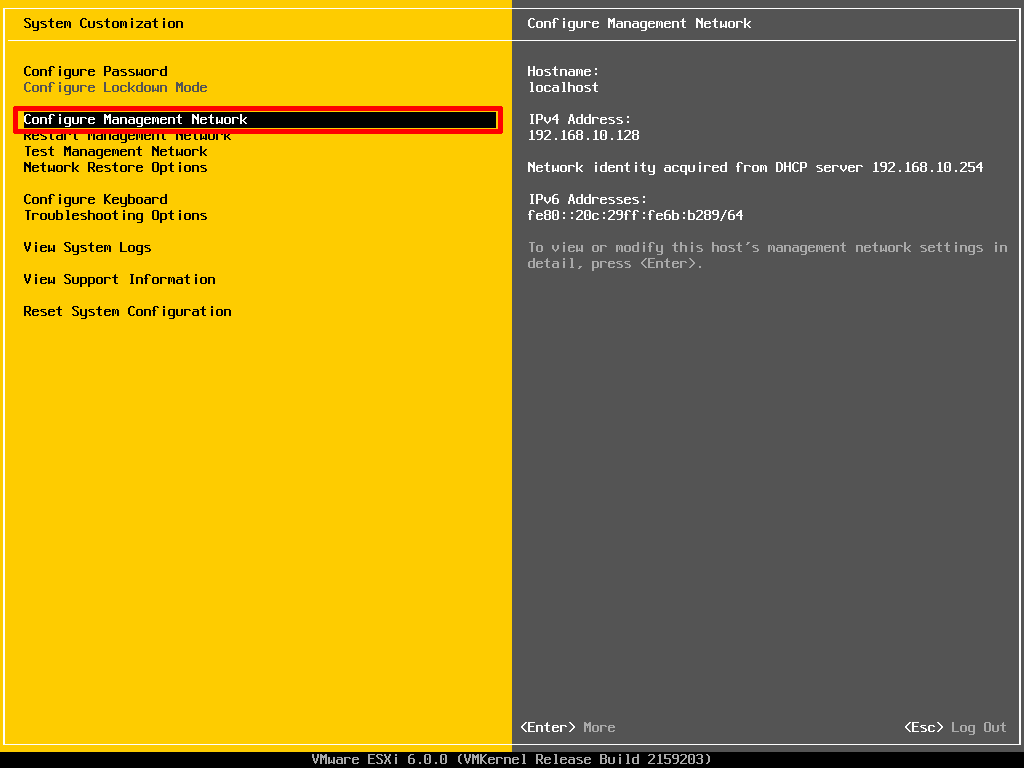 Select Configure Management Network to change Network Parameters.
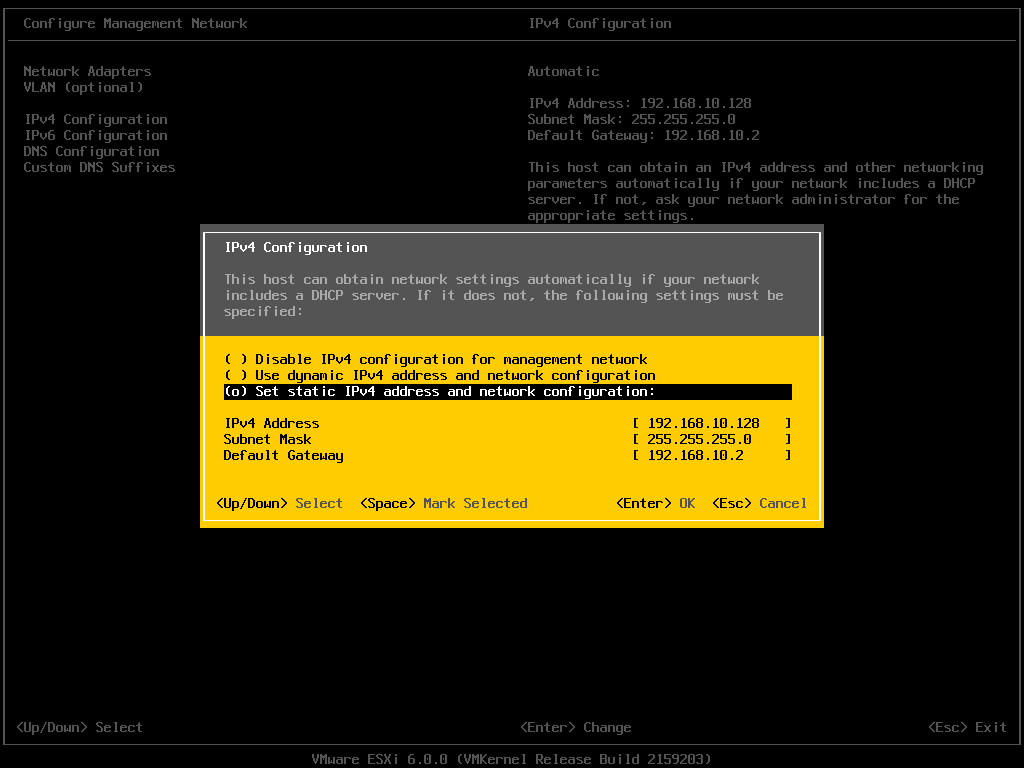
Select IPv4 Configuration
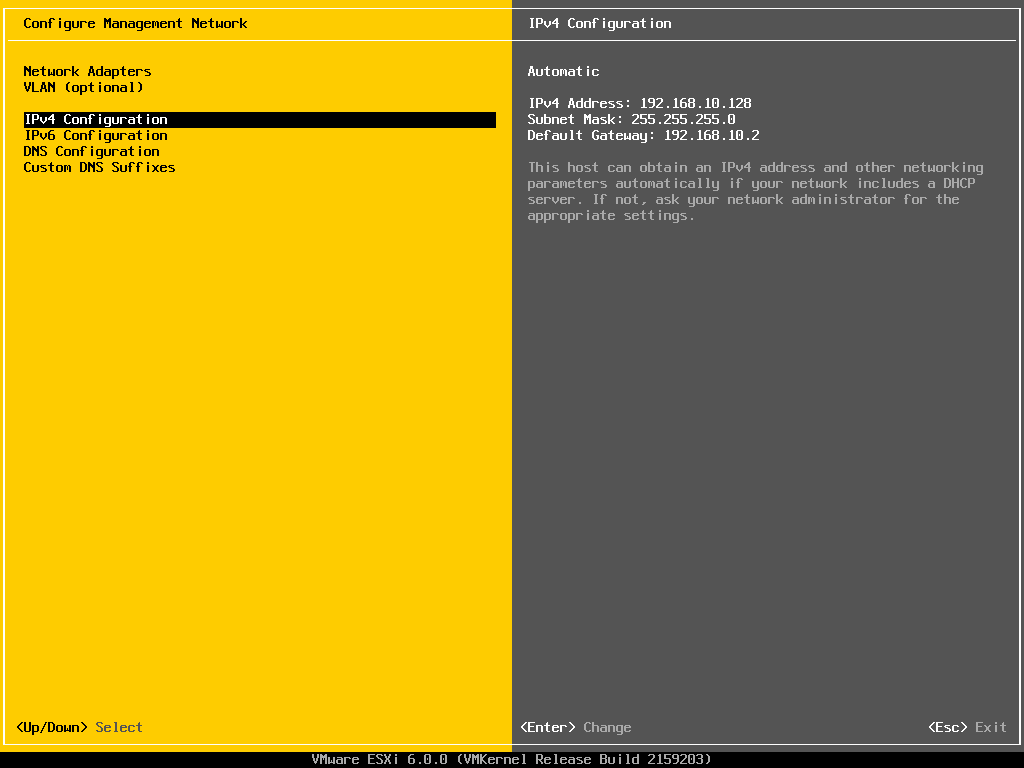 Set the Static IPv4 address and network configuration, Subnet Mask and Default Gateway, it’s important to set the correct Default Gateway, as this will be used later. Hit Enter to confirm and save the configuration.
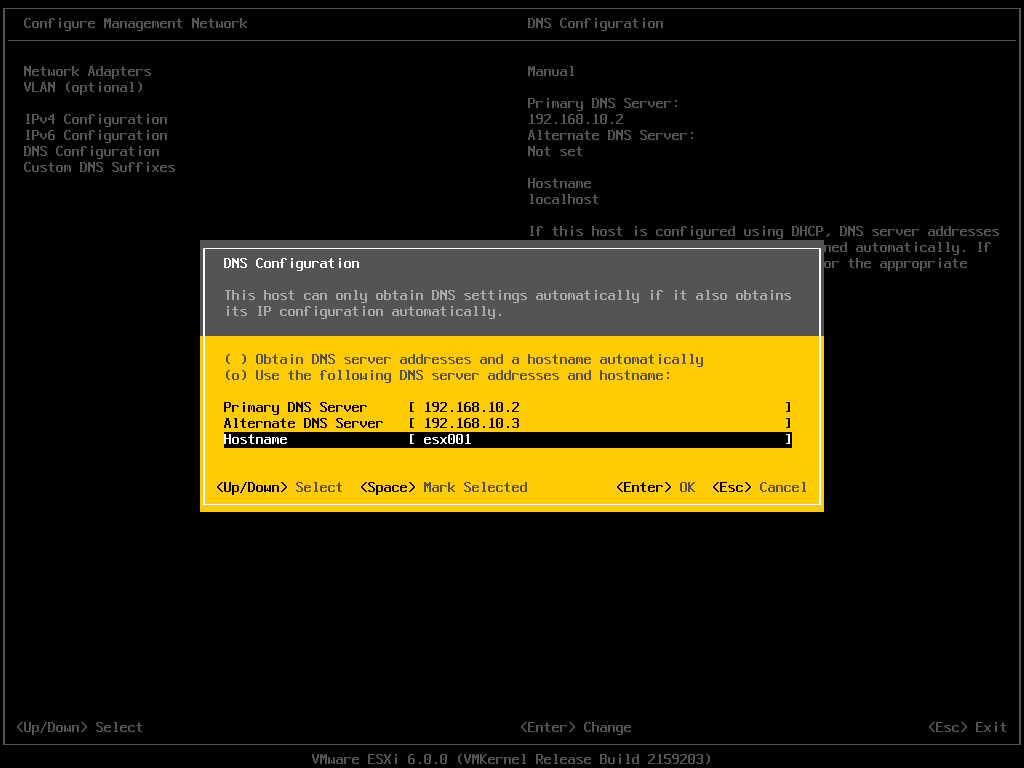
 Select DNS Configuration, enter the correct DNS information for your network, and enter a hostname for your server. Hit Enter to save the configuration.
 Select Custom DNS Suffixes
Enter your DNS suffix (the domain name for your network). Make sure you have created a DNS A Record in your DNS, so that this server can be resolved correctly through forward and reverse lookups.
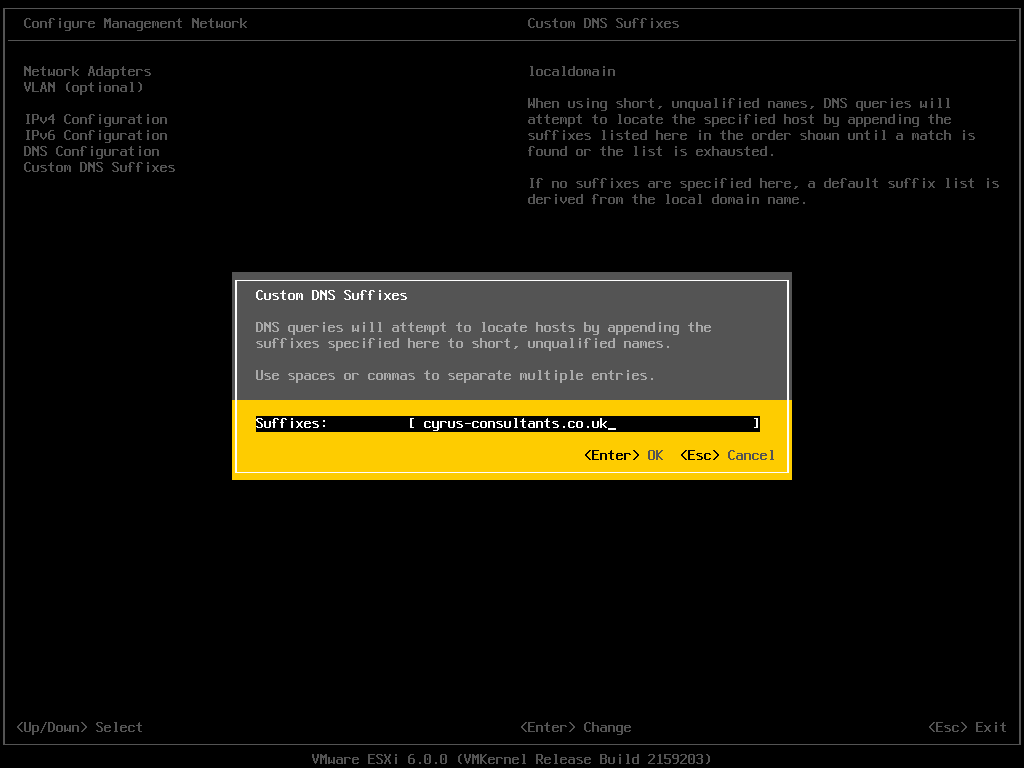 Hit Enter to save your configuration.
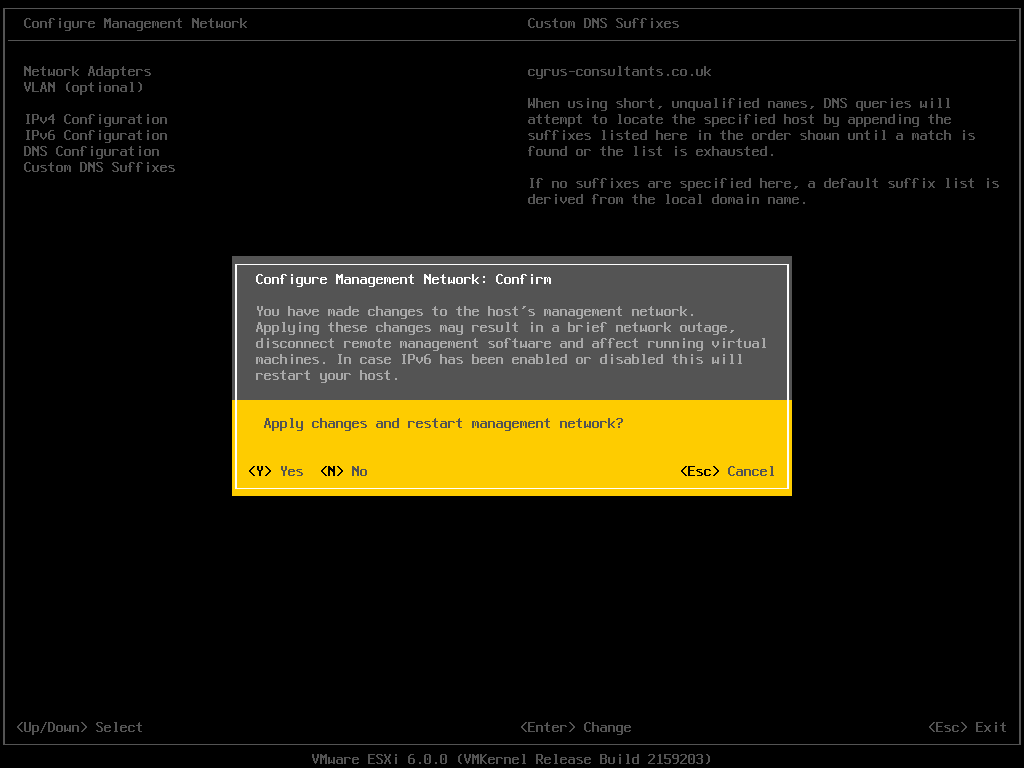
Press Escape, the following screen will appear, select Y(es) to apply changes.
 Press Escape to Logout and return to the console screen.
You will notice on the console screen, the server now has a hostname configured, and correct static IP Address.
Congratulations you have successfully installed and configured VMware vSphere Hypervisor 6.0.
In the next article in the series, we will connect and continue to configure the VMware vSphere Hypervisor 6.0.
Basic VMware Articles Series:
During this series of articles VMware released VMware vSphere 5.5 and VMware vSphere Hypervisor ESXi 5.5. These articles are also applicable to VMware vSphere Hypervisor ESXi 5.0 and 5.5. For consistency, I have used VMware vSphere Hypervisor ESXi 5.1 throughout this series.
In my previous Experts Exchange Articles, most have featured Basic and Intermediate VMware and Virtualisation Topics.
If you would like to read my Basic VMware articles, they are listed at the end of this article for your convenience.
This article will show you how to connect and complete some basic configuration of the VMware vSphere Hypervisor 6.0 on a computer. VMware vSphere Hypervisor 6.0 is also known as ESXi 6.0.
If you have missed the first article in the series, it’s here: HOW TO: Install and Configure VMware vSphere Hypervisor 6.0 (ESXi 6.0)
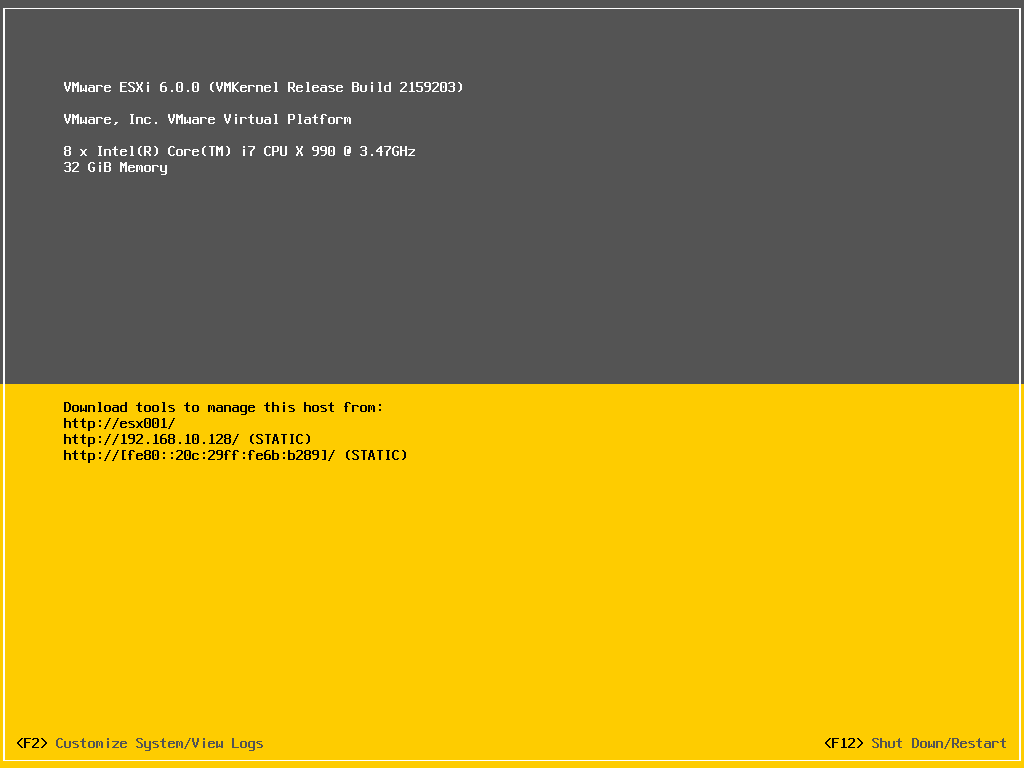
 When the VMware vSphere Hypervisor (ESXi 6.0) server is fully BOOTED and started the above screen is displayed. This screen is called the Direct Console User Interface (DCUI). The majority of the management is performed remotely from another Windows computer using software tools called the VMware vSphere Client. You cannot manage or install virtual machines from the ESXi 6.0 server console; this must be completed remotely from another computer.
You can obtain the VMware vSphere Client software package (VMware-viclient-all-5.1.0-786111.exe) from the VMware website, as detailed in the first article of this series:
HOW TO: Install and Configure VMware vSphere Hypervisor 6.0 (ESXi 6.0) or you can download the software from the VMware vSphere Hypervisor (ESXi 6.0) .
Make a note of the IP Address of the server which is displayed on the console, and using a web browser, browse to the web URL http://192.168.10.128. (This is the IP Address displayed on the console screen; your IP address will be different).
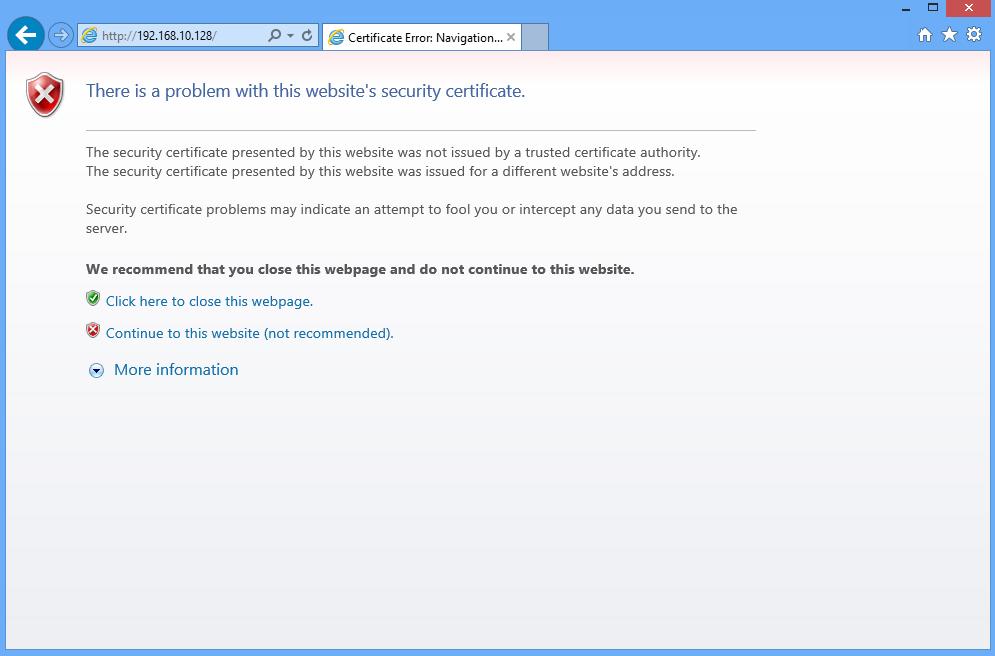
The following screen will be displayed, because VMware’s SSL certificate has been “self-signed” the warning is normal. Click Continue to this website. In this example we are using Internet Explorer 10.
 After clicking continue, the Welcome to VMware ESXi 6.0 screen will be displayed:
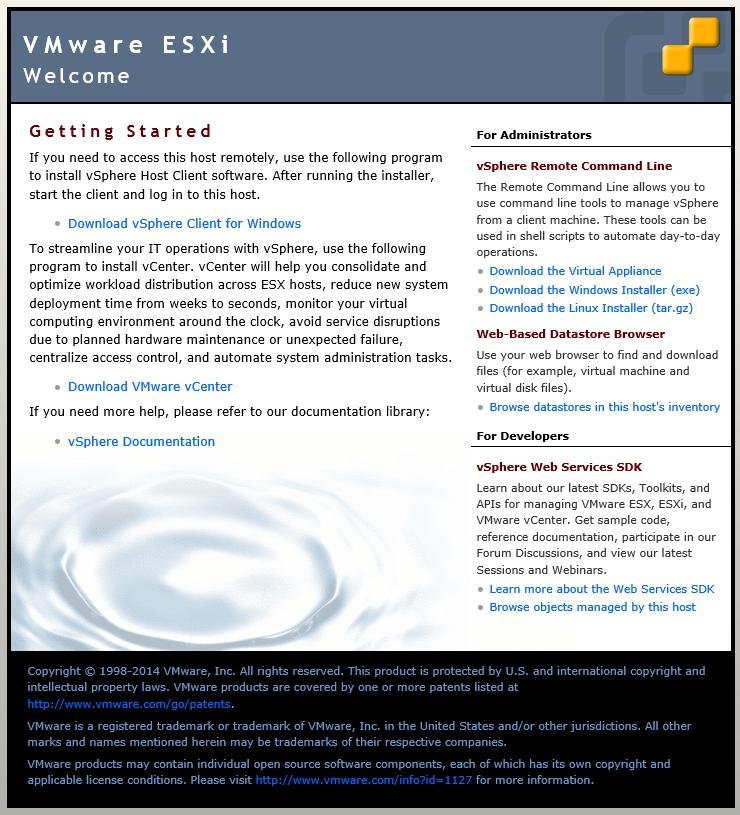 Click Download vSphere Client
This link used to download the vSphere Client from the ESXi Host server, is a link to the VMware web site. VMware Link (http://vsphereclient.vmware.com/vsphereclient/VMware-viclient-all-6.0.0.exe), so you can either download direct from VMware, or find the link through your ESXi 6.0 server. This does test that your ESXi 6.0 Host basic networking is working correctly.
For the sake of this article, we are going to download the vSphere Client from VMware, using the web link included on the Welcome to VMware ESXi 6.0 page. At the following prompt click Save.
 Depending upon your Internet download speed, this can take between two and 30 minutes, as it is approximately 350MB in size.
Once the download has been completed click Run. The setup files will be extracted, and the VMware vSphere 5.1 Client InstallShield Wizard will appear.
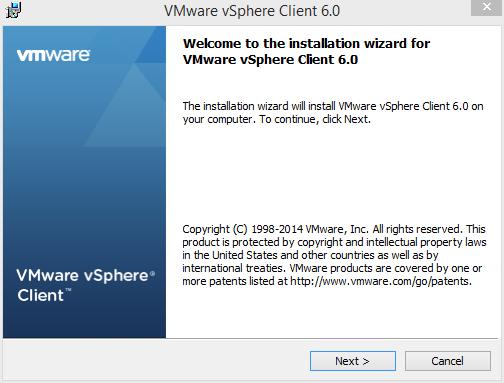
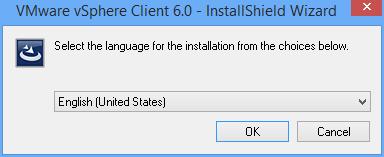 Click OK to Continue. The following Welcome screen will appear, Click Next to Continue.
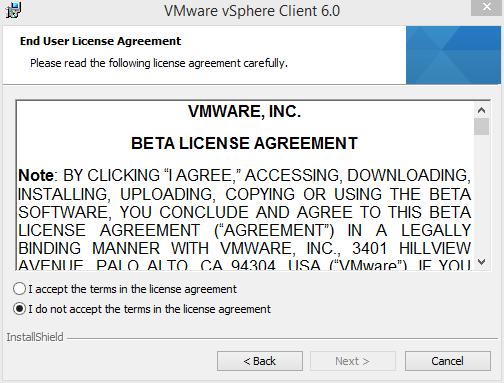
 Select “I agree to the terms of the license agreement” on the VMware End User License Agreement screen and Click Next to Continue.
 Select the Destination Folder. We recommend the Default location C:Program Files (x86)VMwareInfrastrucuturefollowed by Next to Continue. (The VMware vSphere Client in this Tutorial is being installed on a 64-bit version of Windows, so this is the reason for the x86 reference. Your location could read C:Program FilesVMwareInfrastrucuture).
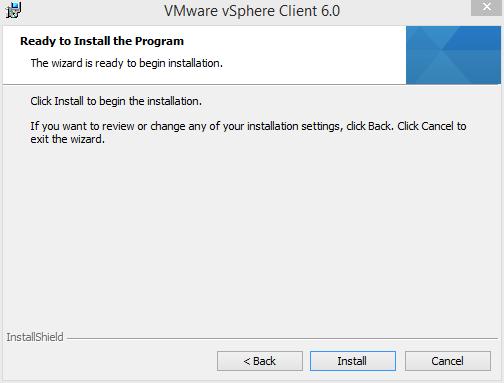
 Click Install to Continue at the Ready to Install the Program screen
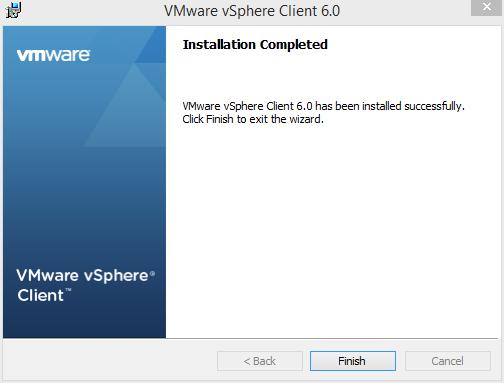
 Click Finish to Complete the installation of the VMware vSphere Client.
Click the VMware vSphere Client icon on your computer Desktop, or click Start > Programs > VMware > VMware vSphere Client icon
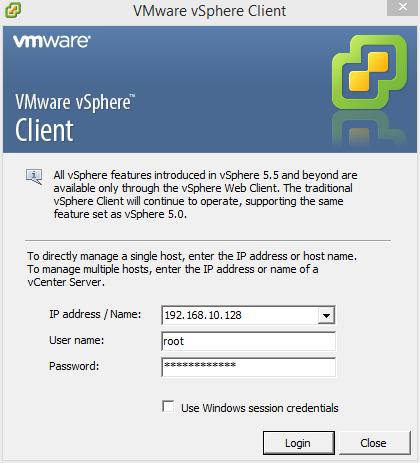
![]() Using the VMware vSphere Client, login and connect to the VMware vSphere Hypervisor ESXi 6.0 server, using the IP address or hostname of the ESXi server, using the root username and password credentials.
Using the VMware vSphere Client, login and connect to the VMware vSphere Hypervisor ESXi 6.0 server, using the IP address or hostname of the ESXi server, using the root username and password credentials.
In this tutorial the IP address of the ESXi 6.0 server is displayed on the console in Step 1. The IP address is 192.168.10.128. Enter the IP address, and username root, followed by the password. Click Login.
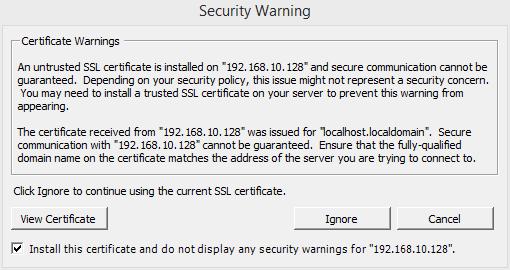
 A Security Warning will appear, stating an untrusted SSL certificate is installed on your server. This is normal, because it’s a VMware “self-signed” certificate and can be replaced. (We will cover this in a later article in the series). Click Ignore and Tick the box to Install.
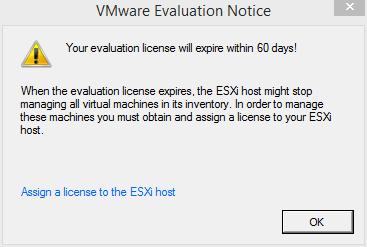
 Click OK to acknowledge the VMware Evaluation Notice
 You are now connected to the VMware vSphere Hypervisor ESXi 6.0 Server. Click the Inventory icon, to see the server’s Inventory.
 The following Inventory is displayed. You will notice it states The ESXi host does not have persistent storage. To store virtual machines (often referred to as Guests or VMs, the VMs must be stored and reside on an ESXi host datastore. The VMware vSphere Hypervisor ESXi server has a compatible filing system called VMFS (similar to Microsoft Windows NT/2000/XP/2003/2008/2012/7/8, which has its own filing system called NTFS). There are two versions of VMFS: VMFS-3 for earlier versions of vSphere e.g. 3.x and 4.x, and WMFS-5 for vSphere 5.x and 6.x.
In this step, we will complete a simple task using the vSphere Client, this task is to Create a new VMFS datastore, so we can store VMs. This is the minimum configuration requirement for your ESXi host.
 Click “Click here to create a datastore…”
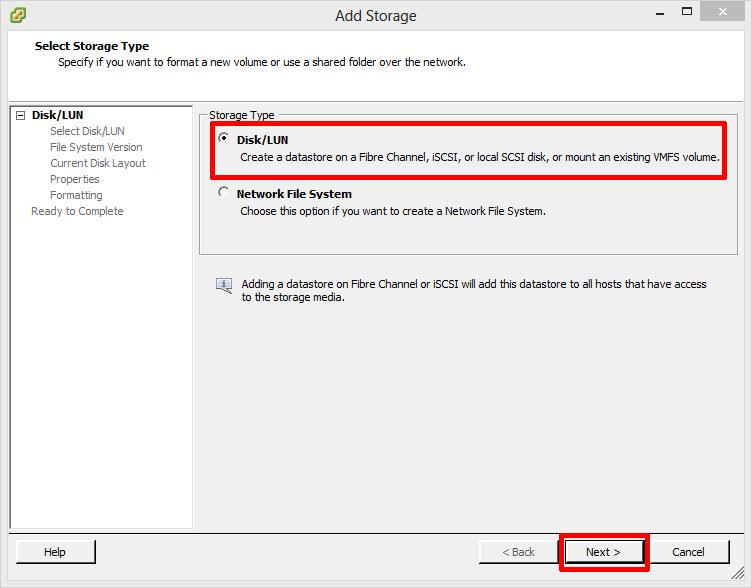
At the Add Storage screen select Disk/LUN followed by Next to Continue, personally we feel the dialgoue box should be called Add New Storage e.g. it’s storage which has never been allocated or presented for use with a VMware ESXi host server.
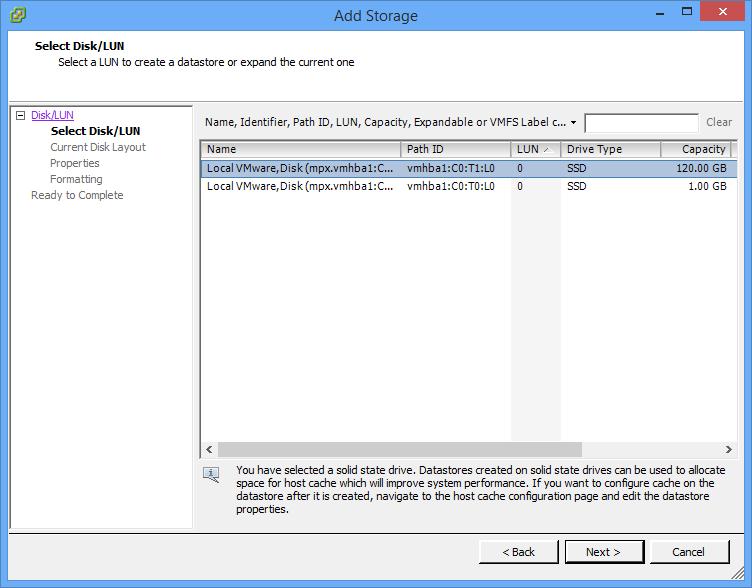
 At the next screen select the actual Disk or LUN, pay special attention to the sizes shown. The size should match the size of disk, LUN or array size you have created for your VMFS datastore, followed by Next to Continue. In this tutorial we are going to select the 120GB Disk/LUN, the first entry in the list.
 The Current Disk Layout will be shown. If this is a used disk, it could show other partition types. (NTFS, FAT32, Linux, Swap, ext2, ext3) Click Next to Continue. This is a new disk in this tutorial, so A new partition will be created and used.
 At the next screen enter the name for the datastore (do not use / * # ! @ (non-alpha numeric characters); it will accept them, but you will have issues later. The dash and underscore are okay.) followed by Next to Continue
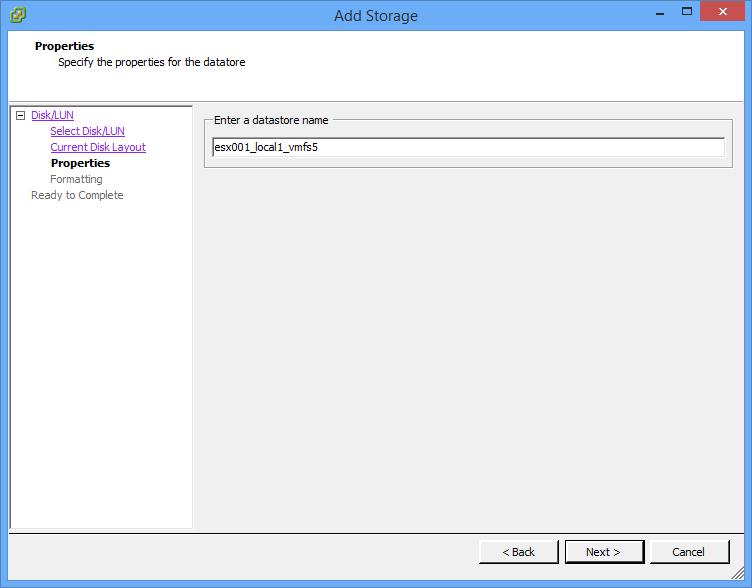
There are many different types of naming conventions. We like to use name of the server followed by underscore (_) local for local disk, iscsi for iscsi disk, nfs for nfs storage, fibre for fibre channel, a number to indicate disk or LUN id number, followed by VMFS type, e.g. 3 or 5. For example: esx001_local1_vmfs5
 At the Disk/LUN – Formatting screen, select Maximum available space, and click Next to Continue.
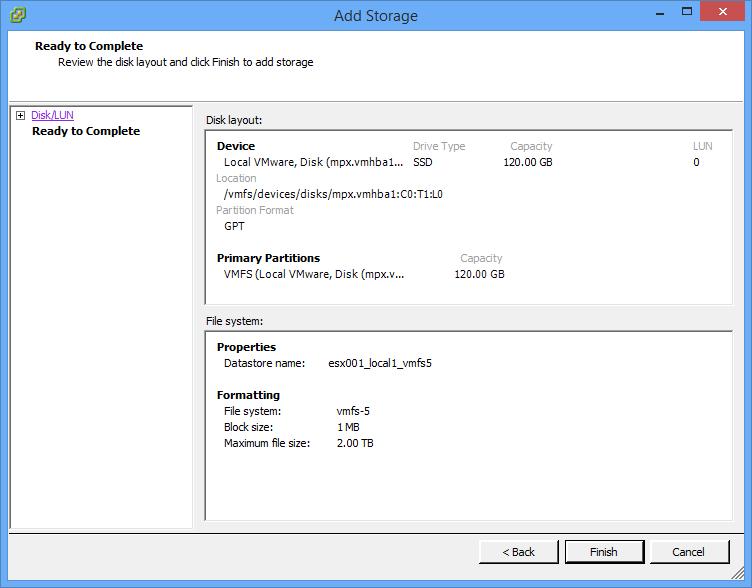 Check the Summary screen for the datastore you are about to create and Click Finish to create the datastore.
You are now ready to use your ESXi server.
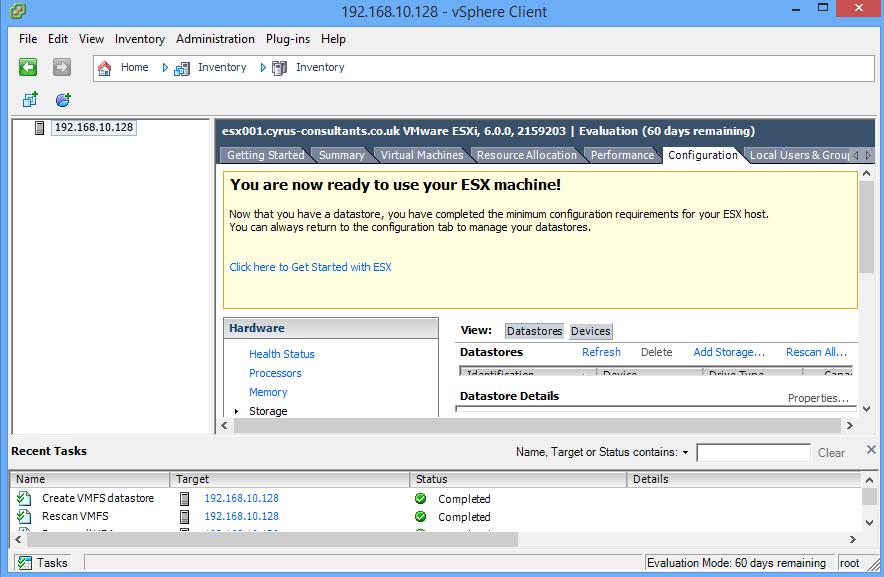 Congratulations you have successfully installed the VMware vSphere Client, Connected to your VMware vSphere Hypervisor 6.0 server, and Created your first VMware VMFS-5 datastore ready to store Virtual Machines.
Basic VMware Articles Series:
During this series of articles VMware released VMware vSphere 5.5 and VMware vSphere Hypervisor ESXi 5.5. These articles are also applicable to VMware vSphere Hypervisor ESXi 5.0 and 5.5. For consistency, I have used VMware vSphere Hypervisor ESXi 5.1 throughout this series.
I can now reveal that I made the IT Pro New Year’s Honours List 2015!
Merry Chrimbo VMware!
I’m busy st present, migrating virtual machines on VMware vSphere 4.1 from an old Fibre Channel 2GBps SAN, to VMware vSphere 5.5 vSAN.
and I’m wearing…

it makes the migration faster you know!


![[Valid RSS]](http://andysworld.org.uk/images/valid-rss.png "Validate my RSS feed")


